
G 1500 1/2 Ton Van V6-4.3L VIN W (1997)
Brake Bleeding: Service and Repair
Pressure Bleeding
NOTE:
^
Bleeding is necessary if air has entered the hydraulic brake system. It may be necessary to bleed the system at all four wheels if a low fluid level in
the brake master cylinder caused the air to enter into the system or if the brake pipes have been disconnected at the brake master cylinder. If a pipe
is disconnected at one wheel, then bleed only that wheel.
^
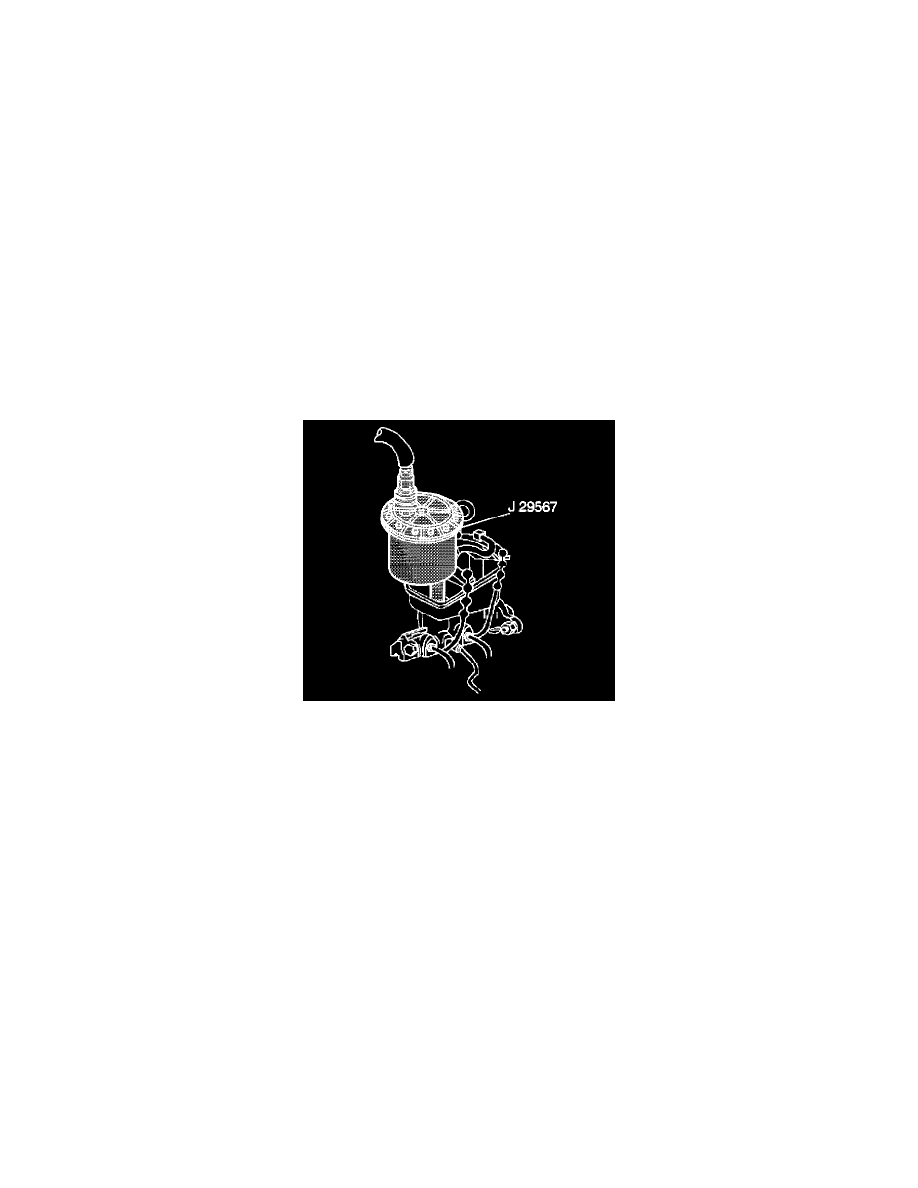
Special tools required:
-
J 29567 Brake Bleeder Adapter
-
J 28434 Wheel Cylinder Bleeder Wrench
USE THE PROPER BLEEDER
A diaphragm type pressure bleeder must be used. It must have a rubber diaphragm between the air supply and brake fluid to prevent air, moisture,
oil, and other contaminants from entering the hydraulic system. If the EBCM has been replaced or air is suspected in the system, you must bleed
the ABS first. See: Antilock Brakes / Traction Control Systems/Service and Repair
CAUTION: Brake fluid can damage electrical connections and painted surfaces. Use shop cloths, suitable containers, and fender covers to prevent
brake fluid from contacting these areas. Always reseal and wipe off brake fluid containers to prevent spills.
1. Fill the pressure tank at least 2/3 full of brake fluid.
^
The bleeder must be bled each time fluid is added.
2. Charge the bleeder to 140-170 kPa (20-25 psi).
3. Install the bleeder adapter.
4. If the EBCM unit is replaced or suspected to have air trapped inside, it must be bled next.
5. Bleed each wheel in the following sequence:
A. Right rear.
B. Left rear.
C. Right front.
D. Left front.
6. Connect the hose from the bleeder to the adapter at the master cylinder.
7. Open the tank valve.
8. Attach a hose to the bleeder valve.
^
Immerse the opposite end of the hose into a container partially filled with clean brake fluid.
9. Open the bleeder valve at least 3/4 of a turn and allow time fluid to flow until no air is seen in the fluid.
10. Tighten the bleeder valve to Nm (110 inch lbs.).
11. Repeat Steps 9 through 11 at all wheels.
12. Check the brake pedal for "sponginess."
^
Repeat the entire bleeding procedure if this condition is found.
13. Disconnect the hose from the bleeder adapter.
14. Remove the bleeder adapter.
15. Fill the master cylinder to the proper level.