
G 1500 1/2 Ton Van V6-4.3L VIN W (1997)
NOTE: Mark each connecting rod and bearing cap, beginning at the front of the engine. Cylinders 1, 3, and 5 are on the left bank and 2, 4, and 6
are on the right bank. The numbers on the, connecting rod and bearing cap must be on the same side when installed in the cylinder bore. If a
connecting rod is ever transposed from one block or cylinder to another, install new connecting rod bearings. Number the connecting rod to
correspond with the new cylinder number.
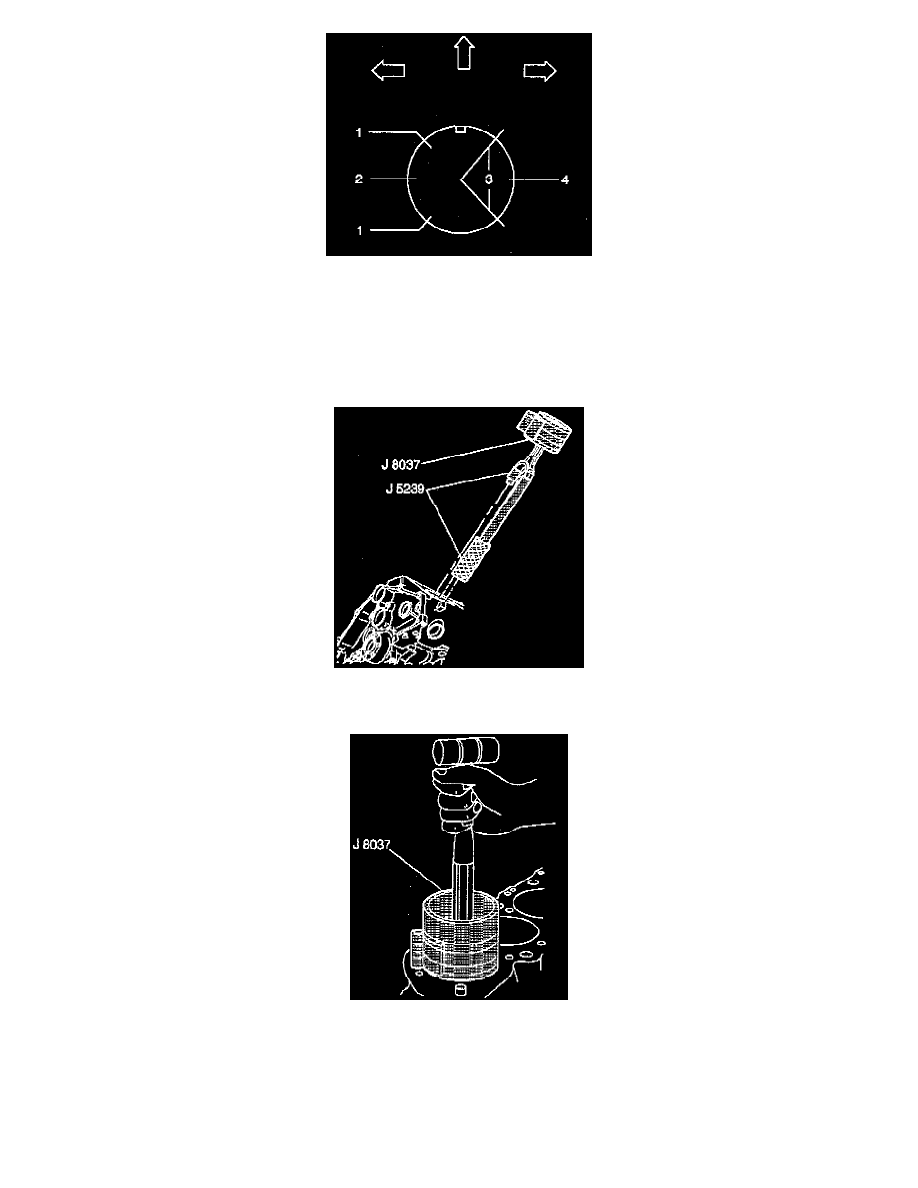
6. Install the piston so that the notch in the piston faces the front of the engine.
7. Place the piston in its matching bore. The connecting rod bearing tang slots must be on the side opposite the camshaft.
8. Using light blows with a hammer handle tap the piston down into its bore. At the same time, from beneath the vehicle, guide the connecting rod to
the crankshaft with the connecting rod guide set.
9. Hold the ring compressor against the block until all rings have entered the cylinder bore.
10. Remove the from the connecting rod bolts
11. Adjust connecting rod bearing clearance.