
G 1500 1/2 Ton Van V6-4.3L VIN W (1997)
CAUTION: The distributor driven gear can be installed in two positions. Make sure when installing the gear that the dimple found below the roll pin
hole in the gear is on the same side as the rotor segment. The dimple will not align directly with the rotor segment if not, the gear is Installed 180° off
and a no start condition may occur. Premature wear and damage may result.
REMOVE OR DISCONNECT
1. Two screws holding the cap to the housing.
2. Cap from the housing.
3. Two screws from the rotor.
4. Rotor.
^
Note which locating holes (B) the rotor was removed from.
5. Two screws holding the hail effect switch.
6. Hall effect switch.
^
The square cut hole (C) in the vane wheel must be aligned with the hall effect switch in order to remove the switch.
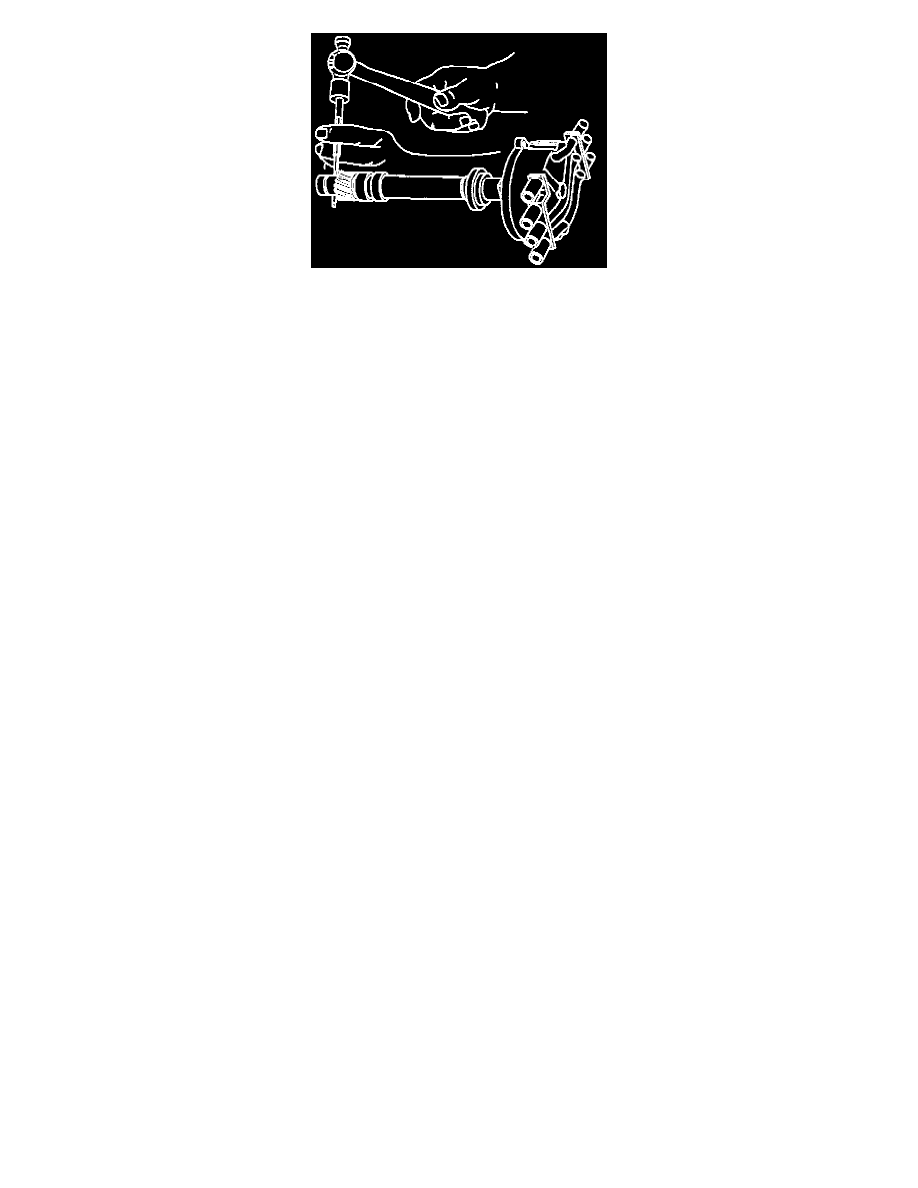
7. Roil pin from the shaft.
A. Note the dimple located below the roil pin hole on the one side of the gear. The dimple will be used to properly orient the gear on the shaft
during assembly.
8. Driven gear, washer, and tang washer.
9. Shaft.
^
If the shaft can't be removed from the distributor housing due to varnish buildup, use a cloth dampened with varnish remover to clean the shaft.
INSTALL OR CONNECT
1. Hall effect switch.
2. Two screws holding the hall effect switch.
CAUTION: Do not overtighten as the base may strip.
3. Shaft.
4. Tang washer, washer, and driven gear.
NOTE: When properly installed the dimple located below the roll pin hole, in the driven gear, will be on the same side as the rotor segment when
the rotor is installed in the distributor. The alignment will not be exact. If the driven gear is installed incorrectly, the dimple will be approximately
180° opposite the rotor segment when the rotor is installed in the distributor.
5. Roll pin.
6. Rotor.
^ "A" shows the mounting holes. "B" shows the locating holes.
7. Two screws holding rotor.
^
Tighten 2.0 Nm (20 lbs. In.)
^
Installation of the distributor into the engine will require the cap off of the assembly.