
G 20 3/4 Ton Van V8-305 5.0L VIN H 4-bbl (1984)
Heater Core: Service and Repair
Replacement
1. Disconnect the battery cable.
2. Remove coolant recovery tank and lay aside.
3. Place a clean pan under the vehicle and then disconnect the heater core inlet and outlet hoses at the heater connections. Quickly plug the heater
hoses and support them in a raised position. Allow the coolant in the heater core to drain into the pan on the floor.
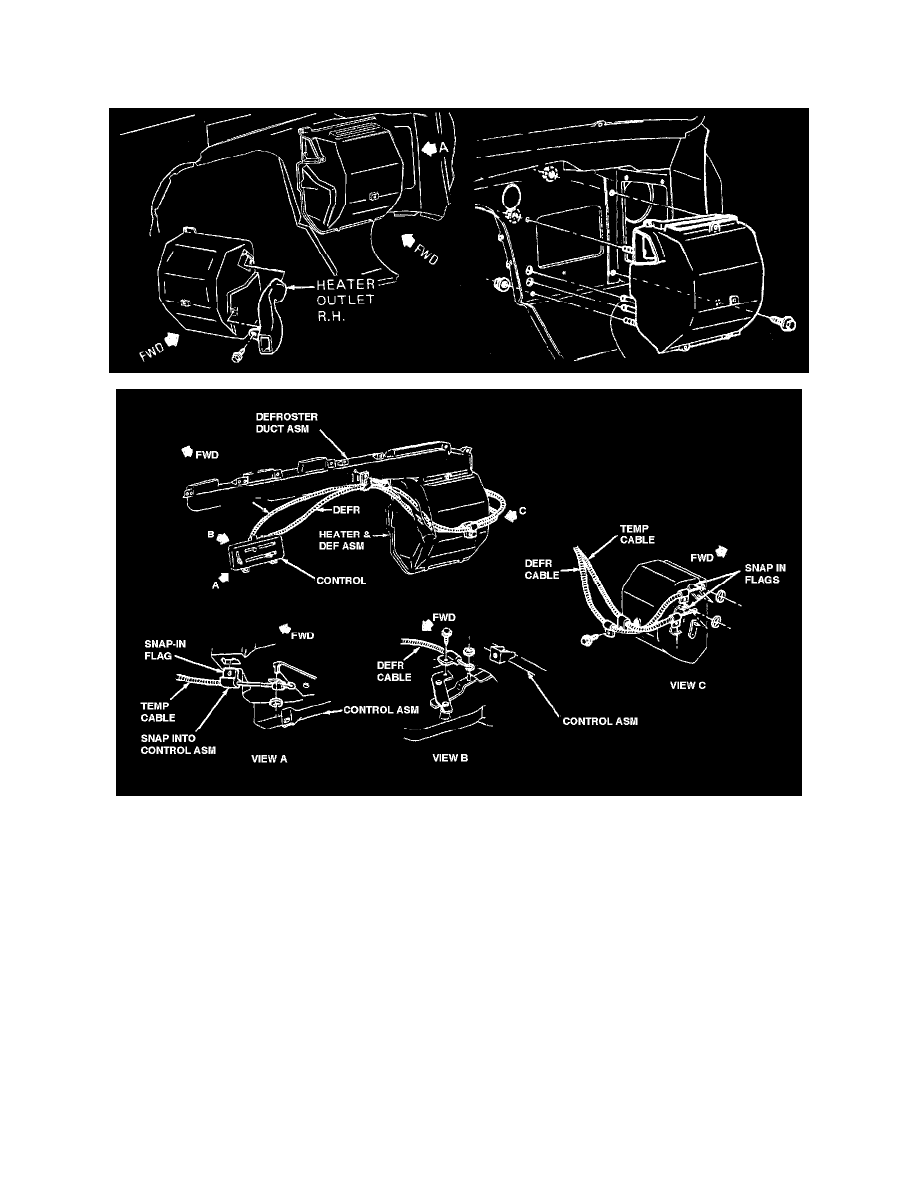
4. Remove heater distributor duct to distributor case attaching screws and distributor duct to engine cover screw and remove duct.
5. Remove engine housing cover.
6. Remove instrument panel attaching screws: above, at windshield, all lower screws and right lower I.P. support bracket at door pillar and engine
housing.
7. Lower steering column, and raise and support right side of I.P.
8. Remove defroster duct to distributor case attaching distributor to heater case.
9. Disconnect temperature door cable and fold cable back for access.
10. Remove three (3) nuts at engine compartment side of distributor case and one (1) screw on passenger side.
11. Remove the heater case and core as an assembly. Tilt the case assembly rearward at the top while lifting up until the core tubes clear the dash
openings.
12. Remove the core retaining strap screws and remove the core.
13. To install a new core, reverse Steps 1-10 above. Be sure core to case and case to dash panel sealer is intact before assembling unit.