
G 20 3/4 Ton Van V8-305 5.0L VIN H 4-bbl (1984)
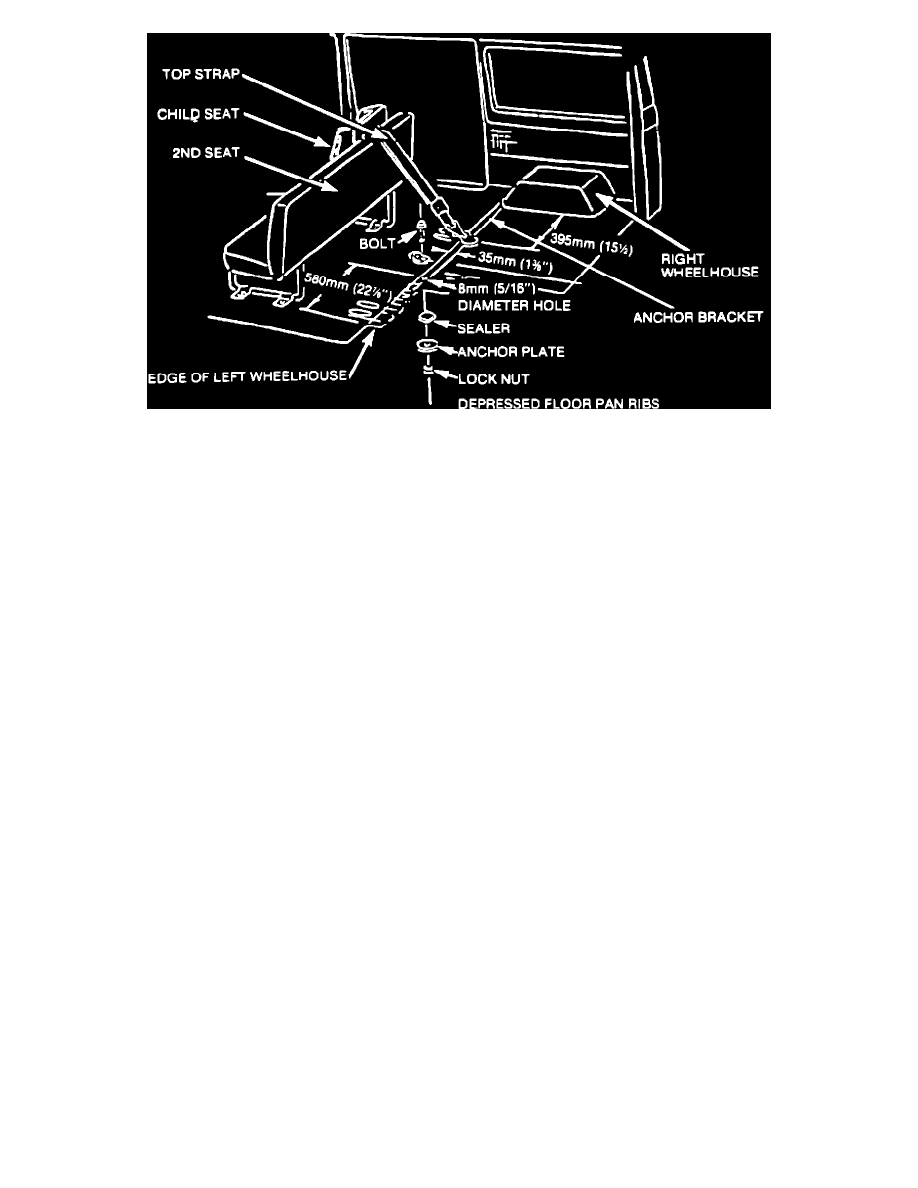
Figure B - 2nd Seat Installation Center or Right Seating Position
Center or Right Seating Positions
1.
Center Seating Position - drill an 8 mm (5/16") diameter hole through the floor pan 35 mm (1-3/8") rearward of the front edge of the left
wheelhouse and on the center of the depressed floor pan rib located 580 mm (22-7/8") inboard of the right wheelhouse. Refer to Figure B.
OR
Right Seating Position - drill an 8 mm (5/16") diameter hole through the floor pan 35 mm (1-3/8") rearward of the front edge of the right
wheelhouse and on the center of the depressed floor pan rib located 395 mm (15-1/2") inboard of the right wheelhouse. Refer to Figure B.
2.
To insure proper sealing of the hole, remove any dirt or foreign matter from around the hole on the underside of the floor pan where the sealer is to
be applied.
3.
Place sealer on the hole from underside of the vehicle and assemble the bolt, anchor bracket, anchor plate and lock nut to the floor pan as shown in
Figure B. Tighten securely and make certain that the hole is completely sealed. NOTICE: The two (2) 35 mm (1-3/8") O.D. spacer washers are not
needed for these installations.
4.
Use the child seat in the seating position of the second seat for which the anchor bracket has been installed. Use the child seat as directed in the
usage instructions, latching the child seat top strap hook to the anchor bracket.
Third Seat Installation Instructions - When Vehicle Does Not Have A Fourth Seat - Refer to Figure C