
G 20 Van V6-262 4.3L VIN Z (1993)
4. Using care to prevent personal injury, strike the staking pin with a hammer until a metal stake, similar to the original, is formed down to, but not
touching, the bearing. Stake three (3) places 120° apart.
NOTICE: The stake metal should not contact the outer race of the bearing to prevent the possibility of distorting the outer race.
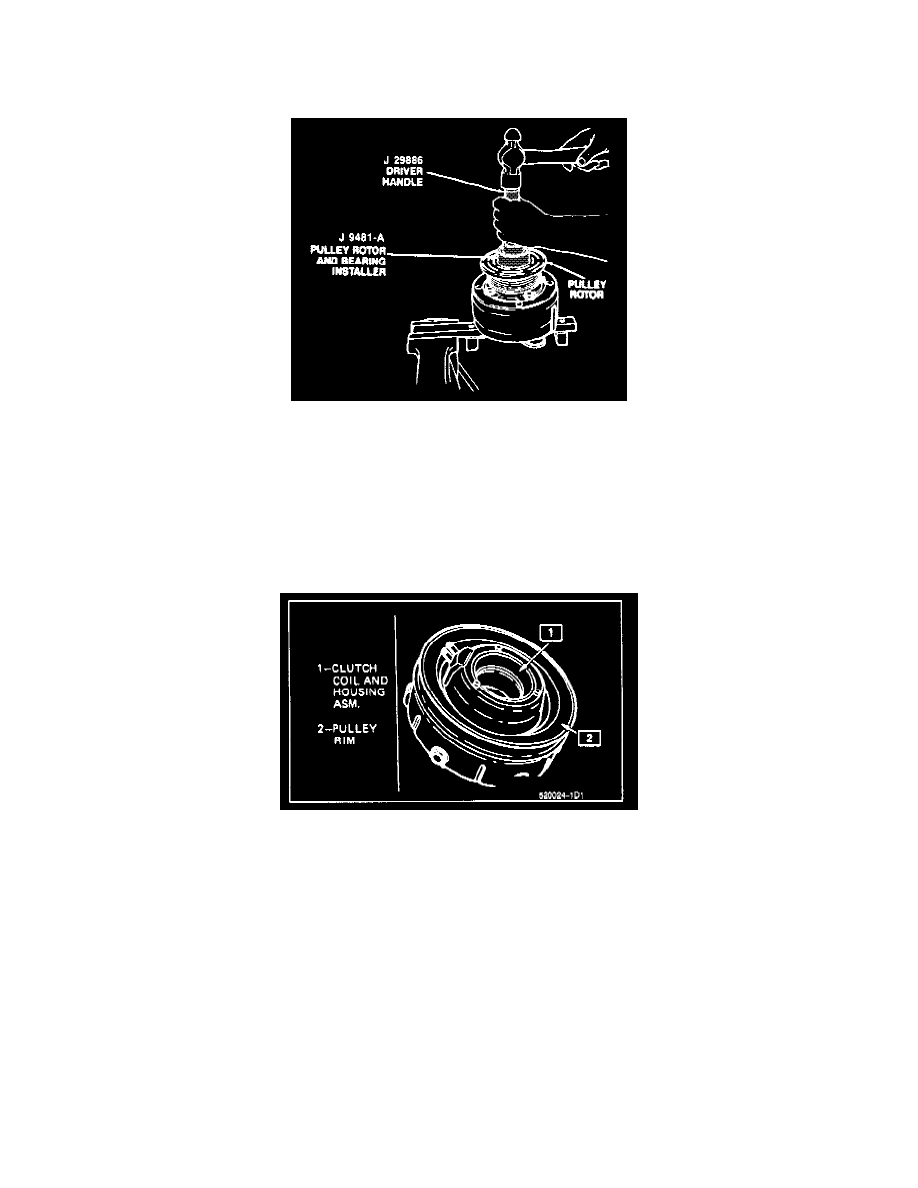
Pulley Rotor And Bearing Installation
5. With the compressor mounted to the J 25008-A Holding Fixture, position the Rotor and Bearing Assembly on the front head. Using Rotor and
Bearing Installer J 9481-A and Universal Handle J 29886 drive the rotor and bearing assembly onto the front head. With the Installer assembled to
the Handle, force will be applied to the inner race of the bearing when installing the assembly onto the front head of the compressor.
6. Install rotor and bearing assembly retainer ring, using Snap Ring Pliers J 6083.
7. Reinstall clutch plate and hub assembly.
Clutch Coil and/or Pulley Rim
Assembling Clutch Coil, Pulley Rim, Rotor & Bearing
CLUTCH COIL AND PULLEY RIM INSTALLATION AND REMOVAL PROCEDURES FOR THE 6 POLE CLUTCH ARE THE SAME AS THE 4
POLE EXCEPT STEPS 1 THROUGH 4 OF THE CLUTCH ROTOR AND/OR BEARING - 6 POLE CLUTCH, REMOVAL OR DISCONNECT
MUST BE USED.
V-Groove Drive-4 Pole Clutch
Remove or Disconnect
1. Perform Steps 1 through 4 of COMPRESSOR CLUTCH ROTOR AND/OR BEARING removal procedure but do not loosen or remove the pulley
rim mounting screws until the Clutch Rotor, Coil and Pulley Rim assembly have been removed from the Front Head. Be careful not to drop the
Puller Guide J 25031 when removing the assembly.
2. Remove the pulley rim mounting screws and discard.