
G 20 Van V6-262 4.3L VIN Z (1993)
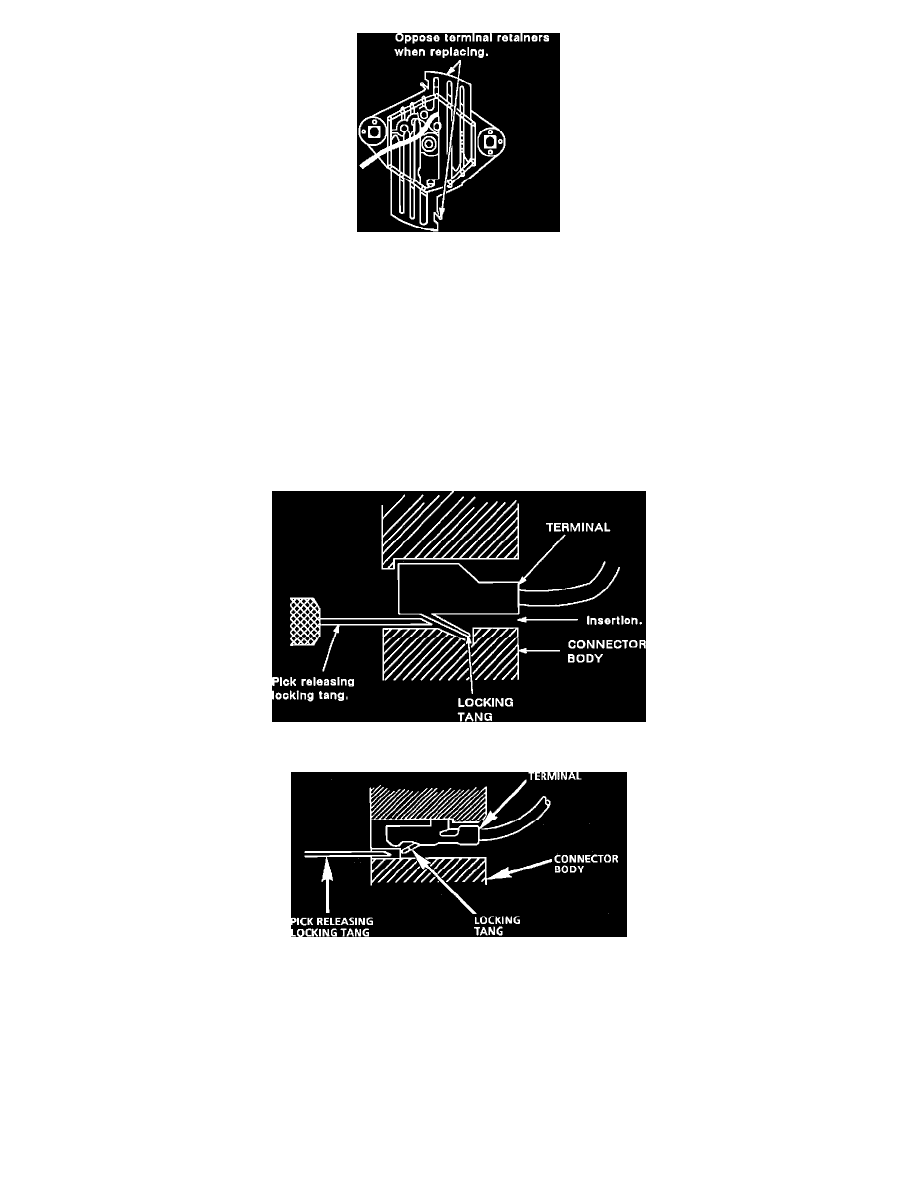
Figure 19
6.
Install TPA's, CPA's and/or secondary locks, if equipped (see Figures 18 & 19).
Repairing Connectors
The following general repair procedures can be used to repair most types of connectors. The repair procedures are divided into three general groups:
Push-to-Seat and Pull-to-Seat and Weather Pack.
^
See CONNECTOR TERMINAL I.D. to determine which type of connector is to be serviced.
^
Use the proper Pick(s) or Tool(s) that apply to the terminal.
^
The GM Terminal Repair Kit (J 38125-A) contains further information.
PUSH-TO-SEAT AND PULL-TO-SEAT
Figure 1 - Typical Push-To-Seat Connector
Fig. 20 Typical Pull-to-Seat Connector and Terminal
Follow the steps below to repair Push-to-Seat or Pull-to-Seat connectors, Figs. 19 and 20. The steps are illustrated with typical connectors. Your
connector may differ, but the repair steps are similar. Some connectors do not require all the steps shown. Skip those that don't apply.
Step 1:
Remove any CPA (Connector Position Assurance) Locks. CPAs are designed to retain connectors when mated.
Step 2:
Remove any TPA (Terminal Position Assurance) Locks. TPAs are designed to keep the terminal from backing out of the connector.
NOTICE: The TPA must be removed prior to terminal removal and must be replaced when the terminal is repaired and reseated.