
G 20 Van V6-262 4.3L VIN Z (1993)
Control Valve And Pressure Switch Assembly
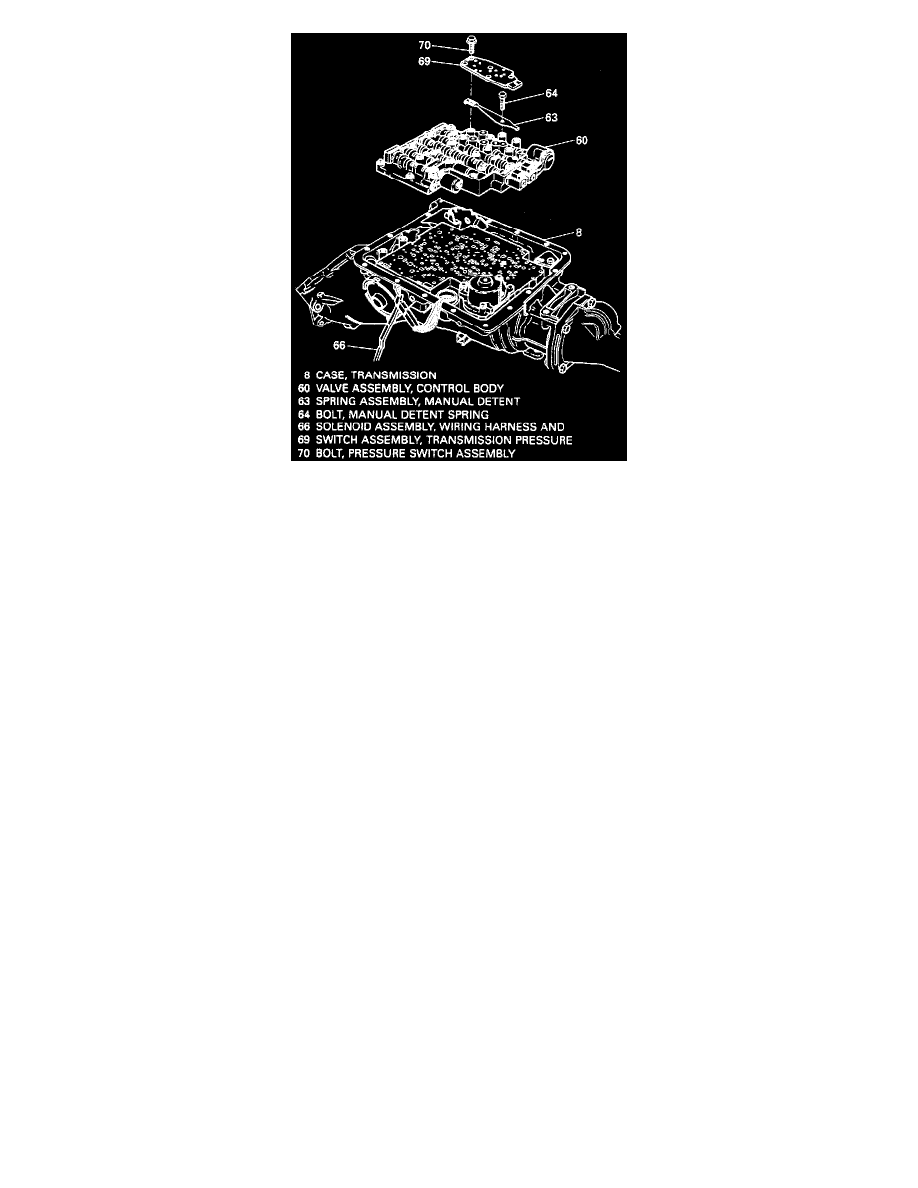
Fig. 2
Remove or Disconnect
1. Negative (-) battery cable.
2. Raise vehicle and suitably support.
^
Place drain pan under transmission oil pan.
^
Refer to "Changing Fluid and Filter".
3. Electrical connections from switches.
4. TCC Solenoid bolts (68 in Fig. 1) and solenoid assembly (66 in Fig. 2) with 0-ring seal and wiring harness.
5. Pressure switch assembly bolt (70 in Fig. 2) and pressure switch assembly (69 in Fig. 2).
6. Bolt (64 in Fig. 1) and manual detent spring assembly (63 in Fig. 2).
7. Wiring harness retaining bolts.
8. Remaning valve body bolts (62 in Fig. 1).