
G 20 Van V8-5.7L VIN R (1996)
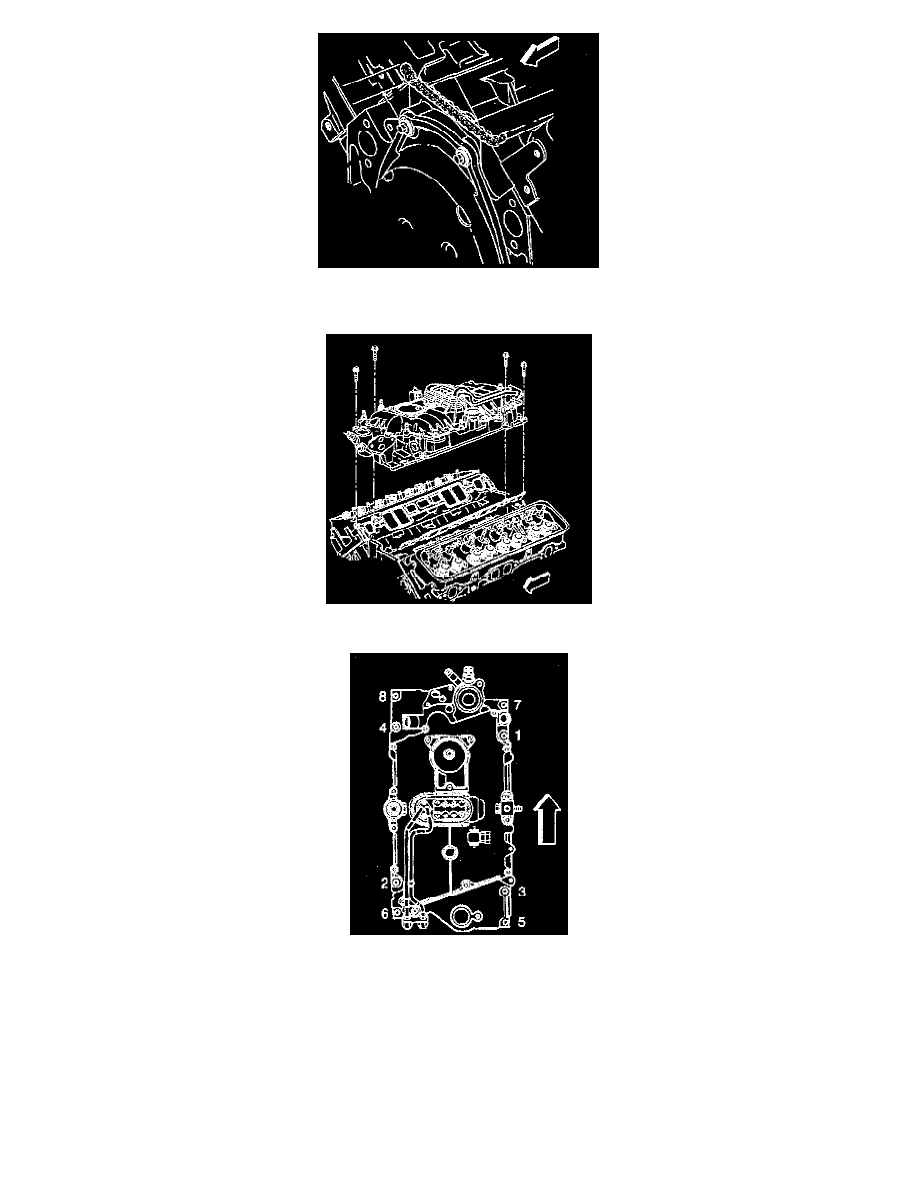
2. Install RTV to the front and the rear sealing surfaces on the block. Apply a 5 mm (0.067 in) bead of RTV GM P/N 12346192 or equivalent to the
front and the rear of the block. Extend the bead 13 mm (0.50 inch) up each cylinder head to seal and retain the gaskets.
3. Install the lower intake manifold to the engine. Apply sealer, GM P/N 12345382 or equivalent, to the lower intake manifold bolts.
Lower Intake Manifold Tightening Sequence
4. Install the lower intake manifold bolts. Tighten the bolts in three steps:
a. Tighten the bolts on the first sequence to 3 Nm (27 inch lbs.)..
b. Tighten the bolts on the second sequence to 12 Nm (106 inch lbs.).
c. Tighten the bolts on the final sequence to 15 Nm (11 ft. lbs.).
5. Install the wiring harness connectors and brackets.
6. Install the upper radiator hose at the thermostat housing. Refer to Cooling System.
7. Install the heater hose at the lower intake manifold. Refer to Cooling System.
8. Install the coolant bypass hose. Refer to Heating and Air Conditioning.
9. Install the EGR valve. Refer to Powertrain Management.