
G 2500 3/4 Ton Van V8-305 5.0L VIN M SFI (1997)
DISASSEMBLE
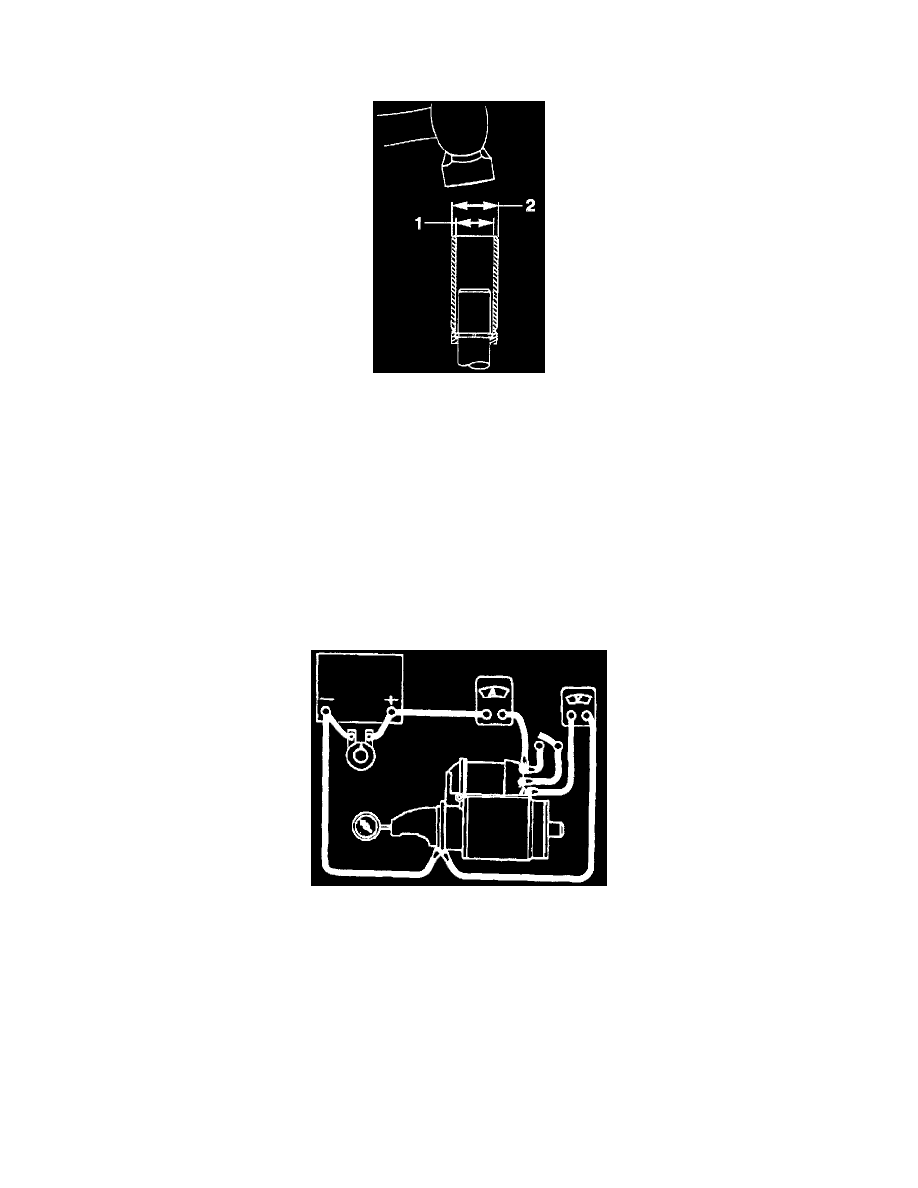
1. Stop rings and pinion stop.
A. Position the driveshaft and clutch group on a work bench with the internal gear end down.
Removing The Pinion Stop
B. Using an open tube #2 (22 mm) which is slightly larger then the shaft #1(14.2 mm). Drive the pinion stop toward the clutch drive assembly
until it clears the stop rings.
C. Pry the stop rings out of the driveshaft groove and slide them off the end of the shaft, being careful not to scratch the driveshaft.
D. Inspect the edges of the shaft groove for burrs that may have been formed through repeated cranking cycles. Such burrs may make removal of
the pinion stop and clutch drive assembly difficult.
^
If burrs are found, use a file to carefully remove burrs only, not the base metal. Thoroughly clean away metal filings.
E. Slide the pinion stop off the driveshaft. Discard the old pinion stop and stop rings. New parts must be used at assembly.
2. Clutch drive assembly from the driveshaft.
3. Driveshaft support from the driveshaft.
^
Do not remove the bearing from the driveshaft unless replacement is required. Refer to "Cleaning, Inspection, and Repair".
No-Load Test - SD-255 Starter Motor
No-Load Test
Connect a voltmeter from the motor terminal to the motor frame and an RPM indicator to measure armature speed. Connect the motor and an ammeter in
series with a fully charged battery of the specified voltage, and a switch in the open position to the switch terminal. Close the switch and compare the
RPM, current, and voltage readings with the specifications. It is not necessary to obtain the exact voltage. If the voltage is slightly higher the RPM will
be slightly higher, with the current remaining basically unchanged. However, if the exact voltage is desired, a carbon pile connected across the battery
can be used to reduce the voltage to the specified value. Compare the test results as follows:
1. Rated current draw and no-load speed indicates normal condition of the starter motor.
2. Low free speed and high current draw indicates:
^
Too much friction. Tight, dirty or worn bearings, bent armature shaft or loose pole shoes allowing the armature to drag.
^
Shorted armature. This can be further checked on a growler after disassembly.
^
Grounded armature or fields. Check further after disassembly.
3. Failure to operate with high current draw indicates:
^
A direct ground. in the terminal or fields.