
G 2500 3/4 Ton Van V8-305 5.0L VIN M SFI (1997)
-
Use a screwdriver or similar tool to enter the case and rotate the lock until it aligns with the thrust block.
-
Install the lock to the button end of the axle shaft.
5. The rear axle shaft lock to the differential case.
6. The shaft lock screw to the differential case.
Important: Anytime a differential pinion shaft locking screw is removed it is important to coat the screw threads with Loctite 242 before
reinstalling. These screws are coated with an adhesive that helps to prevent the screw from loosening in the case. When this screw is removed, the
adhesive is also removed.
7. The pinion shaft to the vehicle.
8. The pinion shaft screw to the differential case
9. The rear axle carrier cover.
10. The rear brake drum.
11. The wheel and tire.
12. Lower the vehicle.
Hub and Brake Drum With Axle Bearing and Oil Seal
REAR WHEEL BEARINGS AND/OR HUB
^
Tool Required:
-
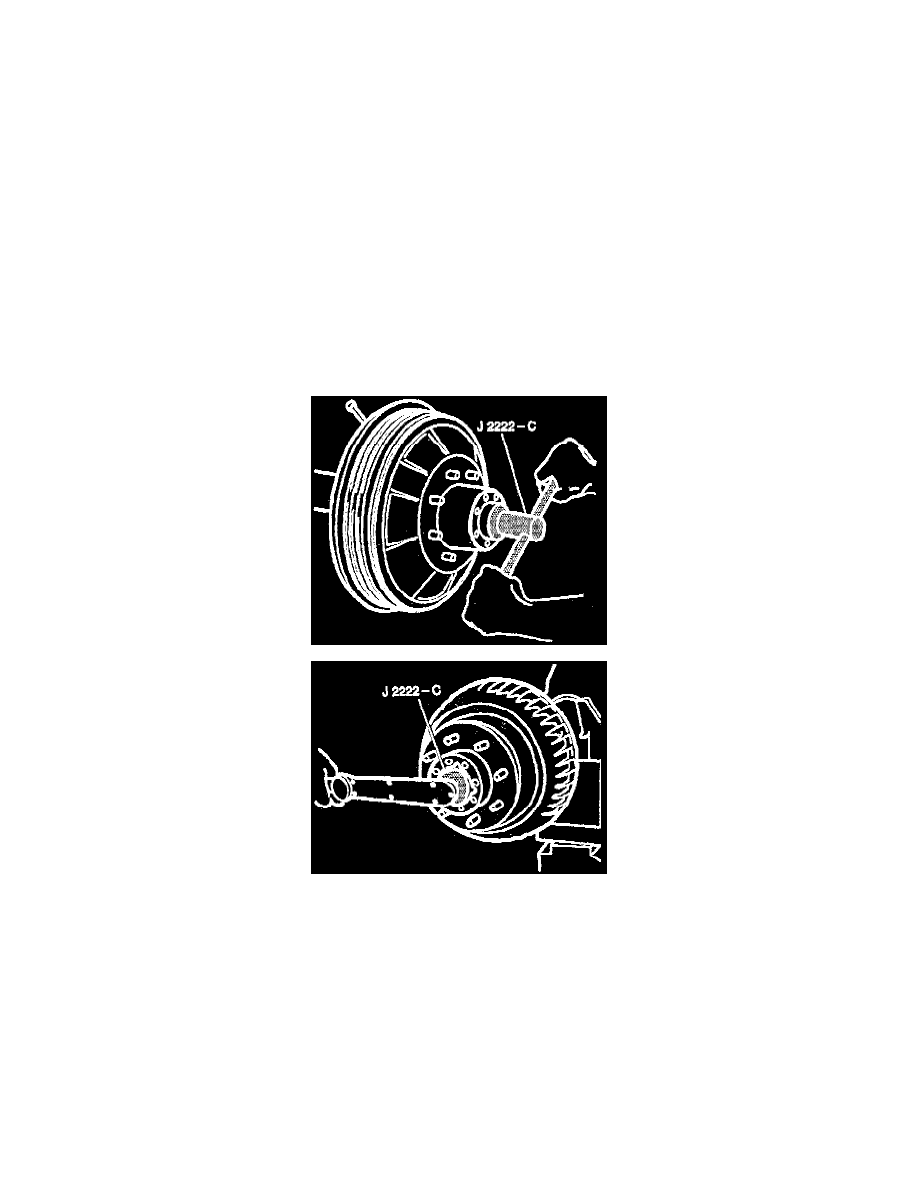
J 2222-C Wheel Bearing Nut Wrench
REMOVE OR DISCONNECT
1. Raise the vehicle and support it with safety stands.
2. The wheel and tire.
3. The axle shaft.
4. The retaining ring from the axle.
5. The key way from the axle.
6. The adjusting nut and washer from the axle using J 2222-C.
7. The outer bearing from the axle.
8. The retaining clip from the axle.
9. The axle oil seal.
10. The inner bearing from the axle.
11. The hub and drum from the axle.
INSTALL OR CONNECT
1. The hub and drum to the axle.