
G 30 1 Ton Van L6-250 4.1L VIN D 2-bbl (1983)
Pick-Up Coil: Service and Repair
IGNITION COIL
1.
Disconnect electrical connectors and high tension lead from coil.
2.
Remove coil attaching screws and the coil
3.
Reverse procedure to install.
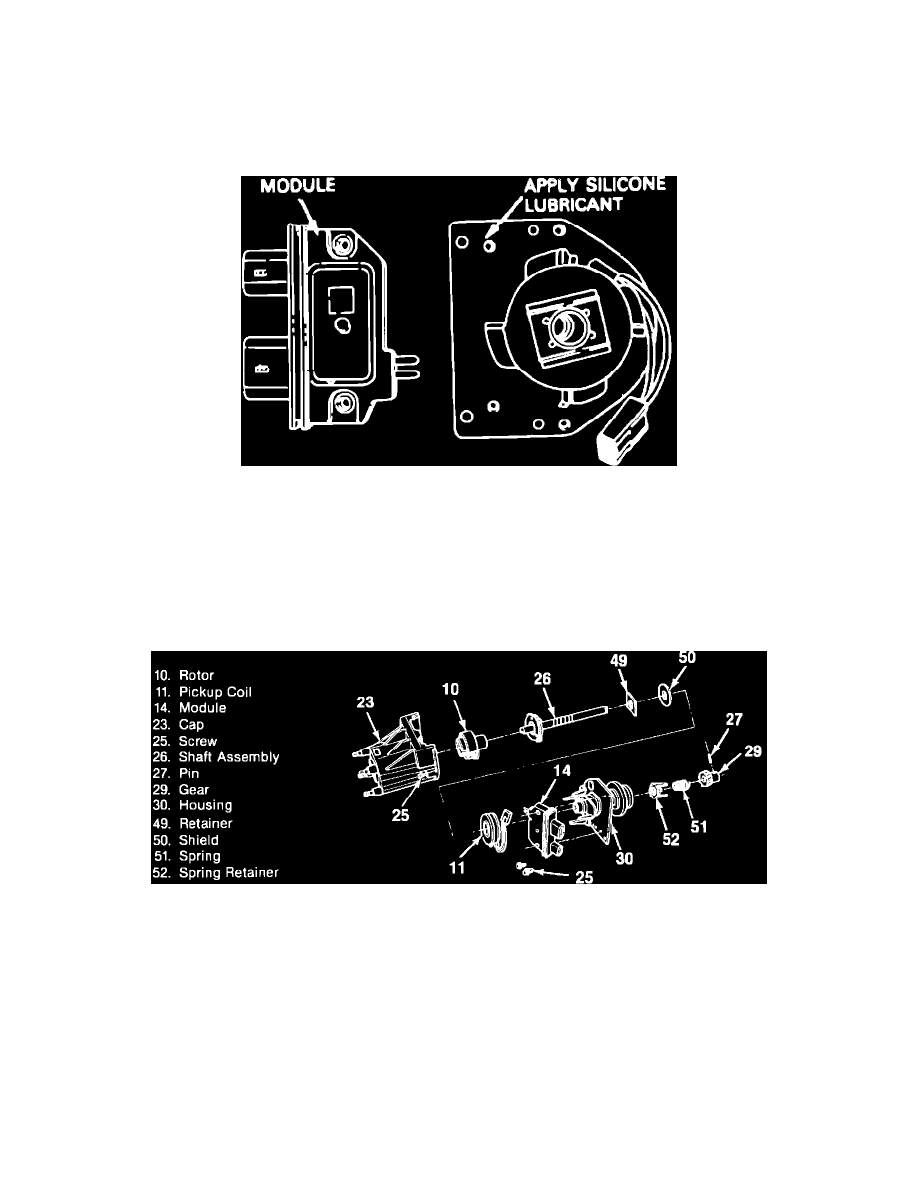
Fig. 5 Ignition Module Installation
MODULE
1.
Remove distributor cap and rotor.
2.
Remove mounting screws, then lift module upward.
3.
Disconnect electrical connectors from module noting installation position, then remove module.
4.
Reverse procedure to install. Prior to installation, coat bottom of new module with dielectric grease, Fig. 5, (furnished with new module) to aid in
heat transfer into distributor housing. Failure to apply grease will cause excessive heat at module and premature module failure.
Fig. 6 Sealed module connector distributor exploded view
PICKUP COIL REPLACE
Removal
1.
Remove distributor as outlined, mark installation position of rotor, then remove rotor by pulling it straight up from distributor shaft.
2.
Remove Hall effect switch, if equipped.
3.
Remove roll pin from drive gear by driving out with 1/8 inch diameter drift punch.
4.
Remove gear, spring and the tanged washer from distributor shaft, Fig. 6. Remove any burrs that may have been caused by removal of pin.
5.
Remove distributor shaft from housing.
6.
Remove thin C-washer from inside pickup coil, pry off retainer, then remove pickup coil. Bushings in the housing are not serviceable.
Installation