
G 30 1 Ton Van L6-250 4.1L VIN D 2-bbl (1983)
Axle Shaft Assembly: Service and Repair
Dana/Spicer Full Floating Axle
Axle Assembly
Rear Drive Axle
1.
Raise and support vehicle. Using a jack, support rear axle assembly.
2.
Drain fluid from axle assembly.
3.
Mark driveshaft to flange, then disconnect driveshaft and tie driveshaft to side rail or crossmember.
4.
Tape bearing cups to prevent loss of the rollers.
5.
Remove wheel and brake drum or hub and drum assembly.
6.
Disconnect parking brake cable from lever and brake flange plate.
7.
Disconnect and cap hydraulic brake lines from connectors.
8.
Remove shock absorbers from axle brackets.
9.
Disconnect vent line from vent fitting.
10.
Remove height sensing and brake proportional valve brackets.
11.
Remove nuts and washers from U-bolts.
12.
Carefully remove U-bolts, spring plates and spacers from axle assembly.
13.
Lower axle assembly from vehicle.
14.
Reverse procedure to install.
Axle Shaft Replace
REAR AXLE SHAFT
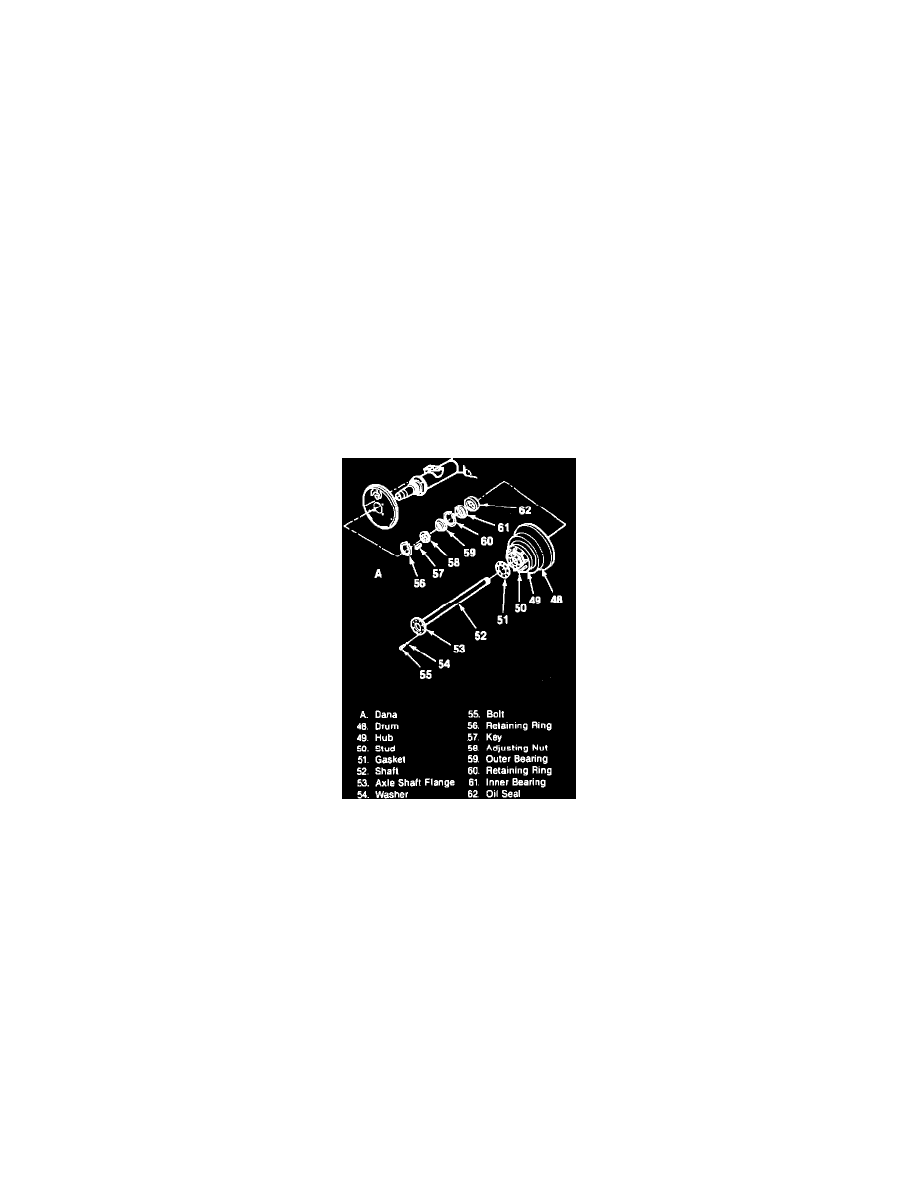
Fig. 3 Axle, Hub & Drum Components.
1.
Using a soft faced mallet, tap axle shaft flange lightly to loosen shaft.
2.
Remove axle shaft attaching bolts, Fig. 3, then grip axle shaft rib with pliers and twist to start shaft removal.
3.
Remove axle shaft from axle tube.
4.
Reverse procedure to install.
Wheel Bearing
REAR WHEEL BEARING
1.
Raise and support vehicle.
2.
Remove axle shaft.
3.
Remove hub and drum.
4.
Remove oil seal, inner bearing and retaining ring.
5.
Remove outer bearing.
6.
Reverse procedure to install.