
G 30 Van V8-454 7.4L VIN J SFI (1996)
Intake Manifold: Service and Repair
Intake Manifold Replacement (Lower)
REMOVAL
1. Remove the upper intake manifold.
2. Remove the air conditioning lines at the A/C compressor.
3. Remove the distributor. Mark the relationship of the distributor housing and the rotor for proper replacement.
4. Drain the coolant. Refer to Heating and Air Conditioning.
5. Remove the upper radiator hose at the thermostat housing.
6. Remove the heater hose
7. Remove the water pump bypass hose.
8. Remove the fuel line brackets and the fuel rail.
9. Remove the lower intake manifold bolts.
10. Remove the lower intake manifold and the gaskets.
11. Clean old pieces of gasket from the gasket surfaces.
12. Clean excessive carbon buildup from the exhaust passages.
13. Clean scale and deposits from the coolant passages.
14. Clean excessive carbon deposits from the EGR passages.
INSTALLATION
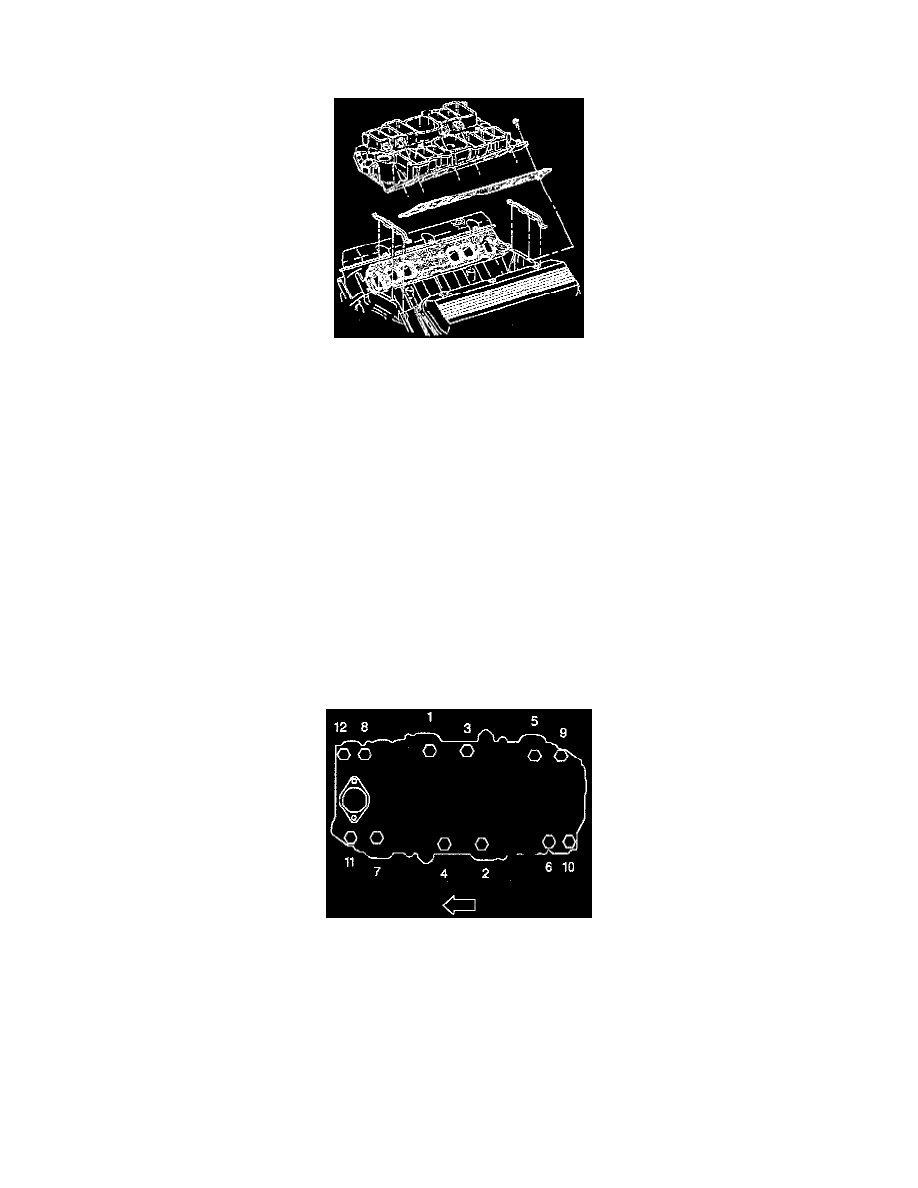
1. Install the gaskets to the cylinder head with the THIS SIDE UP stamping facing up.
2. Install the lower intake manifold to the engine.
3. Apply the sealer Loctite 242 GM P/N 12345382 or equivalent to the lower intake manifold bolts.
4. Install the lower intake manifold bolts.
^
Tighten the bolts in sequence to 40 Nm (30 ft. lbs.).
5. Install the water pump bypass hose.
6. Install the wiring harness, connectors, and brackets.
7. Install the fuel line brackets and the fuel rail.
8. Install the heater hose.
9. Install the upper radiator hose at the thermostat housing.
10. Install the air conditioning lines to the compressor.
11. Install the distributor.
12. Fill the cooling system.
13. Install the upper intake manifold).
14. Charge the A/C system. Refer to Heating and Air Conditioning.