
G 30 Van V8-454 7.4L VIN N TBI (1995)
bore. When applying compressed air do not place fingers in front of piston in an attempt to catch or protect it as this could result in
serious injury.
5.
Carefully pry dust boot out of bore.
6.
Using a small piece of wood or plastic, remove piston seal from bore. Do not use a metal tool of any kind to remove seal as it may damage
bore.
7.
Remove bleeder valve.
INSPECTION
Clean all parts in denatured alcohol, wipe dry using lint-free cloths. Using compressed air, blow out drilled passages and bores. Check dust boots for
punctures or tears. If punctures or tears are evident, new boots should be installed upon reassembly.
Inspect piston bores in both housings for scoring or pitting. Bores that show light scratches or corrosion can usually be cleaned with crocus cloth.
However, bores that have deep scratches or scoring may be honed, provided the diameter of the bore is not increased more than .002 inch. If the bore
does not clean up within this specification, a new caliper housing should be installed (black stains on the bore walls are caused by piston seals and will
do no harm).
When using a hone, be sure to install the hone baffle before honing bore. The baffle is used to protect the hone stones from damage. Use extreme care
in cleaning the caliper after honing. Remove all dust and grit by flushing the caliper with denatured alcohol. Wipe dry with clean lint-free cloth and then
clean a second time in the same manner.
ASSEMBLY
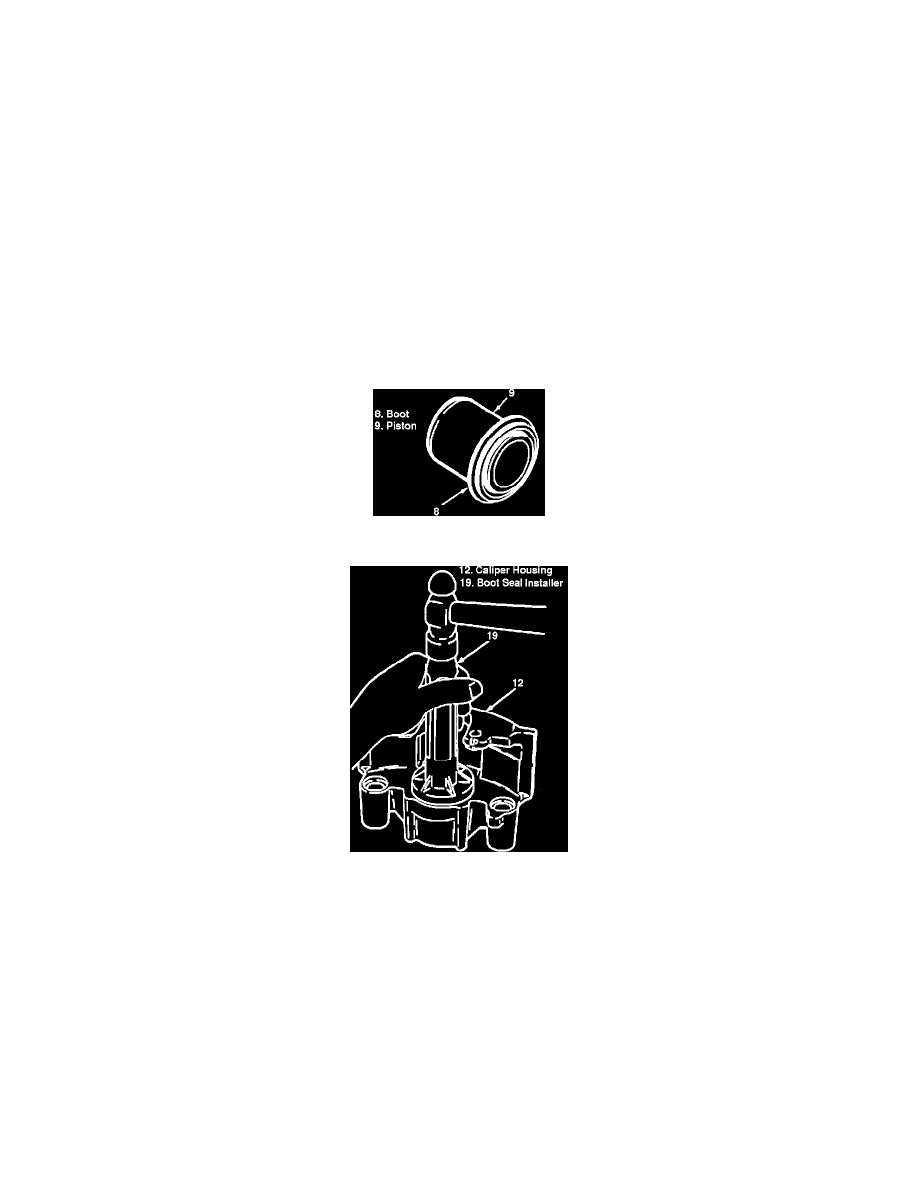
Fig. 5 Installing Boot To Piston
Fig. 6 Installing Boot To Caliper
1.
Lubricate caliper piston bore and new piston seal with clean brake fluid. Position seal in bore groove.
2.
Lubricate piston with clean brake fluid and assemble a new boot into the groove in the piston so the fold faces the open end of the piston, Fig. 5.
3.
Using care not to unseat the seal, insert piston into bore and force the piston to the bottom of the bore.
4.
Position dust boot in caliper counterbore and install, Fig. 6. Check the boot installation to be sure the retaining ring molded into the boot is not
bent and that the boot is installed below the caliper face and evenly all around. If the boot is not fully installed, dirt and moisture may enter the
bore and cause corrosion.
5.
If available, use new copper washers discarding the old washers and install the brake hose to the caliper.
6.
Install pads and caliper assembly.