
G 30 Van V8-454 7.4L VIN N TBI (1995)
^
For alignment notches of the PROM (MEM-CAL) and carefully set aside. Do not open the PROM (MEM-CAL).
Prom MEM-Cal
REMOVE OR DISCONNECT (Figures 1 and 2)
1. New Powertrain Control Module (PCM) from its packaging and check the service number to make sure it is the same as the defective PCM.
2. Access cover.
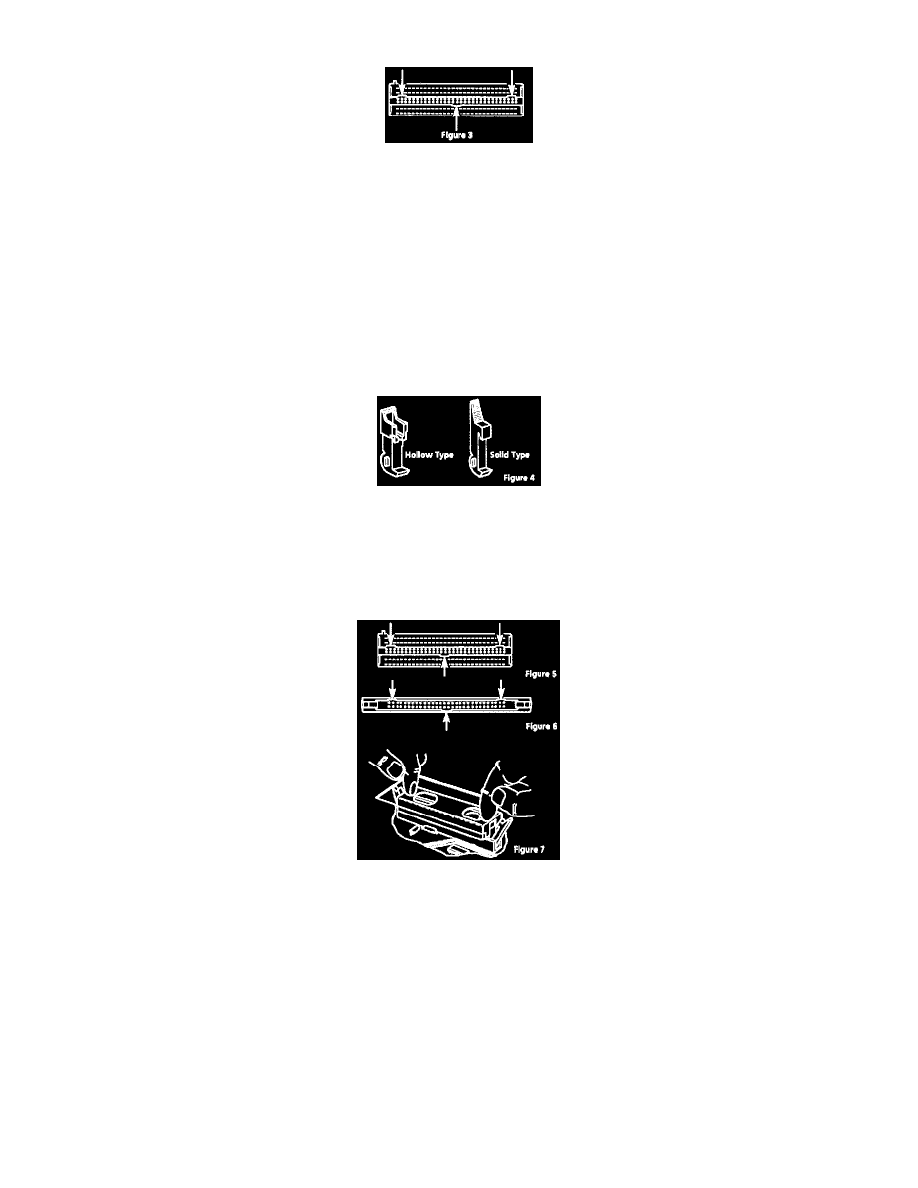
INSTALL OR CONNECT (Figures 4, 5, 6, 7 and 8)
1. PROM (MEM-CAL) in PROM (MEM-CAL) socket.
INSPECT
^
Type of clips used on the PROM (MEM-CAL) sockets.
^
There are two types of clips used on the PROM (MEM-CAL) sockets. A solid type is used on the early production models. See Figure 3.
Prom MEM-Cal Clips
NOTE:
^
Press only on the ends of the PROM (MEM-CAL).
^
Small notches in the PROM (MEM-CAL) must be aligned with the small notches in the PROM (MEM-CAL) socket.
Prom MEM-Cal Clips Location
^
Gently press down on the ends of the PROM (MEM-CAL) until the clips are against the side of the PROM (MEM-CAL). Press inward on the
clips until they snap into place. Listen for the click.
CAUTION: Do not press on the ends of the PROM (MEM-CAL) until the clips snap into place because the controller circuit board and/or clips
may be damaged.