
G 30 Van V8-454 7.4L VIN N TBI (1995)
Power Steering Pump: Service and Repair
Power Steering Pump Overhaul
Disassembly
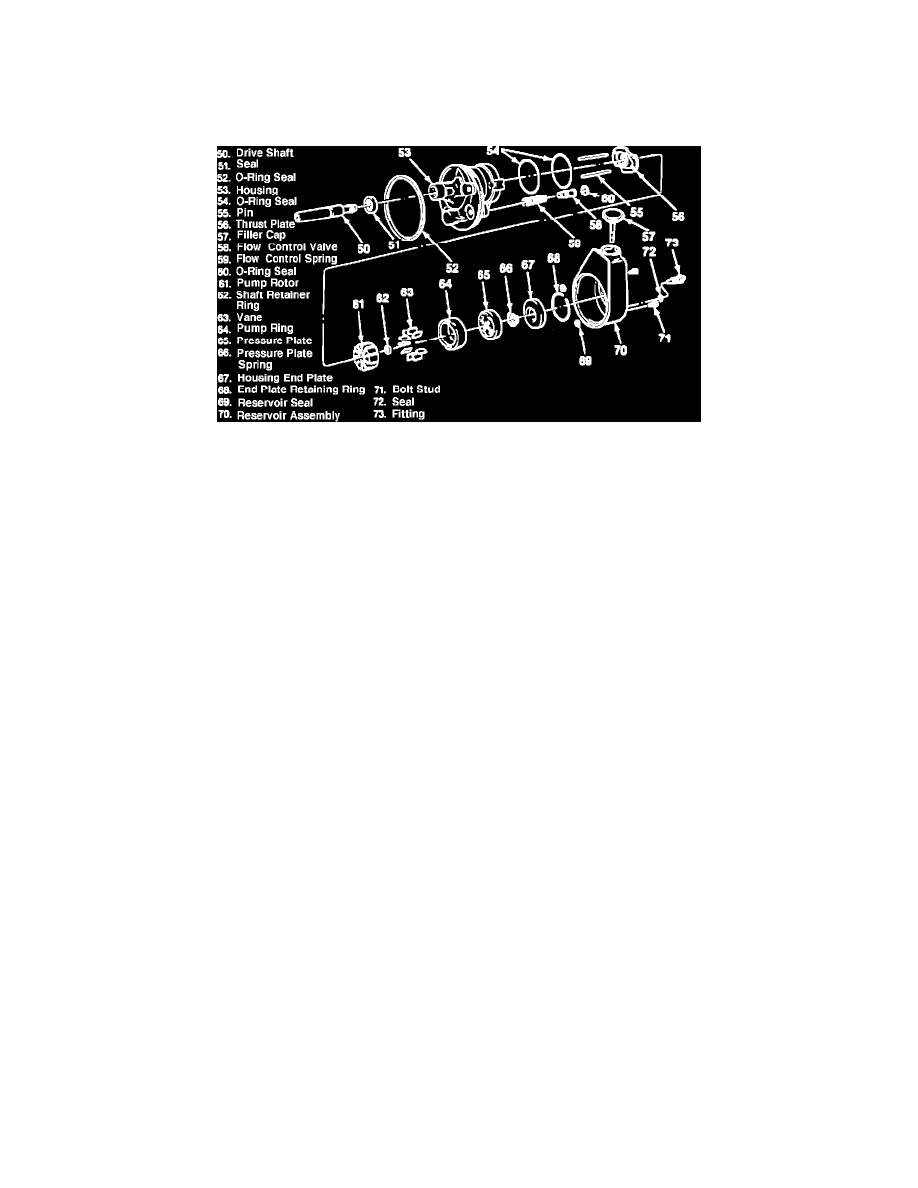
Fig. 2 Exploded view of power steering pump
CAUTION: Before disassembly of pump, remove filler cap and drain fluid. If broken components or foreign materials are found during
disassembly, hydraulic system should be disassembled, inspected, cleaned and flushed before servicing is complete.
1. Clean exterior of pump with solvent and crocus cloth.
2. Remove bolt and fitting from rear of pump reservoir, then the reservoir and seals.
3. Remove end plate retaining ring using a screwdriver and punch.
4. Remove endplate and pressure plate spring, then the O-ring, control valve and control valve spring by inverting housing.
5. Tap lightly on driveshaft with a rubber mallet to remove pressure plate.
6. Pull out pump ring and vanes, then remove shaft retaining ring, pump rotor and thrust plate.
7. Remove driveshaft key from slot in shaft, then with end of shaft pointed downward, press down until shaft is free.
8. Remove seals, dowel pins and O-rings.
Inspection
1. Clean all parts with solvent and blow dry.
2. Check vane tips for scoring or wear. Vanes must fit snugly but slide freely in slots of rotor. Examine rotor slots for burrs and excessive wear at
thrust faces.
3. Check inner surface of pump ring for scoring or wear and thrust plate and pressure plate for wear on plate surfaces.
4. If heavy wear is evident in any of above components, replace entire rotating group.
5. Inspect seal for leakage, cracking or swelling, if evident replace seal.
6. Check driveshaft for excessive burning or scoring.
7. Control valve must move smoothly in the valve bore.
Assembly