
G 30 Van V8-454 7.4L VIN N TBI (1995)
Window Regulator: Service and Repair
Power Regulator
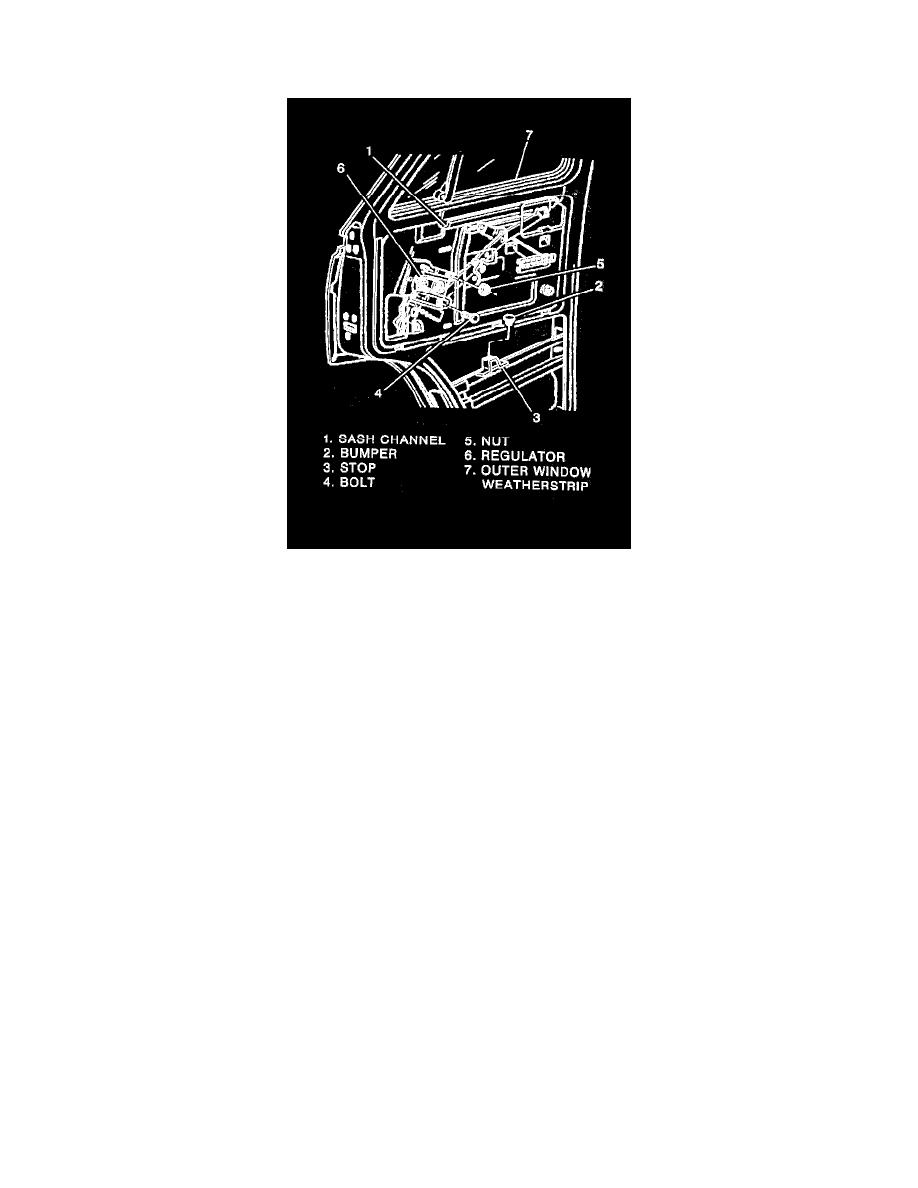
Door Window Components
Remove or Disconnect
^
Raise the window and tape the glass in the full up position using cloth body tape.
1. Negative (-) battery cable.
2. Door trim panel.
3. Remote control to door trim panel bolts. Lay the control aside.
4. Regulator to door panel bolts (4) and nuts (5).
5. Wiring harness from the regulator.
6. Window regulator (6).
A. Slide the regulator rearward to disengage the rear roller from the sash channel. Also disengage the lower roller from the regulator rail.
B. Disengage the forward roller from the sash channel at the notch in the sash channel.
C. Collapse the regulator, and remove it through the access hole in the door.
CAUTION: The next step must be performed when the regulator is removed from the door. The regulator lift arms are under tension from
the counterbalance spring and can cause serious injury if the motor is removed without locking the sector gear in position.
^
Drill a hole through the regulator sector gear and back plate. Drill the hole at least 12.7 mm (1/2 inch) away from the edge of the sector gear or
back plate. Install a pan head sheet metal tapping screw at least 19 mm (3/4 inch) long into the drilled hole to lock the sector gear in place.
7. Motor to regulator attaching screws.
8. Motor from the regulator.
Install or Connect
^
Lubricate the motor drive gear and regulator sector teeth.
1. Regulator motor to regulator.
^
The motor pinion gear teeth must mesh properly with the sector gear teeth before installing the motor to regulator screws.
2. Regulator motor to regulator screws. Remove the sheet metal screw from the back plate and sector gear.
3. Window regulator to the door.
^
Collapse the regulator, and insert it through the access hole in the door.
^
Unfold the regulator; and engage the forward roller to the sash channel at the sash channel notch.
^
Slide the regulator rearward to engage the rear roller to the sash channel. Also engage the lower roller to the regulator rail.