
HHR L4-2.2L (2007)
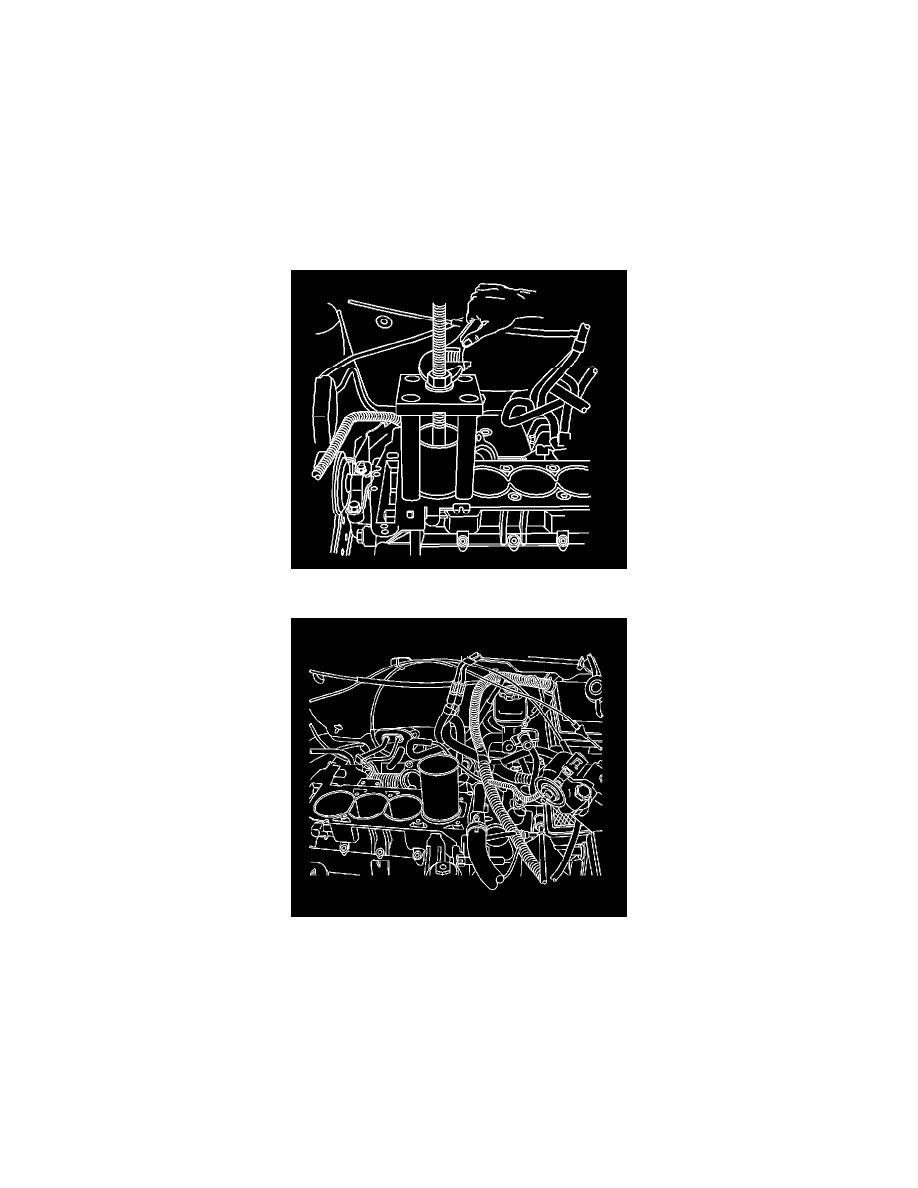
6. Hold the threaded shaft of the cylinder bore sleeve puller EN 45680-852 upward in order to retain the shoe alignment to the bottom of the cylinder
bore sleeve.
7. Install the fixture EN 456850-851 (4) onto the threaded shaft of the cylinder bore sleeve puller EN 456850-852 and the engine block.
8. Install the bearing (3) and the nut (1).
9. Tighten the nut (1) to the bearing (3).
Notice: Refer to Fastener Notice.
Important: Use four old cylinder head bolts for the attaching bolts.
10. Install and tighten the 4 attaching bolts (2) into the cylinder head bolt holes of the block.
Tighten the bolts to 15 N.m (11 lb ft).
11. Rotate the nut clockwise in order to remove the cylinder bore sleeve.
Notice: Do not damage the cylinder block surface. Damage to the cylinder block surface can cause engine failure.
12. Remove fixture EN 45680-851, cylinder bore liner sleeve EN 45680-852, and the cylinder bore liner from the engine block.
13. Inspect the cylinder bore in the cylinder block for cracks or damage. If cracked or damaged, replace the cylinder block.
Installation Procedure
Notice: Do not use assembly aids or lubricants on the cylinder bore sleeve or the cylinder bore block when installing a new cylinder bore sleeve,
or engine damage will occur. These items will not aid in the installation of the new cylinder bore sleeve.
Notice: Do not chill or heat the cylinder bore sleeve or the cylinder block when removing or installing a new cylinder bore sleeve. Chilling or
heating the cylinder bore sleeve or the cylinder block will cause engine damage and will not aid the removal or installation of the new cylinder