
Impala V6-231 3.8L VIN A 2-bbl (1982)
Heater Core: Service and Repair
With Air Conditioning
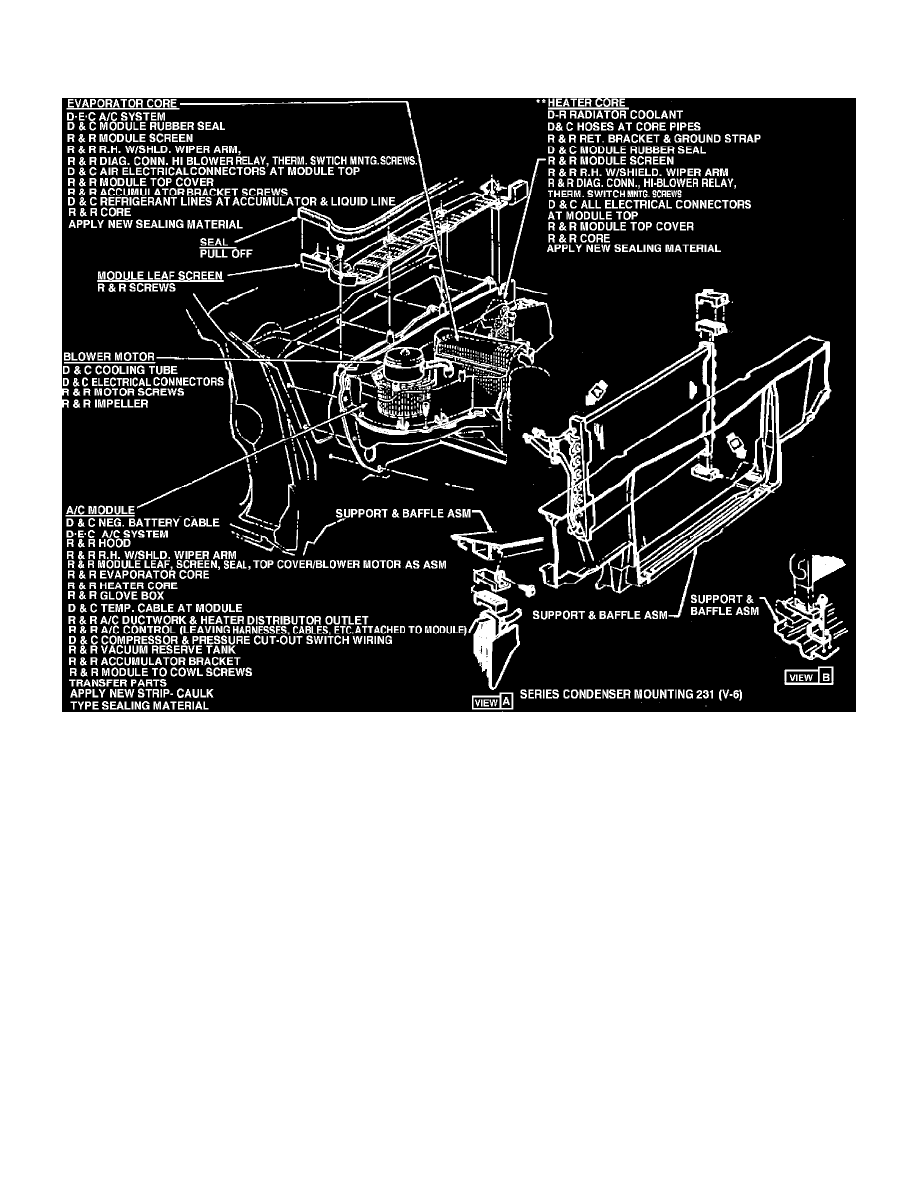
Fig. 24 Blower motor & heater core. Chevrolet Full Size with A/C
CHEVROLET
1.
Disconnect battery ground cable and drain cooling system.
2.
Disconnect heater hoses at heater core. Cap core outlets to prevent coolant spillage.
3.
Remove diagnosis connector to upper case attaching screws.
4.
Disconnect wire connectors from blower motor, resistor, blower relay and thermostatic switch.
5.
Remove wiring harness retainer from blower case shroud.
6.
Remove module screen to cowl attaching screws and remove screen.
7.
Remove upper case to lower case attaching screws. Two screws are located inside air intake area at case separation point.
8.
Disconnect wire connector from thermostatic switch, then remove screws attaching switch to evaporator case. Carefully remove insulation and
loosen two clamps enough to pull formed end of switch capillary tube from under clamps attaching tube to evaporator inlet pipe for installation.
9.
Remove evaporator inlet pipe support bracket to case attaching screws and remove bracket.
10.
Remove heater-evaporator core case cover, using care not to damage sealer.
11.
Remove heater core to case attaching screws at top of heater core, then remove heater core, Fig. 24. The heater core is held in position at
bottom by a spring clip. Pull up firmly on heater core to disengage from clip. When installing, position core base in alignment with clip
before lowering core into case. Upper retaining bracket will line up with hole at top of core when core is properly seated.
12.
Reverse procedure to install.