
Impala V6-3.5L VIN N (2006)
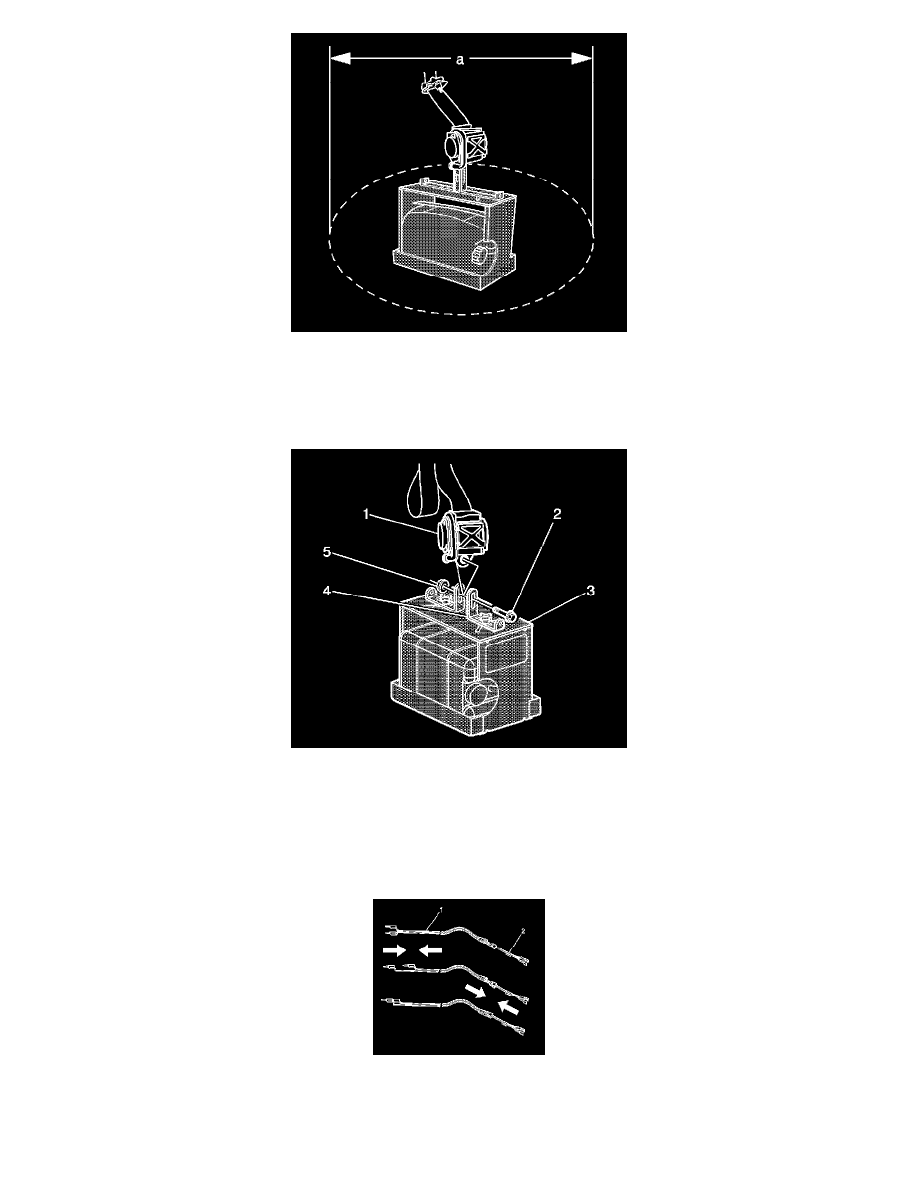
6. Clear a space on the ground about 1.85 m (6 ft) in diameter for deployment of the seat belt pretensioner. If possible, use a paved, outdoor location
free of activity. Otherwise, use a space free of activity on the shop floor. Make sure you have sufficient ventilation.
7. Make sure no loose or flammable objects are in the area.
8. Place the J 39401-B in the center of the cleared area.
9. Fill the fixture plastic reservoir with water or sand.
10. Mount the seat belt pretensioner in the SIR deployment fixture with the seat belt webbing exiting through the top of the pretensioner. Use the
following mounting method.
-
Adjust and secure two of the J 39401-B arms to the deployment fixture, with the short slotted portions of the arms standing vertically and
facing toward the center of the deployment fixture.
-
To mount, use the proper size bolt and nut with washers in order to secure the seat belt pretensioner mounting hole between the two
deployment fixture brackets.
-
Securely tighten all fasteners prior to deployment.
11. Inspect the J 38826 and the appropriate pigtail adapter for damage. Replace as needed.
12. Short the 2 SIR deployment harness (1) leads together using 1 banana plug seated into the other.