
Impala V6-3.8L SC VIN 1 (2005)
Installation Procedure
Important: You MUST install the lower control arm vertical bushing in the same position in order to maintain the original vehicle ride, handling,
and road feel.
1. Align the flat edge of the bushing flange to the mark in the control arm (1). Ensure that the flat edge of the bushing flange is 30 degrees (2) from
the centerline of the lower control arm. Ensure that the thin slot in the bushing is facing outboard.
2. Insert the bushing into the control arm.
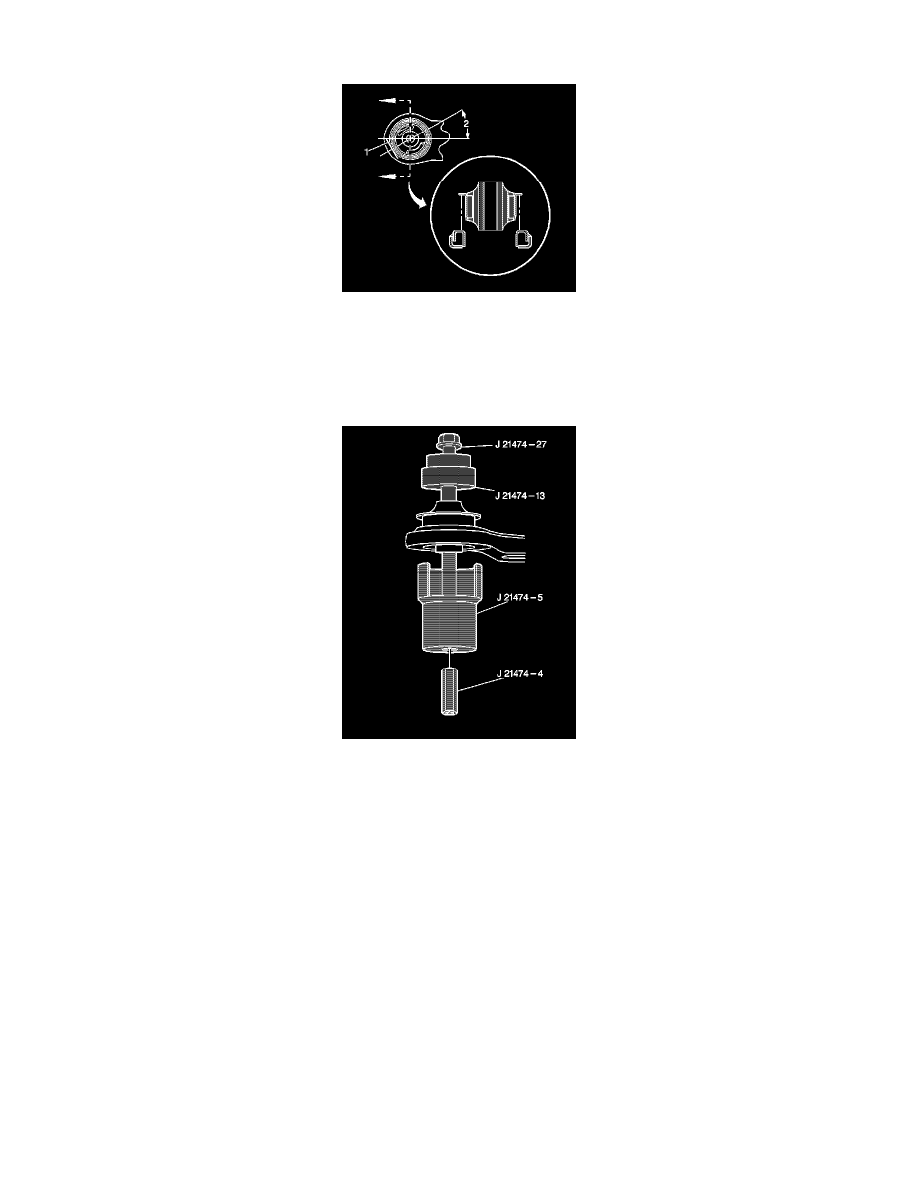
Important: Apply J 23444-A or equivalent to the threads of J 21474-27.
3. Assemble these bushing installation tools as shown:
a. J 21474-27
b. J 21474-13
c. J 21474-5
d. J 21474-4
4. Tighten J 21474-4.
5. Disassemble the bushing installation tools.
6. Install the lower control arm.