
Impala V6-3.8L VIN K (2004)
8. Install the bolts to the HVAC module assembly upper support.
Tighten
Tighten the bolts to 4 N.m (35 lb in).
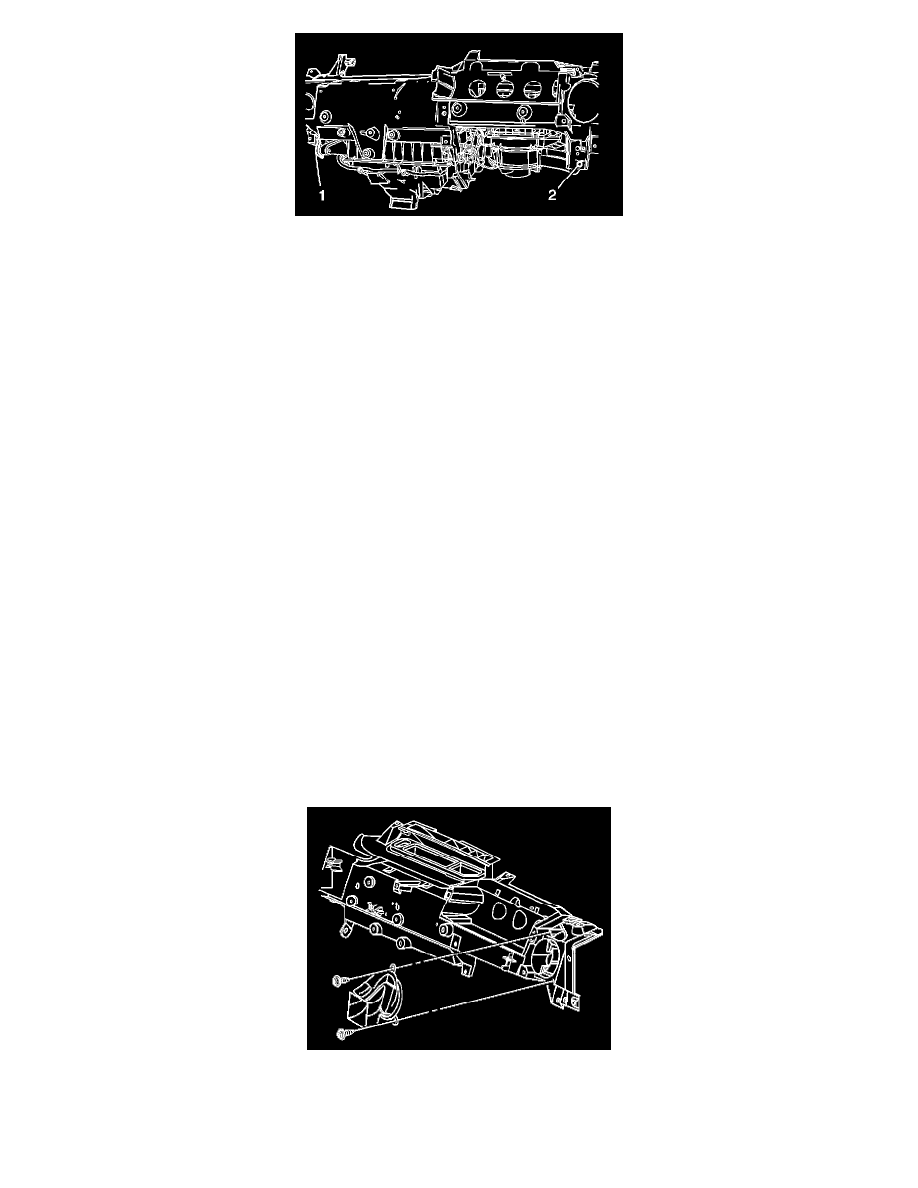
9. Install the bolt to the HVAC module assembly lower support (1).
Tighten
Tighten the bolt to 4 N.m (35 lb in).
10. Install the bolt to the HVAC module assembly lower support (2).
Tighten
Tighten the bolt to 4 N.m (35 lb in).
11. Reposition the I/P wiring harness on to the cross vehicle beam and secure the retaining clips.
12. Connect the electrical connector from the HVAC module assembly to main wire harness connector.
13. Install the 3 bolts through the brake pedal bracket to the cross vehicle beam.
Tighten
Tighten the bolts to 50 N.m (37 lb ft).
14. Install the brake pedal.
15. Connect all disconnected ground wires.
16. Install the body control module to the cross vehicle beam.
17. Connect the wire harness connectors to the body control module.
18. Install the left side fuse block to the cross vehicle beam.
19. Install the bolts to the left side fuse block.
Tighten
Tighten the bolts to 10 N.m (89 in lb).
20. Install the right side fuse block to the cross vehicle beam.
21. Install the bolt to the right side fuse block.
Tighten
Tighten the bolt to 10 N.m (89 in lb).