
Impala V6-3.8L VIN K (2004)
Trailing Arm: Service and Repair
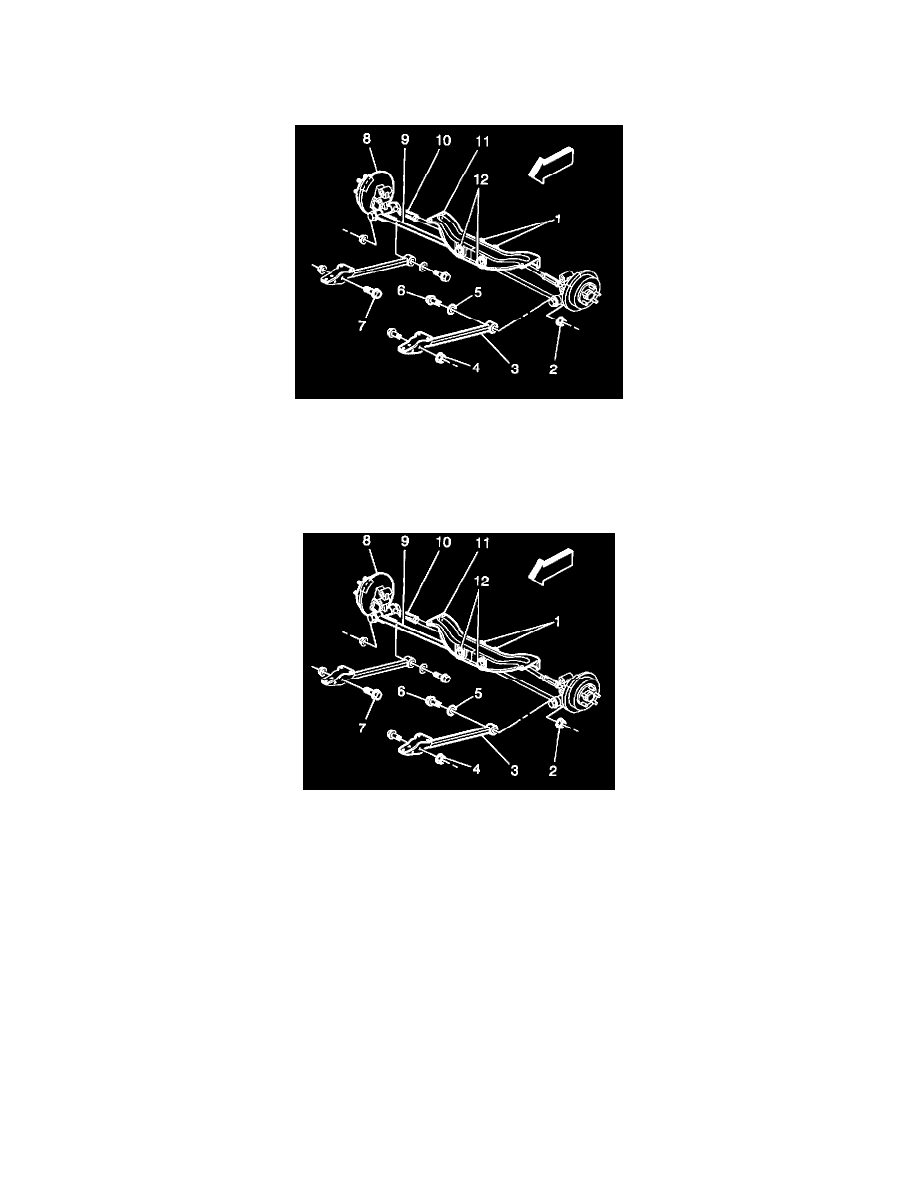
Trailing Arm Replacement
Removal Procedure
1. Raise and support the vehicle. Refer to Vehicle Lifting.
2. Remove the bolt (6) and nut (2) from the trailing arm (3) and the knuckle (8).
3. Remove the nut (4) and bolt (7) from the trailing arm (3) and the trailing arm bracket.
4. Remove the trailing arm (3) from the vehicle.
Installation Procedure
1. Install the trailing arm (3) to the trailing arm bracket.
Notice: Refer to Fastener Notice in Service Precautions.
2. Install the bolt (7) and nut (4) to the trailing arm (3) and the trailing arm bracket.
^
Tighten the bolt and nut to 105 Nm (77 ft. lbs.).
3. Install the trailing arm (3) to the knuckle (8).
4. Install the bolt (6) and nut (2) to the trailing arm (3) and the knuckle (8).
^
Tighten the nut to 70 Nm + 65° (52 ft. lbs. + 65°).
5. Lower the vehicle.