
Impala V6-3.9L (2007)
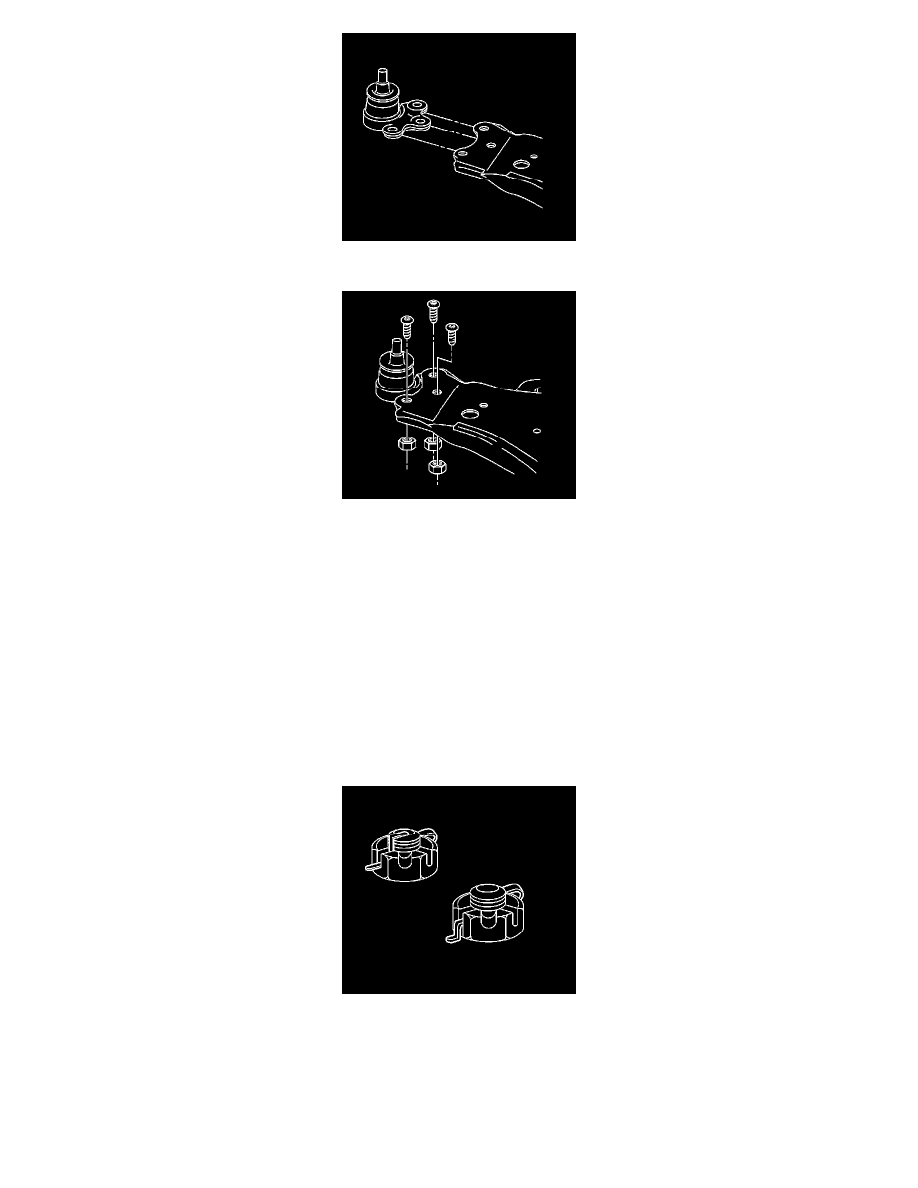
1. Install the ball stud to the lower control arm.
2. Install the NEW ball stud bolts facing down, away from the ball stud.
Notice: Refer to Fastener Notice.
3. Install the NEW ball stud nuts.
Tighten the NEW ball stud nuts to 68 N.m (50 lb ft).
4. Install the ball stud to the steering knuckle.
Important: Verify the nut is torqued to a minimum of 55 N.m.
5. Install the ball stud castle nut.
Tighten the nut to 20 N.m (15 lb ft) plus an additional 120 degrees
Important: Do NOT loosen the ball stud nut in order to align the ball stud nut slots to the ball stud cotter pin hole. If necessary, tighten
the ball stud castle nut in order to align the ball stud castle nut slot to the ball stud cotter pin hole.
Important: Ensure the cotter pin ends do NOT contact the ABS wheel speed sensor, the ABS sensor connector or the drive axle.
6. Install a new cotter pin and bend the ends.
7. Install the tire and wheels.
8. Lower the vehicle.