
Impala SS V8-350 5.7L VIN P MFI (1995)
Intake Manifold: Service and Repair
These engines are equipped with a sequential multi-port fuel injection system. Fuel injector connectors must be positioned onto the correct
fuel injectors or engine performance and exhaust emissions may be seriously affected. Fuel injector connectors are numbered to match the correct
injector for that cylinder.
1. Disconnect battery ground cable, then drain coolant into suitable container(s).
2. Remove air cleaner resonator bracket nuts and resonator assembly by loosening clamp at air intake duct and sliding resonator assembly off studs.
3. Remove throttle body air duct.
4. Disconnect fuel injector wiring harness connectors.
5. Disconnect left and right wiring harness clips, then position aside.
6. Remove accelerator control cable bracket bolts/screws and bracket from throttle body.
7. Relieve fuel system pressure as outlined.
8. Disconnect fuel pipe connectors from fuel rail, then remove fuel rail bolts/screws.
9. Remove resonator bracket with canister purge solenoid attached.
10. Disconnect fuel pressure regulator vacuum tube, then remove fuel rail from intake manifold and position aside.
11. Disconnect vacuum and crankcase vent hoses.
12. Remove EGR control valve relay nut, then control valve relay.
13. Remove EGR valve pipe nuts, bolt/screw, pipe and gasket. Discard gasket.
14. Disconnect engine wiring harness and remove nuts at left front corner of intake manifold.
15. Disconnect coolant hoses from throttle body, then remove throttle body bolts/screws, throttle body and gasket.
16. Remove intake manifold bolts/screws and studs, then intake manifold and gaskets. Discard gaskets.
17. Reverse procedure to install, noting the following:
a. Ensure surfaces are clean and dry, then apply a 3/16 bead of RTV sealer to front and rear of engine block. Extend bead approximately 1/2 inch
up each cylinder head.
b. Install manifold and retaining bolts, ensuring areas between case ridges and manifold are completely sealed.
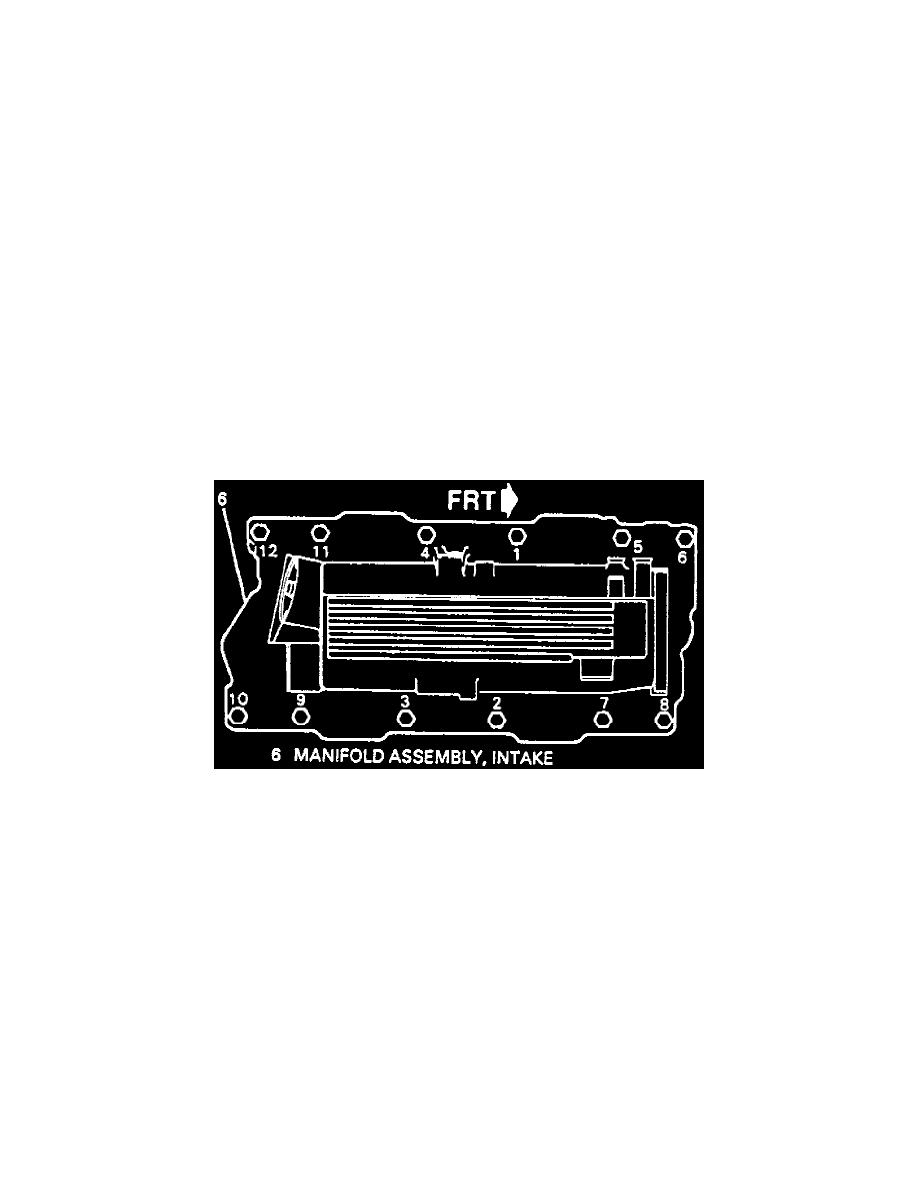
Intake Manifold Bolt Tightening Sequence
c. Tighten manifold bolts to specifications in sequence shown in Fig. 2.