K 1500 Suburban 4WD V8-4.8L VIN V (2003)

Installation Procedure
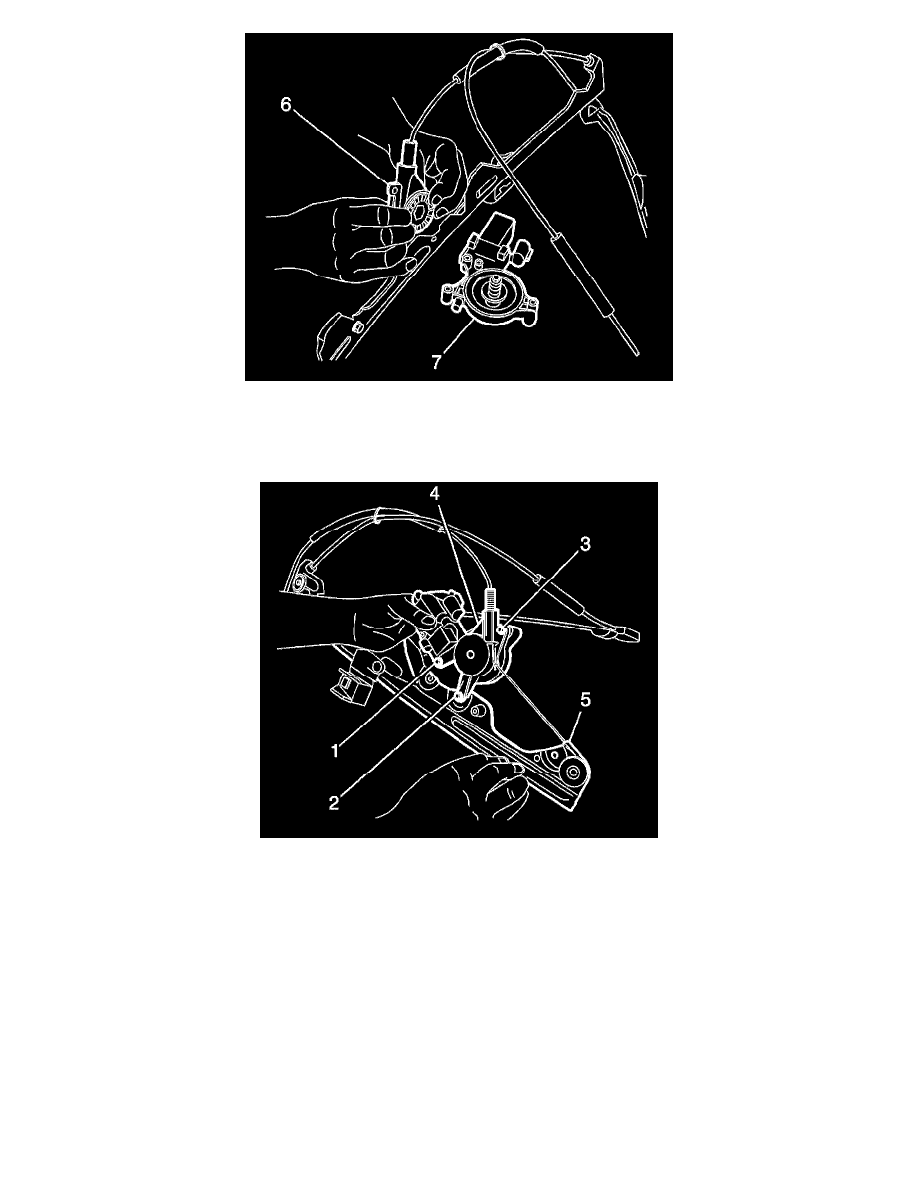
1. Install motor by aligning gear teeth and mounting points simultaneously, pushing the motor into the gear/spool and installing the motor to housing
fastener first (3).
2. Slide the motor and housing assembly (4) onto the rail (5) and install the fastener number two (2).
Notice: Use the correct fastener in the correct location. Replacement fasteners must be the correct part number for that application. Fasteners
requiring replacement or fasteners requiring the use of thread locking compound or sealant are identified in the service procedure. Do not use
paints, lubricants, or corrosion inhibitors on fasteners or fastener joint surfaces unless specified. These coatings affect fastener torque and joint
clamping force and may damage the fastener. Use the correct tightening sequence and specifications when installing fasteners in order to avoid
damage to parts and systems.
3. Rotate the motor and housing assembly to align the attachment point for attachment number one (1) and install the fastener.
Tighten
Tighten the bolts to 5 N.m (44 lb in).
4. Install the power window module.
5. Install the window if removed.
