
K 1500 Suburban 4WD V8-4.8L VIN V (2003)
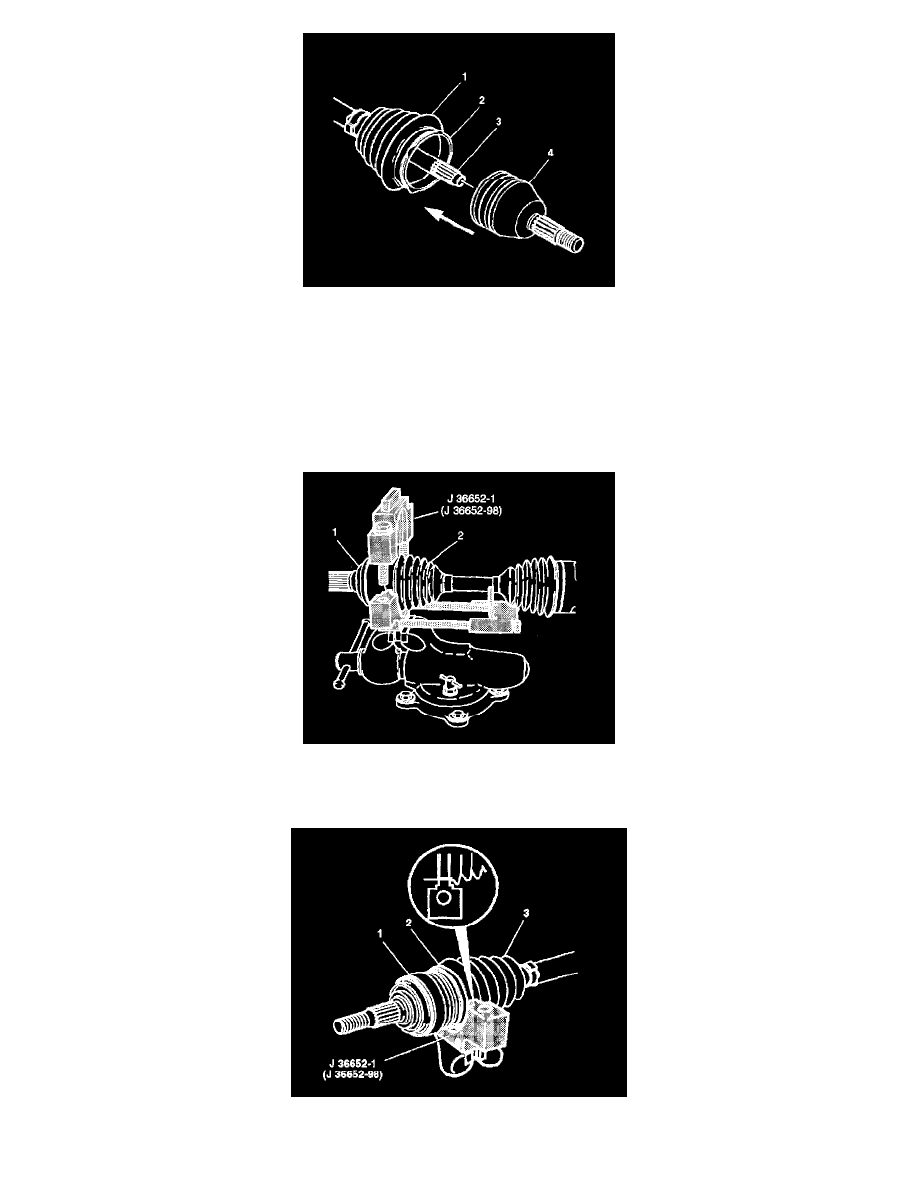
18. Pinch the new swage ring (2) slightly by hand to distort it into an oval shape.
19. Slide the distorted swage ring (2) over the large diameter of the boot (1).
Important: Be sure that the retaining ring side of the CV joint inner race faces the halfshaft bar (3) before installation. Slide the CV joint (4) onto the
halfshaft bar (3). The retaining snap ring inside of the inner race engages in the halfshaft bar groove with a click when the CV joint (4) is in the proper
position.
20. Pull on the CV joint (4) to verify engagement.
21. Slide the large diameter of the CV joint boot (1), with the large swage ring (2) in place, over the outside edge of the CV joint outer race (4).
22. Clamp the CV joint boot (2) tightly to the CV joint outer race (1) with the large swage ring (4), using this procedure:
23. Mount the base of J36652 in a vise.
24. Position the CV joint end (outboard end) of the halfshaft assembly in the bottom half of J36652.
25. Align these during this procedure:
^
The CV joint boot (3)