K 1500 Suburban 4WD V8-5.3L VIN Z Flex Fuel (2003)

2. Connect the wire connector.
3. Install the 4 retaining screws.
Ensure the screw follows the same thread in the screw boss so that a new thread is not formed.
NOTE: Refer to Fastener Notice in Service Precautions.
Tighten
Tighten the screws to 6 N.m (53 lb in).
4. Move the console forward in order to connect the wire connector.
5. Install the console to the I/P.
6. Install the 2 front seats.
Speaker Replacement - Front (Windshield Pillar Speaker)
REMOVAL PROCEDURE
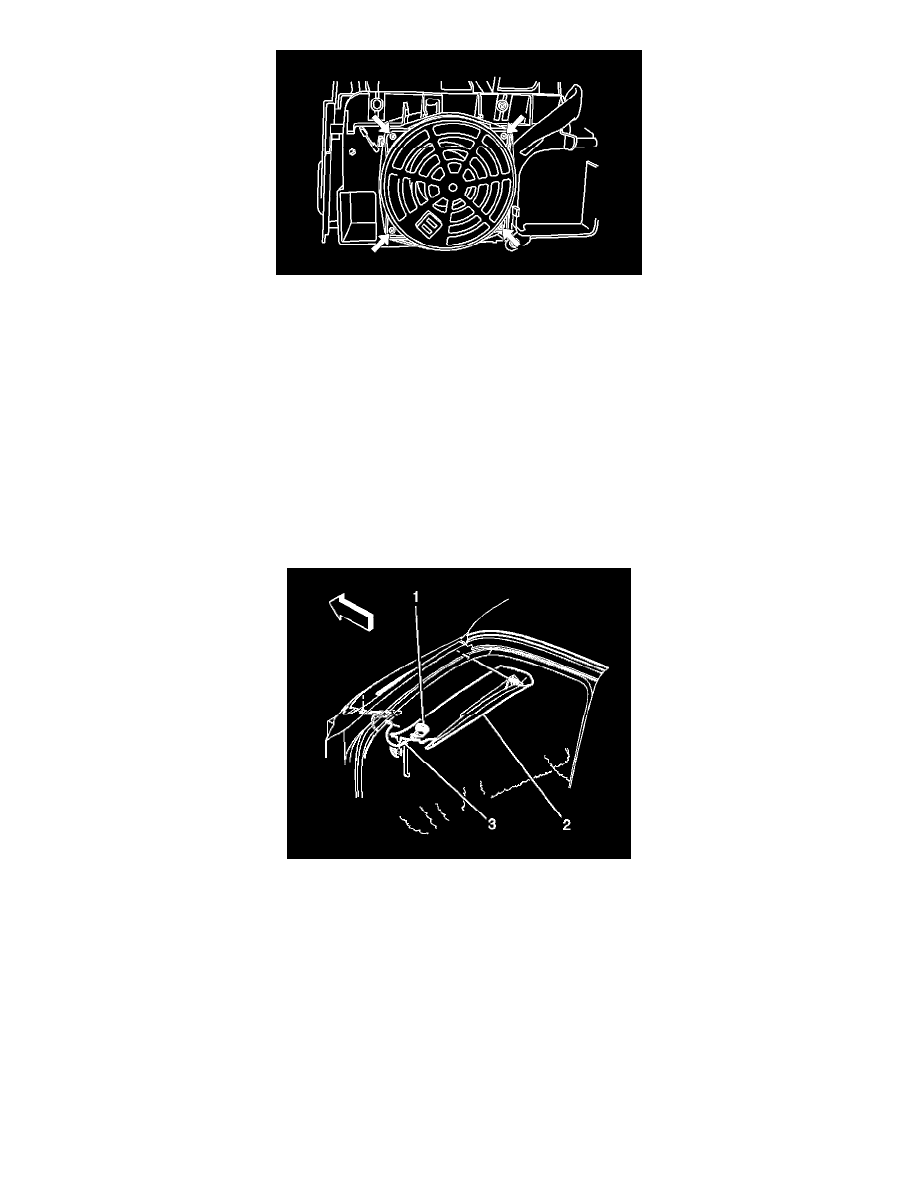
1. Remove the windshield garnish molding (2).
2. Disconnect the electrical connector (3) to the speaker.
3. Remove the speaker (1) by press until it is out of the molding.
INSTALLATION PROCEDURE
