
K 1500 Suburban 4WD V8-5.3L VIN Z Flex Fuel (2003)
5.
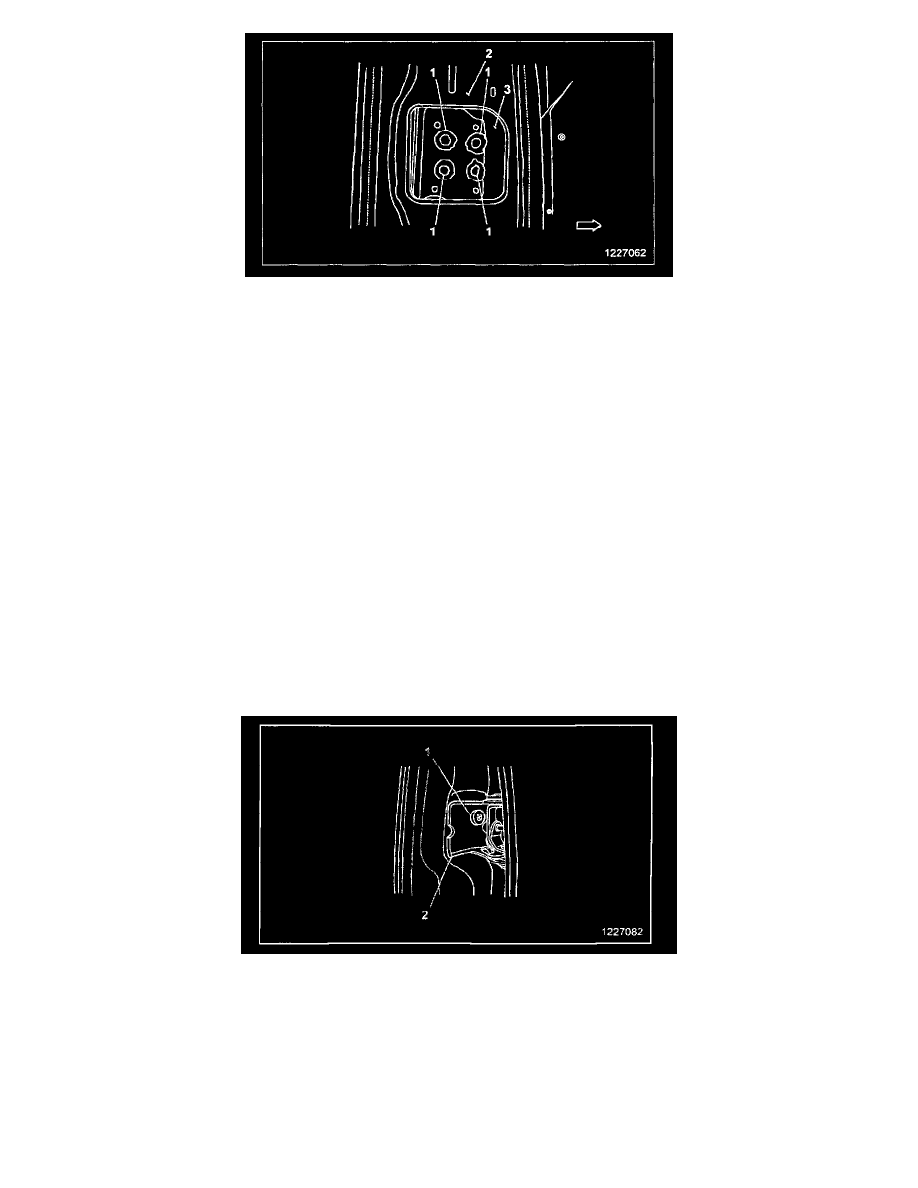
From inside the vehicle, look through the opening in the center pillar sheet metal directly behind the upper hinge.
^
If there are four welds (1) present and ALL four are approximately the same size, NO repair is required. Proceed to step 14 to reassemble the
vehicle.
^
If ONE of the REAR welds is missing, or is a lot smaller in size than the others, NO repair is required. Proceed to step 14 to reassemble the
vehicle.
^
If TWO of the REAR welds are missing, or if the two rear welds are a lot smaller than the front welds, then a repair is required.
Important
The next steps should only be performed if the two rear welds are BOTH missing or are a lot smaller in size than the others. Also, you only have to
repair one of the two rear welds.
6.
Place shop towels on the floor at the base of the center pillar to catch the metal shavings when drilling in the next step.
7.
From inside the vehicle, center punch and drill a 1/8 inch pilot hole through the body sheet metal where one of the missing welds should be. If the
welds are present, but just smaller in size, drill the hole directly through the center of one of the small welds. Continue drilling all the way through
the hinge plate on the other side.
8.
Using a 15/32 inch drill bit, increase the size of the hole to allow for the installation of the repair stud (bolt).
9.
Remove any metal burrs or debris from the drilled hole. Touch-up the drilled hole as necessary using the information found in the applicable
Service Manual and GM Refinish Material Booklet # 4901M-D-2003 (English) or # 4901M-D-F2003 (French)
10.
From outside of the vehicle, install the bolt (1) into the drilled hole in the upper hinge (2).
Important
When tightening the nut in the next step, the serration on the shoulder of the bolt will begin to pull into the hinge plate. Until the serrations begin to
pull in, it may be necessary to hold the bolt with the appropriate tool.
11.
From inside the vehicle, install the nut on the bolt and tighten to 25 Nm (18 lb ft).
12.
Verify that the head of the bolt is fully seated to the hinge plate.