
K 1500 Suburban 4WD V8-5.3L VIN Z Flex Fuel (2003)
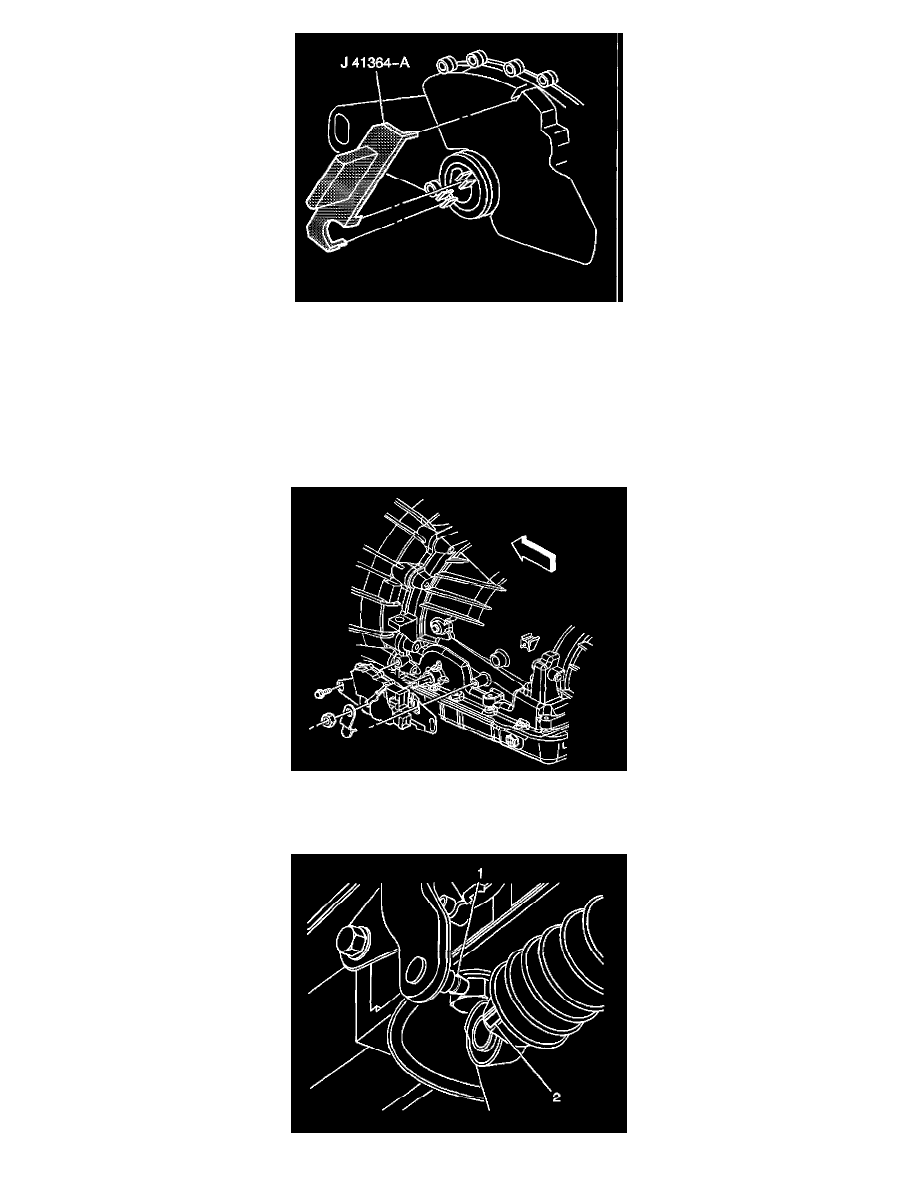
4. Position the J 41364-A onto the PNP switch. Ensure that the two slots on the switch where the manual shaft is inserted are lined up with the lower
two tabs on the tool.
Notice:
Refer to Fastener Notice in Service Precautions.
See: Transmission and Drivetrain/Service Precautions/Vehicle Damage Warnings/Fastener Notice
5. Rotate J 41364-A until the upper locator pin on the tool is lined up with the slot on the top of the switch.
-
Tighten the bolts to 25 Nm (18 ft. lbs.).
6. Remove J 41364-A from the PNP switch. If installing a new switch, remove the positive assurance bracket at this time.
7. Install the control lever to the manual shaft with the nut.
8. Install the manual shaft nut.
-
Tighten the nut to 25 Nm (18 ft. lbs.).