
K 1500 Suburban 4WD V8-6.5L DSL Turbo VIN F (1999)
Brake Shoe: Service and Repair
Leading/Trailing Drum Brakes
REMOVAL PROCEDURE
GM replacement brake lining material is recommended for all vehicles to maintain the balance between front and rear brake performance. GM
replacement brake parts have been carefully selected to provide the proper brake balance for the purposes of stopping distance and control over the full
range of operating conditions. Installation of front or rear lining material with performance different from that of recommended GM replacement parts
can change the intended brake balance of this vehicle.
1. Raise the vehicle and support the vehicle with safety stands.
2. Mark the relationship of the wheel to the hub.
3. Remove the tire and the wheel.
4. Mark the relationship of the drum to the axle.
5. Remove the drum.
6. If the drum is difficult to remove, do the following:
^
Make sure the parking brake is released.
^
Back off the parking brake cable adjustment.
^
Remove the access hole plug from the backing plate and insert a screwdriver through the hole to push the parking brake lever off the stop.
^
Use a rubber mallet to tap gently on the outer rim of the drum and/or around the inner drum diameter. Be careful to not deform the drum by
excessive beating.
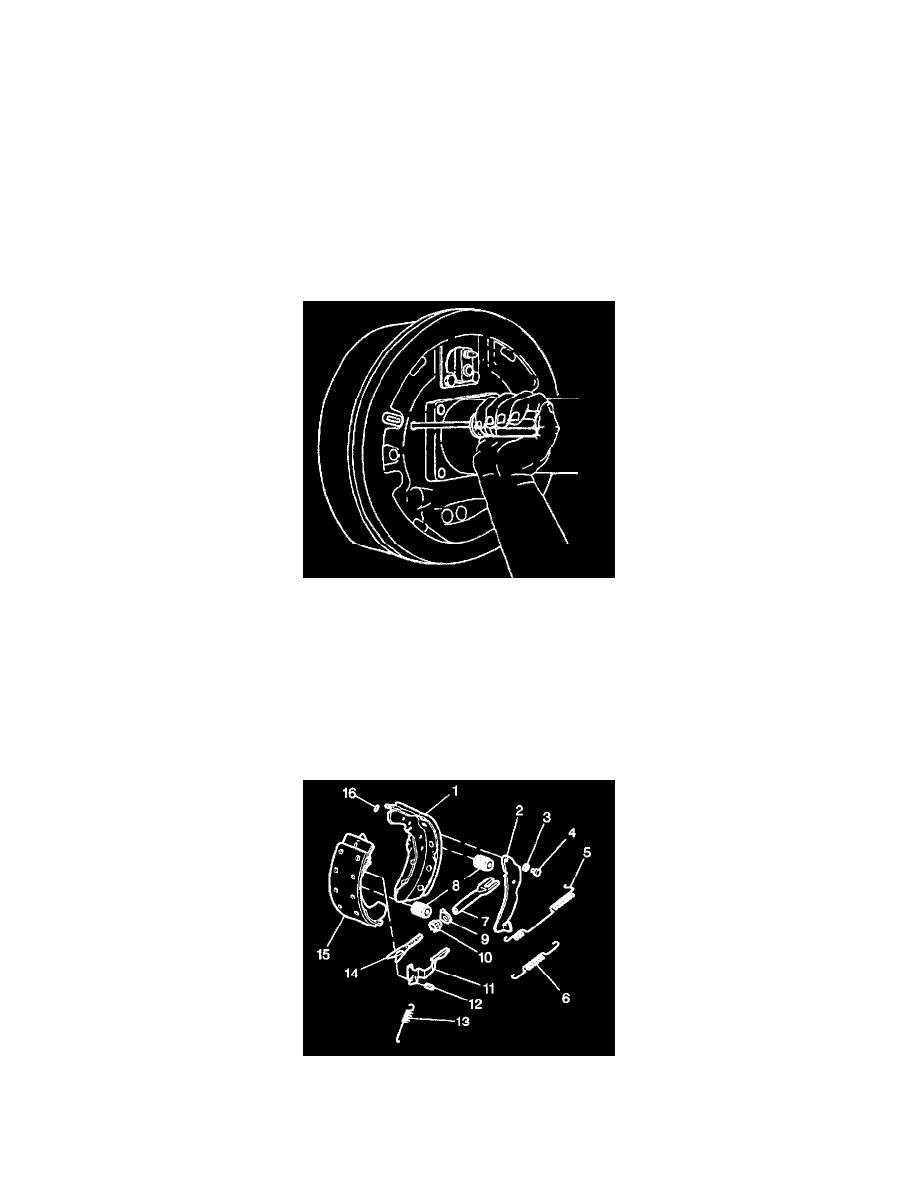
7. Remove the actuator spring and the adjuster actuator.
8. Raise the lever arm of the actuator until the upper end is clear of the slot in the adjuster screw.
9. Slide the actuator (10) off of the adjuster pin (12).
10. Disconnect the actuator spring (13) from the shoe (15).
11. Remove the hold-down spring assemblies (8) and the pins.
12. Remove the lower return spring (6).