
K 1500 Suburban 4WD V8-6.5L DSL Turbo VIN F (1999)
Evaporator Core: Service and Repair
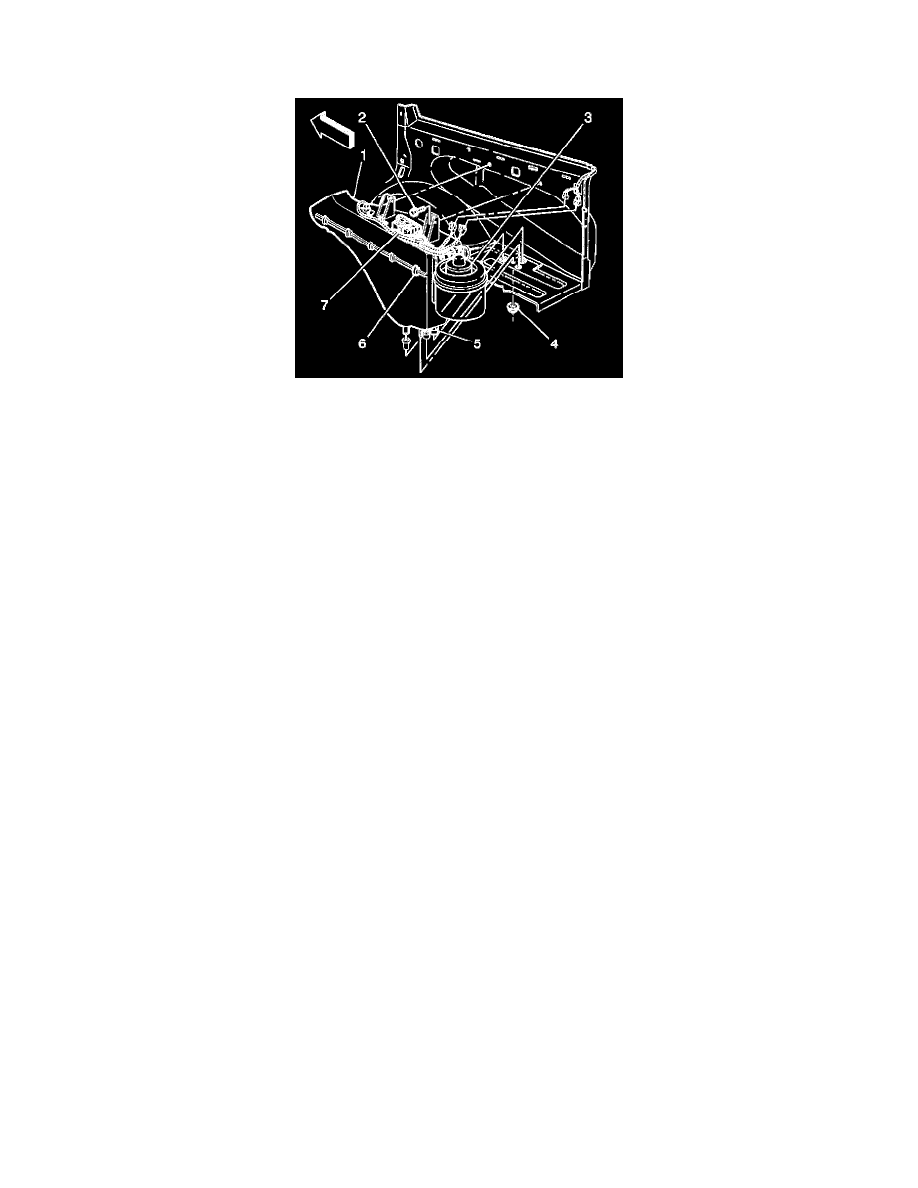
Evaporator Core Replacement - Auxiliary (4 - Door)
REMOVAL PROCEDURE
CAUTION: Refer to Battery Disconnect Caution in Cautions and Notices.
1. Disconnect the negative battery cable.
2. Recover the refrigerant. See: Refrigerant/Service and Repair
3. Remove the rear quarter interior trim, as necessary.
4. Remove the right rear quarter trim panel.
5. Disconnect the auxiliary refrigerant hoses from the auxiliary evaporator (5).
6. Disconnect the electrical connectors, as necessary.
7. Complete the following steps in order to remove the evaporator case cover:
7.1. Remove the screws (2) securing the case to the rear quarter sheet metal.
7.2. Remove the blower housing (3) from the rear of the case.
7.3. Remove the 10 case clips (6).
7.4. Separate the case halves.
8. Remove the pipe insulator.
9. Remove the evaporator core.
INSTALLATION PROCEDURE
1. Install the evaporator core.
2. Install the pipe insulator.
3. Install the clips (6) to the evaporator case cover.
4. Install the screws (2) to the evaporator case cover.
5. Install the auxiliary case to the vehicle.
6. Connect the auxiliary refrigerant hoses to the auxiliary evaporator (5).
7. Connect the electrical connectors, as necessary.
8. Install the right rear quarter trim panel.
9. Install the rear quarter interior trim.
10. Connect the negative battery cable.