
K 1500 Suburban 4WD V8-6.5L DSL Turbo VIN F (1999)
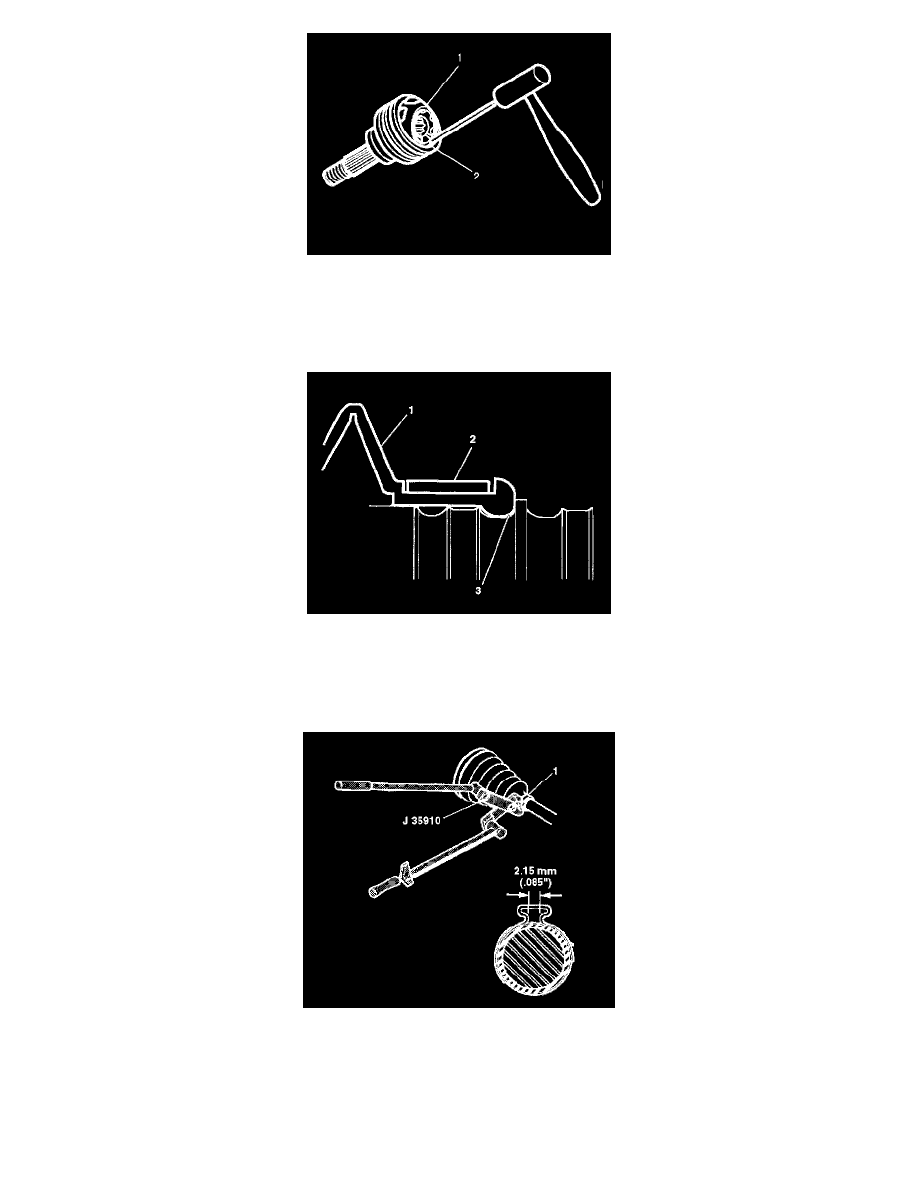
7. Place a brass drift against the CV joint cage (1).
8. Tap gently on the brass drift with a hammer in order to tilt the cage (1).
9. Install the first chrome alloy ball (2) when the CV joint cage (1) tilts.
10. Tilt the CV joint cage (1) in the opposite direction to install the opposing chrome alloy ball (2).
11. Repeat this process in order to install all six of the balls.
12. Pack the CV joint boot (1) and the CV joint assembly with the grease supplied in the kit. The amount of grease supplied in this kit has been
pre-measured for this application.
13. Place the new small boot clamp (2) onto the CV joint boot (1).
14. Slide the CV joint boot (1) onto the halfshaft bar.
15. Position the small end of the CV joint boot (1) into the joint boot groove (3) on the halfshaft bar.
16. Secure the small boot clamp (1) using J35910 (or equivalent), a breaker bar, and a torque wrench.
^
Tighten the small clamp (1) to 136 Nm (100 ft. lbs.). Check the gap dimension on the clamp ear.