
K 1500 Truck 4WD V6-262 4.3L (1991)
10.
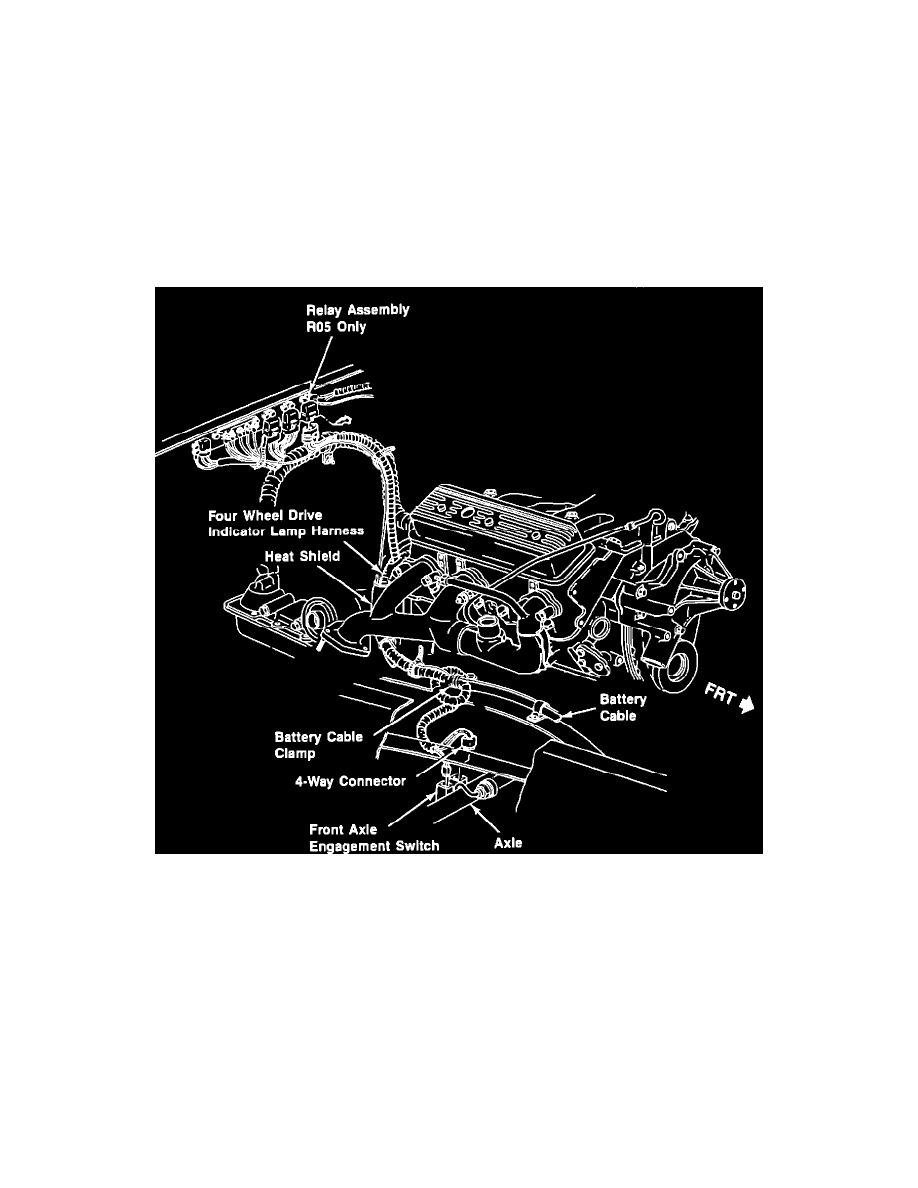
Fabricate a pull wire about four (4) to five (5) feet long, and attach it to front axle end of harness.
11.
Pull harness through the starter heat shield from transmission side of truck, leaving pull wire running through the heat shield.
12.
Connect new harness to pull wire on front axle connector side of harness and tape over the two connectors to allow them to pass through the
heat shield easily.
13.
Pull new harness through heat shield toward the front axle side.
14.
Remove and replace front axle engagement switch.
15.
Reconnect harness to front axle engagement switch and actuator, and tie strap the harness to the starter wires at the bottom of the starter heat
shield.
Figure 1
NOTICE: Harness must be looped under battery cable harness on frame rail to prevent harness from touching the exhaust manifold (Figure 1).
16.
Connect the connectors to left side of transmission and rear of transfer case. Reclip harness to clip at top right of the transfer case and to the
clip bolted onto transmission bell housing.
17.
For trucks with dual rear wheels (RPO R05), attach pull wire to relay connector, and feed pull wire up through truck to assist in retrieving
this connector.
18.
Lower truck, and reconnect engine wiring harness connector (purple wire) and relay connector (if equipped with dual rear wheels - RPO
R05) located in the convenience center.
19.
Refasten clamp on right frame rail, keeping harness routed under battery cable and free from exhaust manifold.
20.
Reconnect battery and road test truck to verify proper operation of 4wd indicator lamp.