K 1500 Truck 4WD V6-262 4.3L VIN Z (1993)

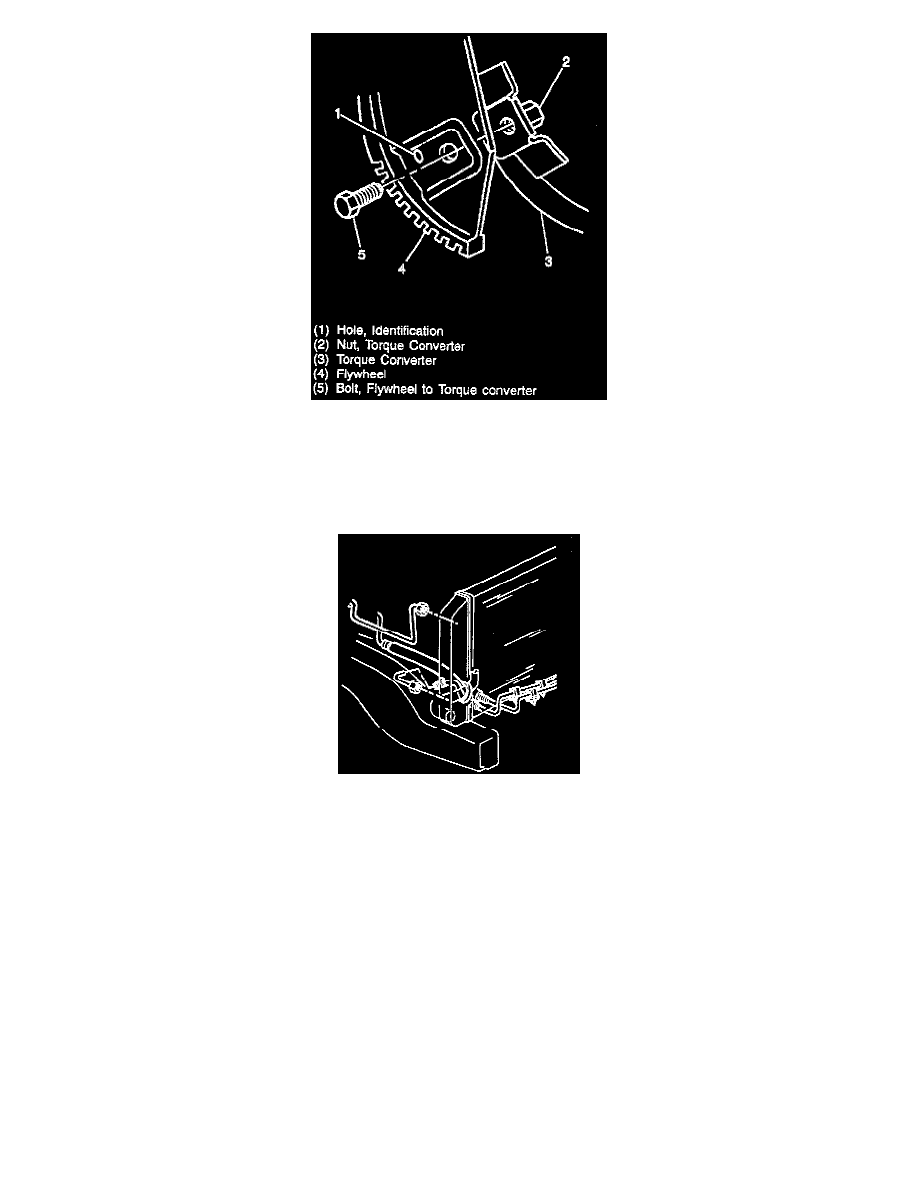
3. Position the torque converter to the flywheel.
-
Using the reference marks, align the torque converter with the flywheel.
-
Ensure the identification hole on the flywheel is aligned with the attachment on the torque converter.
4. Three bolts securing the torque converter to the flywheel.
-
Tighten flywheel to torque converter bolts to 44 Nm (33 lbs. ft.).
5. Starter.
6. Bolts securing the torque converter cover to the transmission.
-
Tighten torque converter cover bolts to 33 Nm (24 lbs. ft.).
7. Wiring harness connectors to the transmission speed sensor and park/neutral position switch.
-
Position/install all vehicle harness wires, harness clips, tubes, brackets, and lines that were removed or moved prior to the transmission
removal.
8. Transmission cooler lines to the transmission.
-
Unplug all of the openings in the transmission and oil cooler lines.
-
Do not twist or bend the lines during installation.
9. Oil level indicator tube with a new seal.
-
Ensure that the oil level indicator tube plug is removed from the transmission case.
10. Transmission vent hose and wiring harness to the transmission.
-
Remove the transmission jack.
11. Bolts securing the crossmember to the frame.
-
Tighten bolts to 77 Nm (56 lbs. ft.).
