
K 1500 Truck 4WD V8-5.3L VIN T (1999)
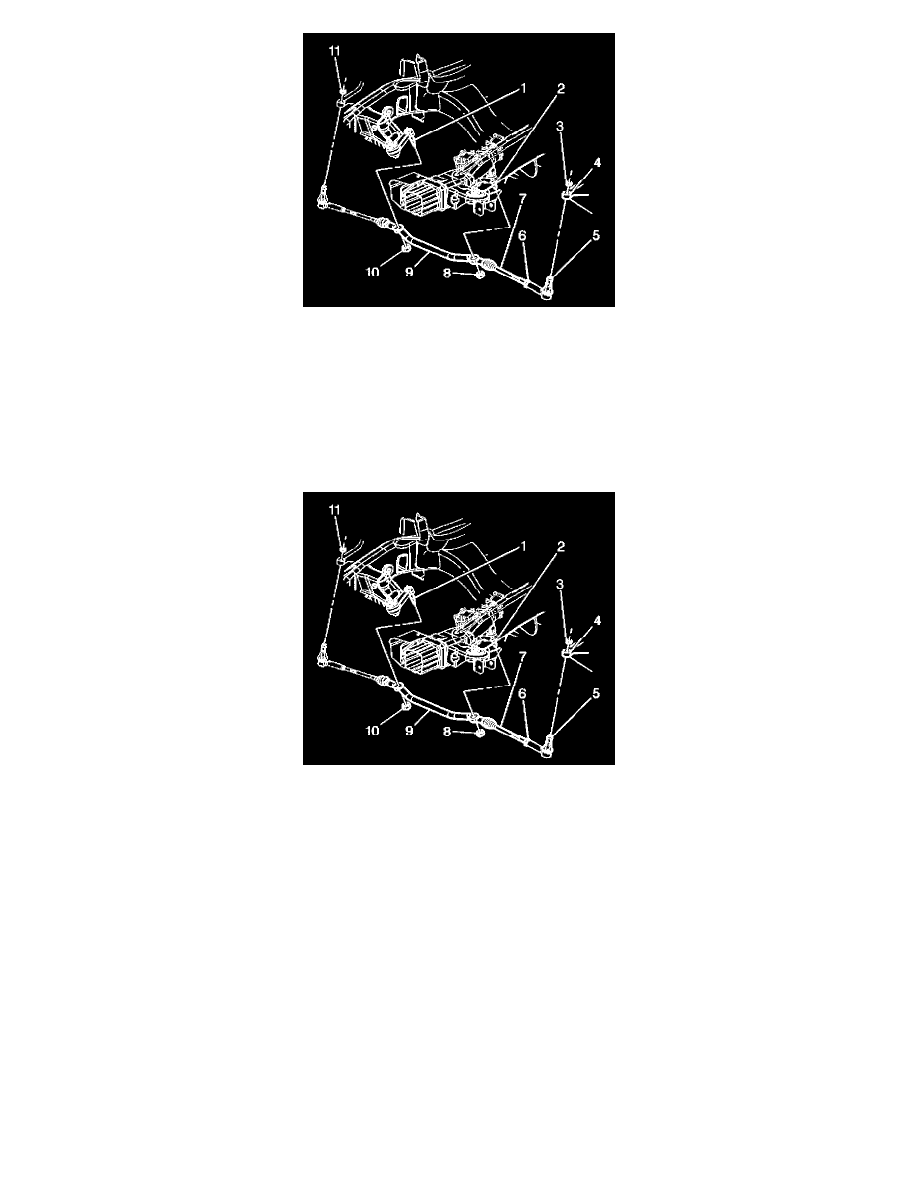
6. Remove the power steering gear. Refer to Steering Gear Replacement.
Mark the pitman arm and the pitman shaft in order to ensure the proper alignment at assembly.
7. Remove the pitman arm nut.
8. Use the J 29107-A in order to remove the pitman arm from the steering gear pitman shaft.
9. Inspect the ball stud threads (2) for damage.
10. Inspect the ball stud seals for excessive wear.
11. Clean the threads on the ball stud (2).
INSTALLATION PROCEDURE
1. Install the pitman arm on the pitman shaft.
2. Align the marks made at the removal on the pitman arm and the pitman arm shaft.
3. Install a new pitman arm nut.
NOTICE: Refer to Fastener Notice in Service Precautions.
-
Tighten the pitman arm nut to 250 Nm (184 ft. lbs.).
4. Install the power steering gear. Refer to Steering Gear Replacement.
5. Install the relay rod (9) to the pitman arm ball stud.