
K 1500 Truck 4WD V8-5.7L VIN R (1997)
A. Position the driveshaft and clutch group on a work bench with the internal gear end down.
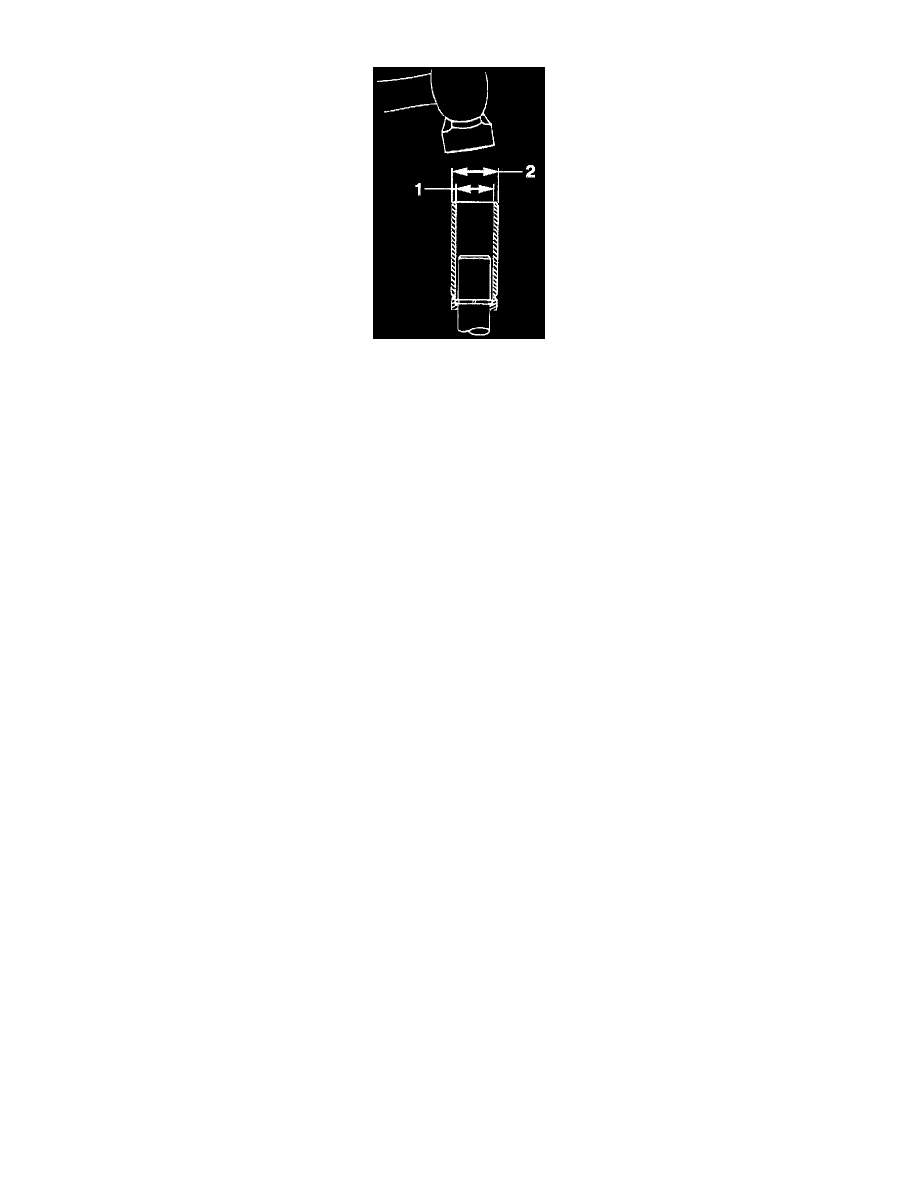
Removing The Pinion Stop
B. Using an open tube #2 (22 mm diameter) slightly larger than the shaft #1(14.2 mm diameter), drive the pinion stop toward the clutch
drive assembly until it clears the stop rings .
C. Pry the stop rings out of the driveshaft groove and slide them off the end of the shaft, being careful not to scratch the driveshaft.
D. Inspect the edges of the shaft groove for burrs that may have been formed through repeated cranking cycles. Such burrs may make removal
of the pinion stop and clutch drive assembly difficult.
-
If burrs are found, use a file to carefully remove burrs only, not the base metal. Thoroughly clean away metal filings.
E. Slide the pinion stop off the driveshaft. Discard the old pinion stop and stop rings. New parts must be used at assembly.
2. Clutch drive assembly from the driveshaft.
3. Driveshaft support from the driveshaft.
-
Do not remove the bearing from the driveshaft unless replacement is required, refer to "Cleaning, Inspection, and Repair". See:
Cleaning, Inspection, and Repair