
K 2500 Truck 4WD V6-262 4.3L (1988)
Installing The Shaft Key
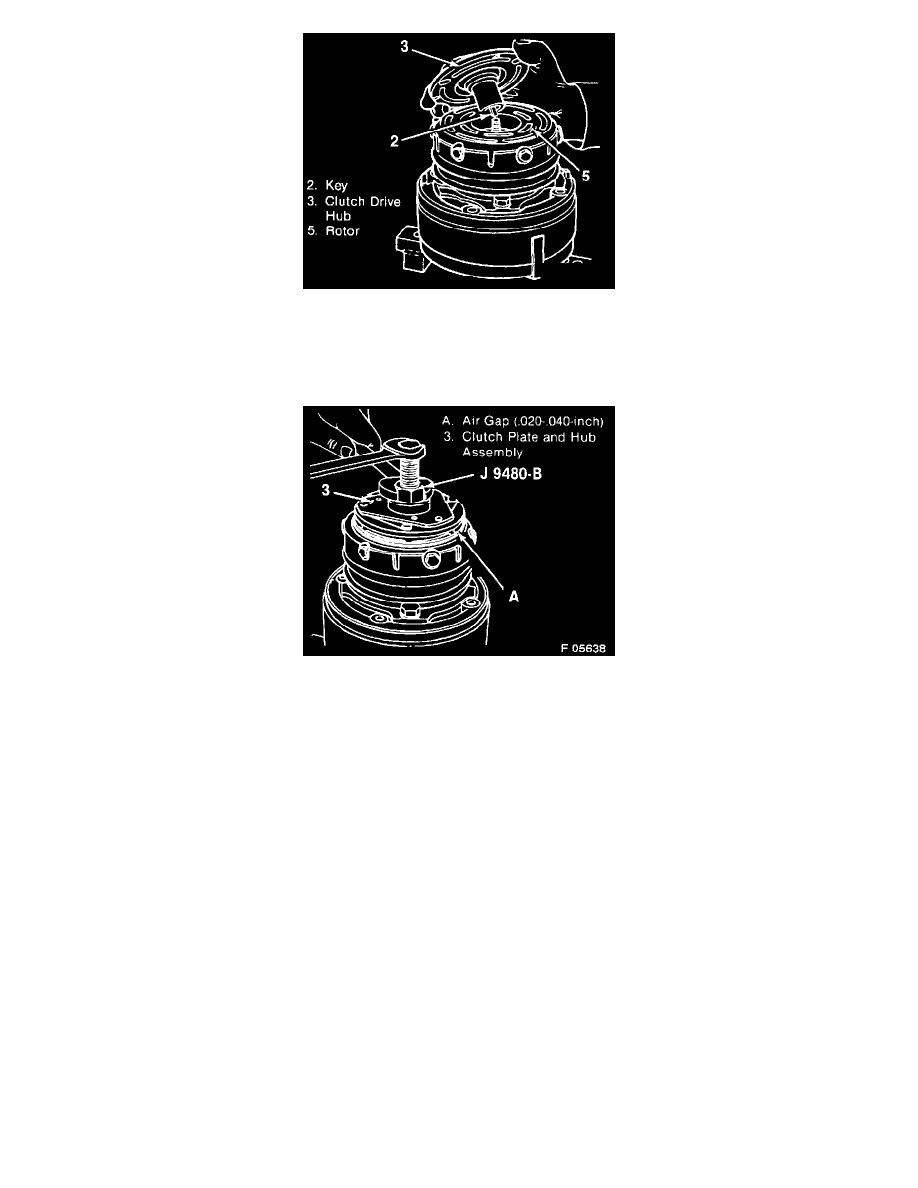
1. Shaft key (2).
^
Allow the shaft key (21) to extend 4.8 mm (3/16-inch) out of the key way.
^
The shaft key (2) is curved slightly to give an interference fit in the groove.
Installing The Clutch Plate & Hub Assembly
2. Clutch drive hub (3).
^
Install J 9480-B.
^
Hold the hex portion of J 9480-B with a wrench and tighten the center screw to press the hub onto the shaft until there is a 0.5-1.0 mm
(0.20-.040-inch) air gap between the frictional surfaces of the clutch plate and clutch rotor.
^
Remove J 9480-B.
2. Shaft nut (1) with J 9399.
^
Use J 25030 to hold the clutch plate and hub assembly.
Tighten
^
Shaft nut (1) to 17 N.m (13 ft. lbs.). Hand spin the pulley (11) to check for free rotation.
V-Groove Type
Remove or Disconnect
Tools Required:
J 6083 Snap Rings Pliers
J 9398 Rotor Bearing Remover
J 25031 Rotor and Bearing
J 8092 Driver Handle
1. Clutch drive hub (3).