K 2500 Truck 4WD V8-305 5.0L VIN M SFI (1996)

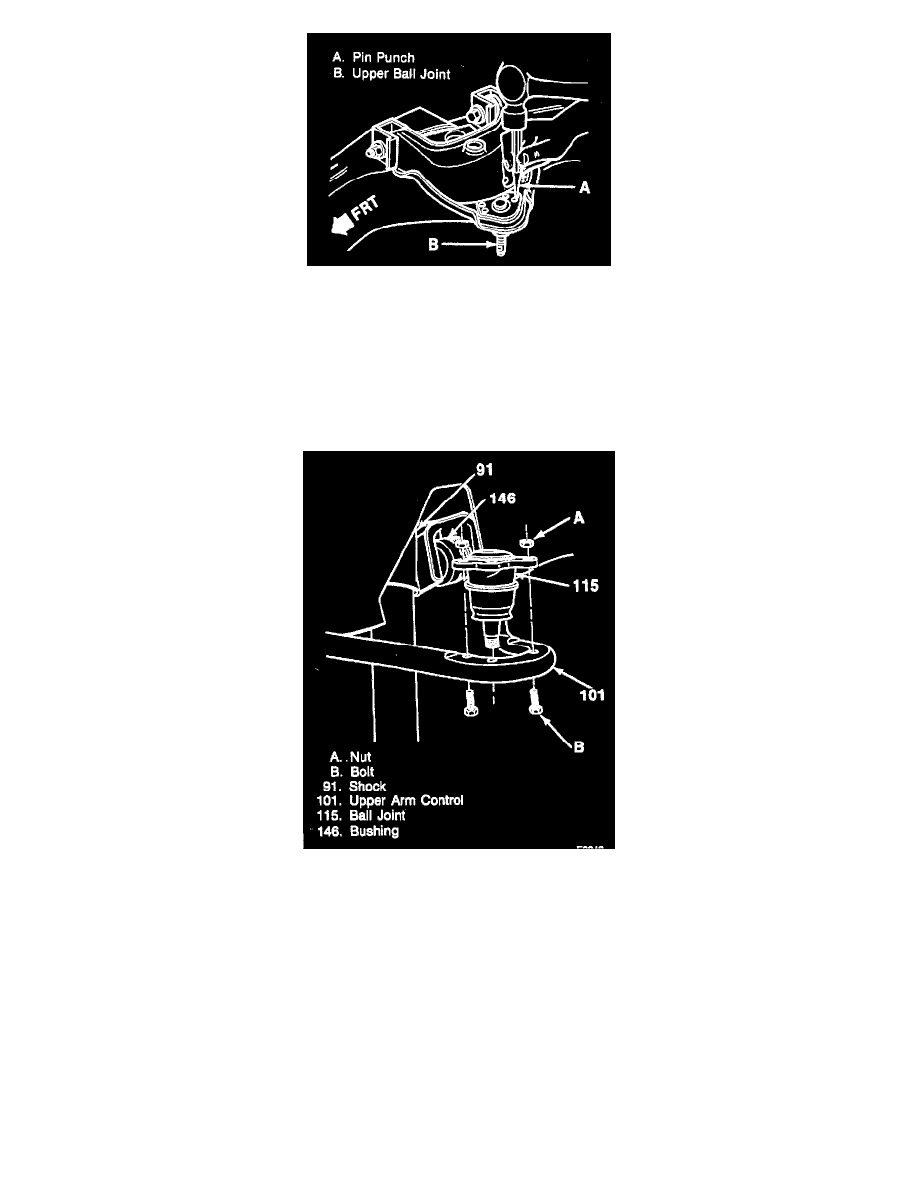
Removing The Upper Ball Joint Rivets
D. Using a pin punch remove the rivets.
3. Cotter pin.
4. Stud nut from upper ball joint.
5. Ball joint (115) from the knuckle (117) using J 36607. Support the knuckle.
6. Ball joint (115).
INSTALL OR CONNECT
Installing The Upper Ball Joint
1. Ball joint (115) to the control arm (101).
2. Bolts (B) and nuts (A) to the ball joint. Tighten Nuts (A) to 23 Nm (17 lb. ft.) for K1 - K2 and to 70 Nm (52 lb. ft.) for K3
3. Ball joint (115) to the knuckle (117).
4. Nut. Tighten nut to 100 Nm (74 lb. ft.).
^
Nut must be tightened with the control arm at "Z" Height.
^
Tighten the nut to align the cotter pin. Do not tighten more than 1/6 turn.
5. New pin.
^
Bend the pin ends against the nut.
6. Tire and wheel assembly.
^
Lower the vehicle.
^
Check front wheel alignment.
