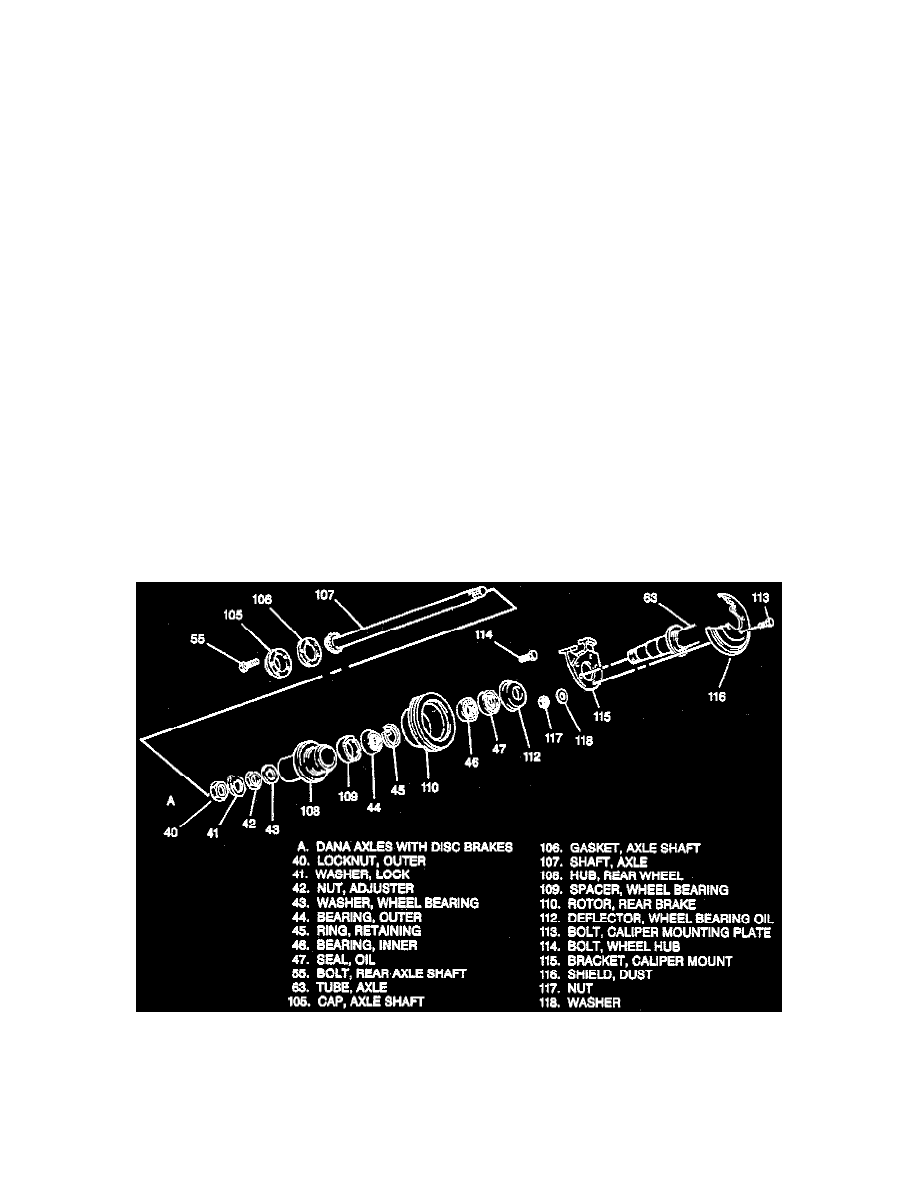
K 2500 Truck 4WD V8-305 5.0L VIN M SFI (1996)

Inspect
-
All parts and replace as necessary.
INSTALL OR CONNECT
NOTICE: Always use the correct fastener in the proper location. When you replace a fastener, use ONLY the exact part number for that application.
The manufacturer will call out those fasteners that require a replacement after removal. The manufacturer will also call out the fasteners that require
thread lockers or thread sealant. UNLESS OTHERWISE SPECIFIED, do not use supplemental coatings (paints, greases, or other corrosion inhibitors
on threaded fasteners or fastener joint interfaces. Generally, such coatings adversely affect the fastener torque and joint clamping force, and may
damage the fastener. When you Install fasteners, use the correct tightening sequence and specifications. Following these instructions can help you
avoid damage to parts and systems.
1. Hub and drum to the tube.
-
Be sure the bearings and the oil seal are positioned properly.
-
Apply a light coat of high melting point EP bearing lubricant to the contact surfaces and the outside of the axle tube.
2. Washer.
-
Place the tang into the keyway.
3. Adjusting nut.
Adjust
-
Bearing preload. See: Wheel Bearing/Adjustments/Full-Floating Axle (10 1/2 Inch Ring Gear)
4. Key.
5. Retaining ring.
6. Axle shaft.
7. Wheel and tire.
-
Lower the vehicle.
Full-Floating Axle (11 Inch Ring Gear)
REAR HUB/BEARING
^
Tool Required:
-
J 2222-C Wheel Bearing Nut Wrench
REMOVE OR DISCONNECT
^
Raise the vehicle until the wheel is free to rotate.
1. Tire and wheel assembly.
