
K 2500 Truck 4WD V8-350 5.7L VIN K TBI (1995)
Intake Manifold: Service and Repair
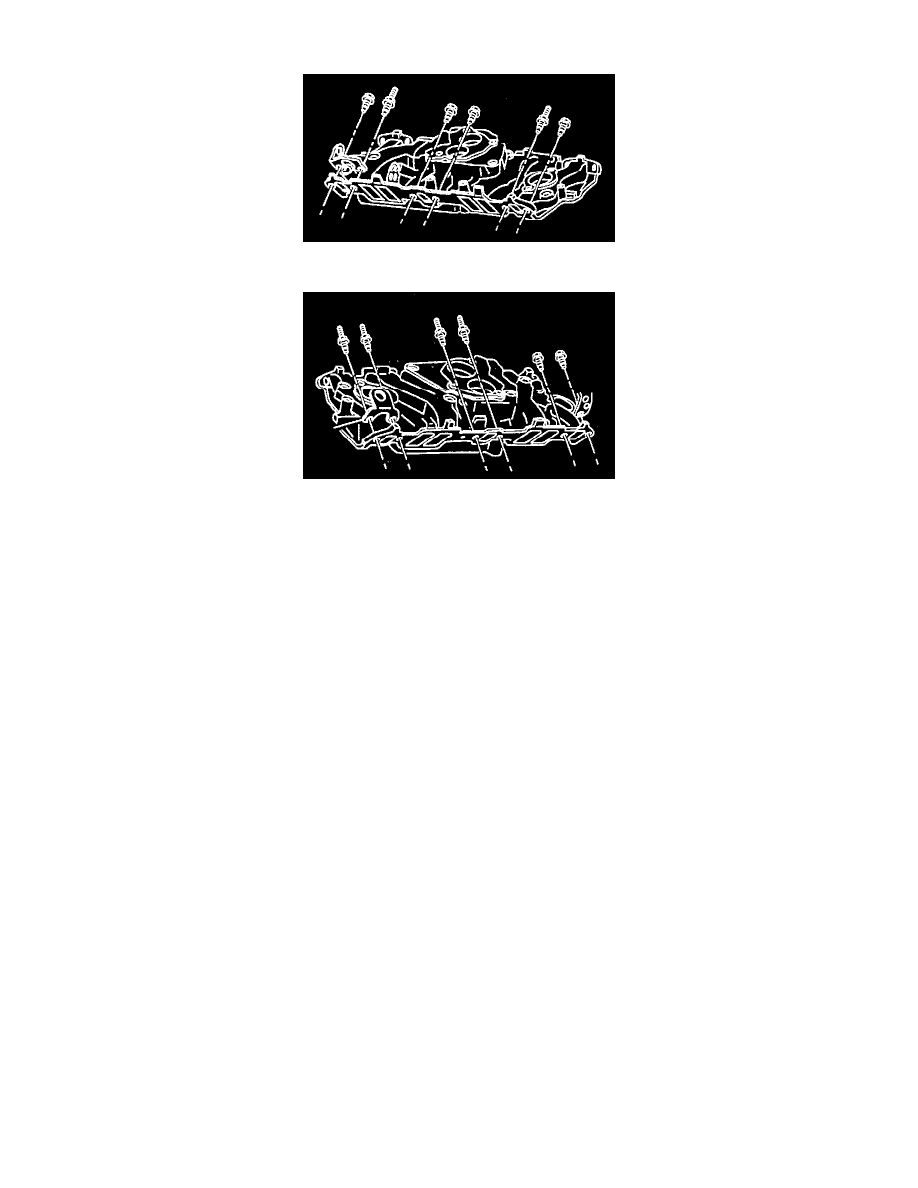
Intake Manifold (Right)
Intake Manifold (Left)
REMOVE OR DISCONNECT
1. Negative battery cable.
2. Air cleaner.
-
Drain the cooling system.
3. Heater pipe and upper radiator hose at the intake manifold.
4. Generator rear brace at the manifold.
5. Vacuum hoses at the manifold, Throttle body injection (TBI) unit, and EGR valve.
6. Electrical connections at the manifold and TBI unit.
7. Fuel lines at the TBI unit.
8. Accelerator and cruise control cables (if equipped).
9. Distributor.
10. Air conditioning compressor rear bracket.
11. Brake booster vacuum pipe.
12. Coil wires.
13. Emission control sensors and bracket on right side.
14. Fuel line bracket at rear of manifold. Move the fuel lines aside.
15. Bracket at rear of belt idler pulley.
16. TBI unit (if necessary).
17. Intake manifold bolts.
18. Intake manifold.
19. Gaskets and clips.
CLEAN
-
Old gasket and RTV from the block, heads, and intake manifold. Remove all RTV that is loose or will cause interference at assembly.
-
Excessive carbon deposits from the exhaust and EGR passages.
-
Excessive scale and deposits from the coolant passages.
INSPECT
-
Manifold for cracks and gasket surface damage.