
K 2500 Truck 4WD V8-350 5.7L VIN K TBI (1995)
^
Use J 39549 to break the ball joint loose from the knuckle.
6.
Lower control arm from the knuckle.
7.
Remove knuckle from the vehicle.
8.
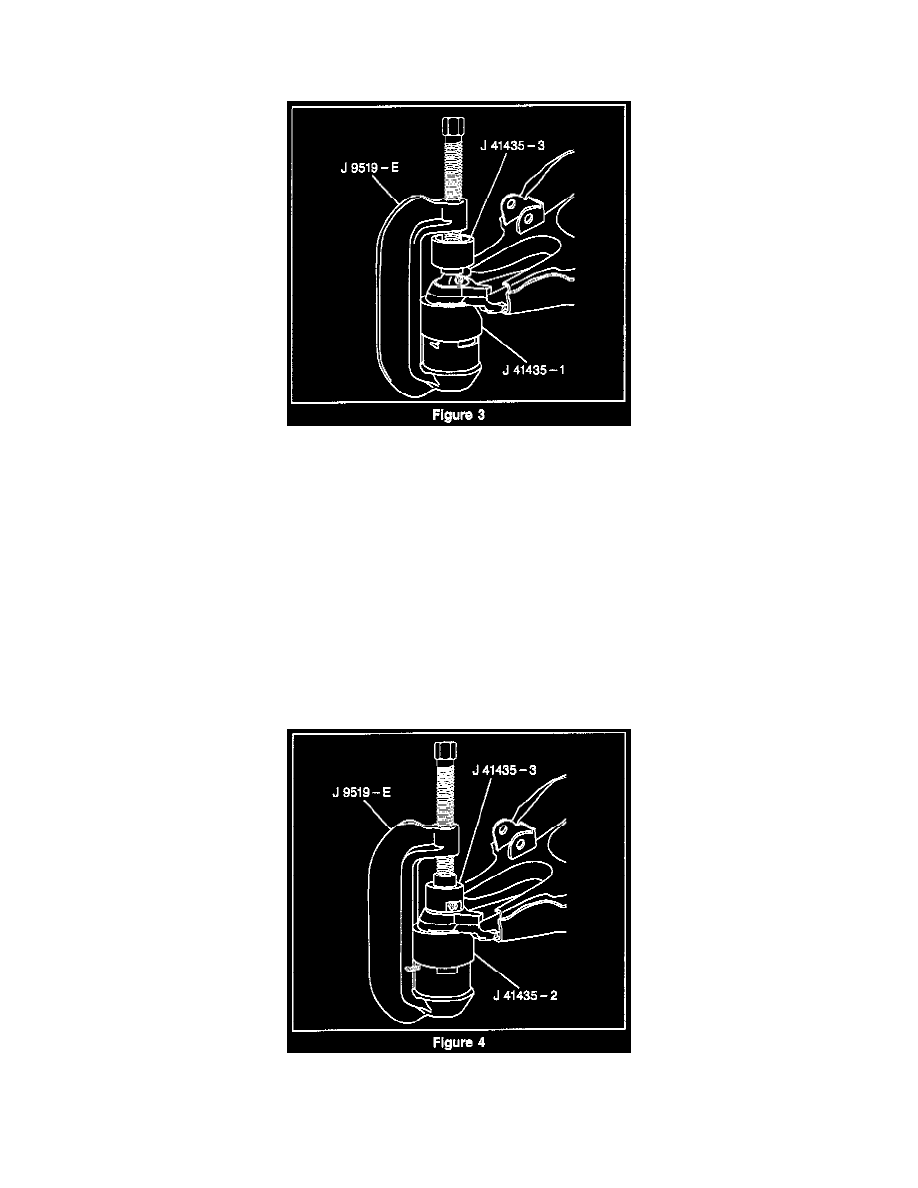
Remove ball joint from the lower control arm.
^
Use tools as shown in (Figure 3).
Inspect
^
The tapered hole in the steering knuckle and remove any dirt. If the hole is out of round, deformed or damaged, the knuckle must be replaced.
Clean:
Lower control arm ball joint mounting surfaces and new ball joint prior to installation using Loctite® Cleaning Solvent 755 or equivalent. Do
not apply solvent to ball joint seal.
Install or Connect (Figures 1, 2 and 4)
1.
Apply a 6 mm (1/4 inch) bead of Loctite(R) 680 evenly to the serrations on the top of the ball joint prior to installation.
2.
Position ball joint in control arm with the grease fitting toward the rear of the vehicle.
3.
When installing the ball joint with J 41435, ensure that the notch in the tool is aligned with the grease fitting.
4.
Press in the ball joint using tools in (Figure 4). The ball joint will bottom in the control arm.
5.
Install stud nut onto the stud. Tighten nut to 128 N.m (94 lb ft) and align the slot in the stud nut with the hole in the stud by tightening.
6.
Install new cotter pin to the stud.
7.
Install drive axle (halfshaft).