
K 2500 Truck 4WD V8-454 7.4L VIN J SFI (1997)
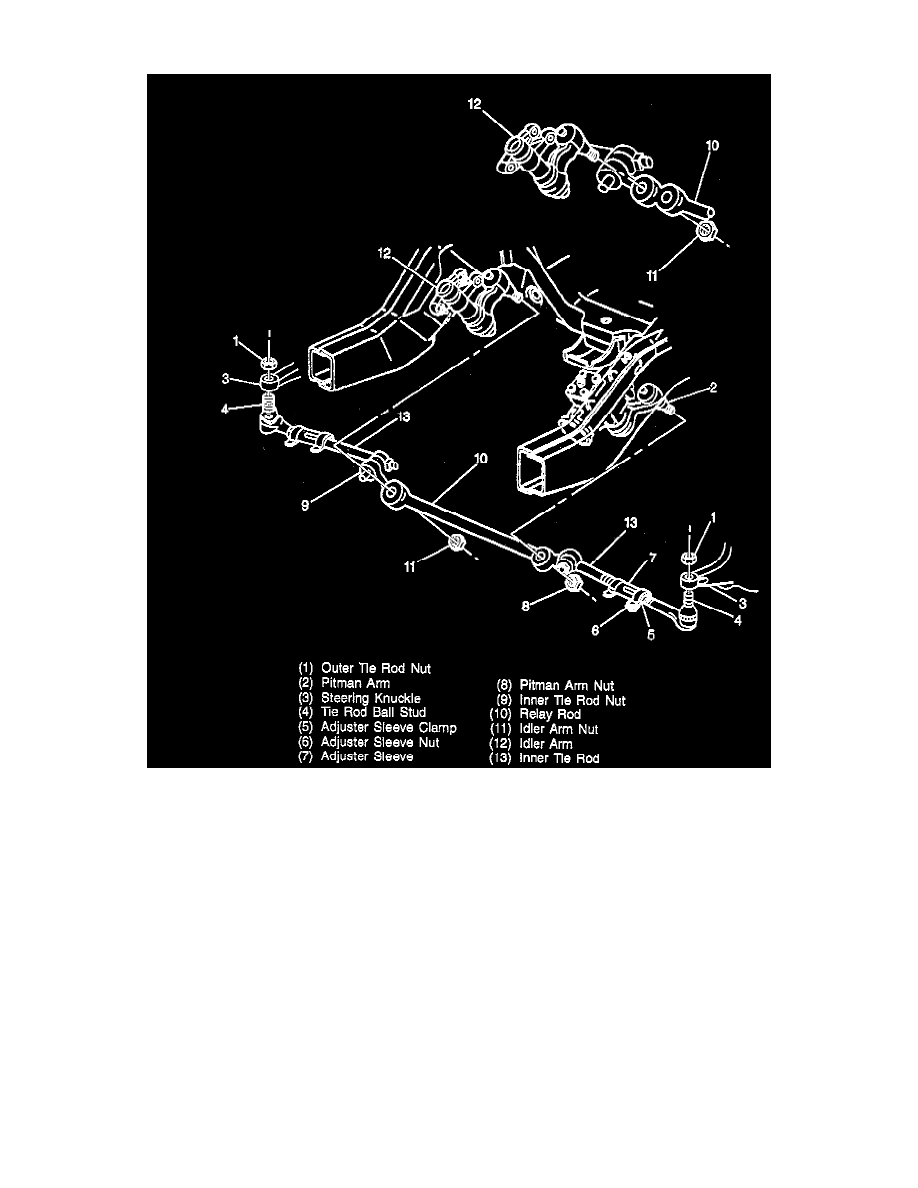
Tie Rod: Service and Repair
^
Tools Required:
-
J 6627-A Wheel Stud Remover and Tie Rod Remover
-
J 29193 Steering Linkage Installer (12 mm)
-
Or Equivalents
PRELIMINARY INFORMATION
There are two tie rod assemblies. Each assembly consists of five pieces, an adjuster tube, two clamps, and two tie rod ends. The ends are threaded into
the sleeve and secured with the clamps. Right and left hand threads are used for toe-in adjustments. The tie rod ends should be replaced when
excessive up and down motion is present, or when excessive end play or loss of motion at the ball stud exists.
Before servicing, note the position of the tie rod adjuster tube and the direction the clamp bolts are installed. The tie rod adjuster tube components
may be rusted. If the torque required to remove the nut from bolt the exceeds 9 Nm (80 inch lbs.) discard the nuts and bolts. Apply penetrating oil
between the clamp and tube and rotate the clamps until they move freely. Install all parts (with the correct part number) in the proper position.
REMOVAL
NOTE:
-
Use J 6627-A to separate all tie rods and ball joints.
-
Raise the vehicle. Support the vehicle with jack stands.
Remove or disconnect the following: