
K 2500 Truck 4WD V8-5.7L VIN R (1996)
Drive Axle (Halfshaft)
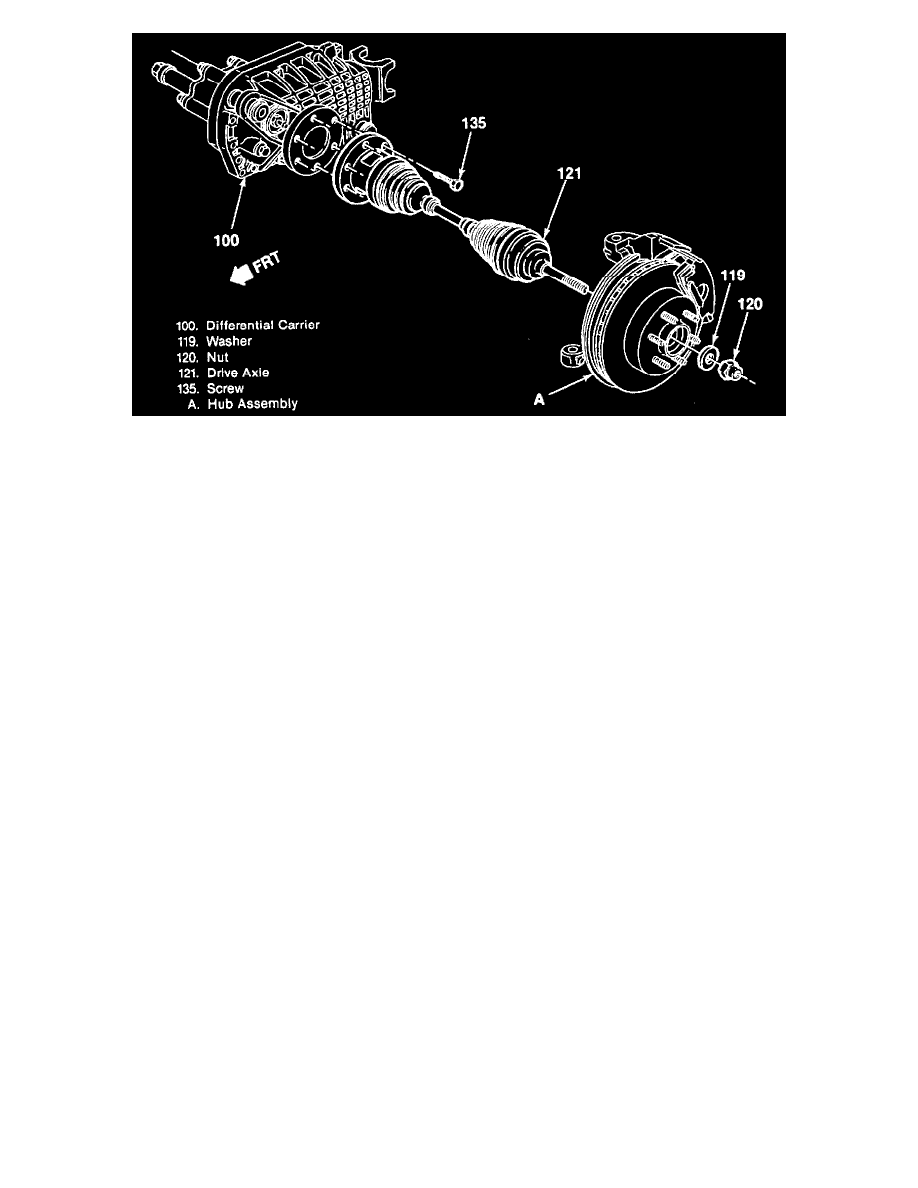
REMOVE OR DISCONNECT
1. Tire and wheel assembly.
^
Place a floor jack under the control arm and raise it until it supports the control arm.
2. Drive axle (halfshaft).
3. Brake caliper.
IMPORTANT: Support the caliper with a piece of wire to prevent damage to the brake line.
4. Cotter pin and nut from lower control arm ball joint.
^
Use J 39549 to break the ball joint loose from the knuckle.
5. Lower control arm from the knuckle.
6. Knuckle from vehicle.
INSPECT
^ The tapered hole in the steering knuckle and remove any dirt. If the hole is out of round, deformed or damaged, the knuckle must be replaced.
7. Rivets.
A. Center punch the bottom of the rivets.
B. Using a 3.17 mm (1/8 inch) drill bit, drill a guide hole 6.35 mm (1/4 inch) into the center of each rivet heads.
C. Using an 12.7 mm (1/2 inch) drill bit, drill the rivet head off.
D. Drill a hole two-thirds the length of the rivet shank, using an 8 mm (5/16 inch) drill.
E. Using an 8 mm (5/16 inch) pin punch, punch out the rivets.