
K 30 P/U 4WD V6-262 4.3L (1985)
c. Drive rivet stems out of air bleed valve tower with a small punch. Remove and discard cover.
d. Remove pieces of rivet from bleed valve tower, then blow out any dirt or metal chips that may have entered bleed valve cavity.
8.
Examine top of air bleed valve for an identification letter, Fig. 7.
9.
If no letter is stamped on valve, proceed to Mixture Adjustment A. If a letter is stamped on valve, proceed to Mixture Adjustment B.
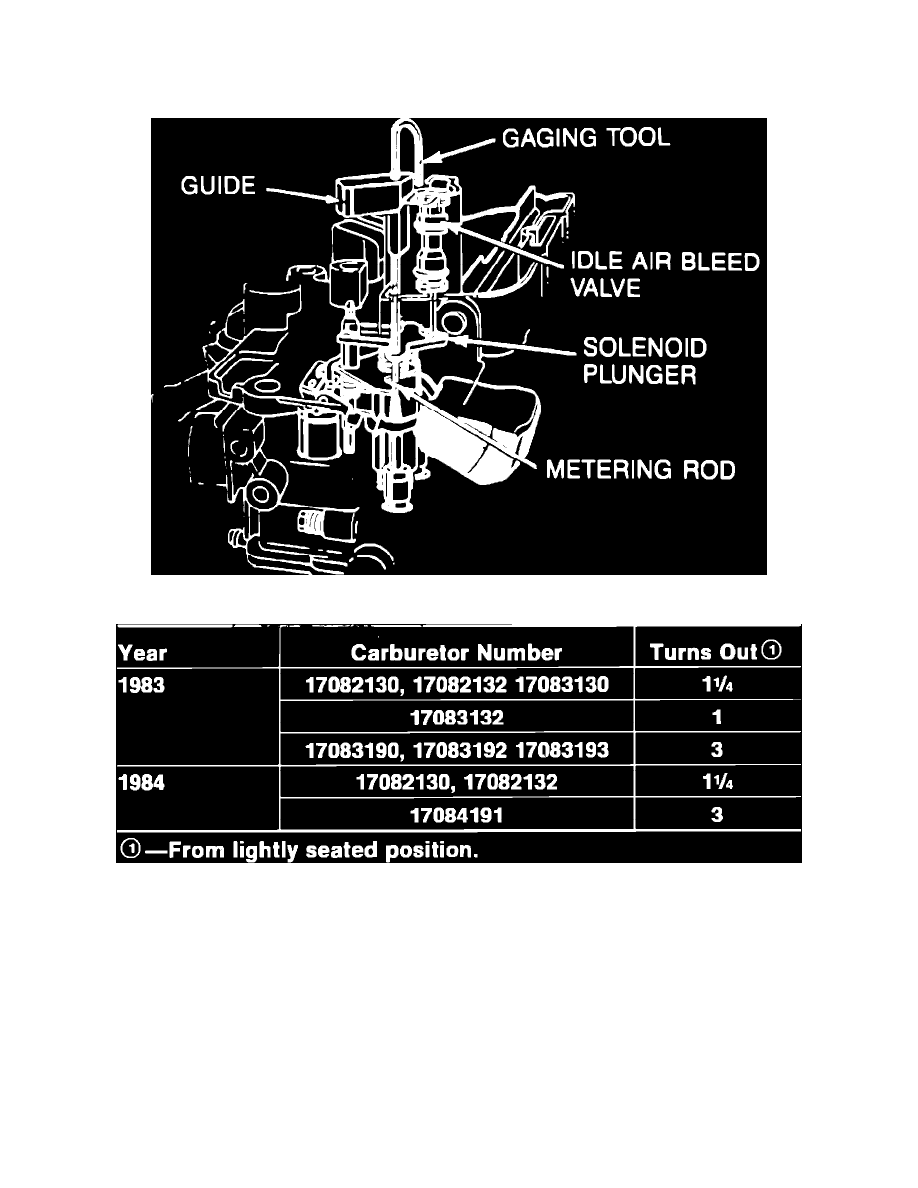
Fig. 8 Idle air valve adjustment. V6-229 & 231 w/E2MC-ME carburetor
Fig. 9 Idle mixture screw base adjustment position. V6-229 & 231 w/E2MC-ME carburetor
MIXTURE ADJUSTMENT A
1.
Install gauging tool J-33815-2 or equivalent in ``D'' shaped hole on throttle side of air horn, with end of tool positioned above open cavity next to
idle air bleed valve, Fig. 8.
2.
Hold gauge down lightly to bottom MC solenoid plunger, then adjust idle air bleed valve so tool will pivot over and just contact top of valve.
Remove gauging tool.
3.
Start engine and run until it reaches normal operating temperature and dwell reading begins to fluctuate.
4.
Place automatic transmission in drive (manual transmission in neutral) and adjust idle air bleed valve to obtain a fluctuating dwell reading between
25° and 35° (as close to 30° as possible), at specified curb idle speed. Bleed valve is very sensitive to adjustment. Adjust valve in small
increments, allowing time between adjustments for engine to stabilize.
5.
If unable to adjust dwell reading to specifications, or if reading does not fluctuate, remove plugs covering idle mixture screws as outlined under
``Concealment Plug Removal'' in the appropriate carburetor section.
6.
Turn each mixture screw in (clockwise) until lightly seated, then back screws out specified number of turns, Fig. 9.
7.
Reinstall carburetor using a new gasket, with air cleaner removed, and vacuum hoses disconnected and plugged as outlined on underhood vehicle