
K 3500 Truck 4WD V8-454 7.4L (1994)
6. Turn signal switch (10) connector through column housing assembly (16).
7. Upper bearing retainer (23).
8. Lock housing cover assembly (16) with bowl (37) and shroud (39) to jacket assembly (40).
9. Cover screws (11).
^
Tighten screws (11) in a clockwise order finger tight.
TIGHTEN
^
Tighten screws (11) in same order to 5.3 Nm (47 lb.in.).
10. Wiring protectors (32) and (33).
11. Support bracket (47).
12. Four support bolts (48).
TIGHTEN
^
Tighten bolts (48) to 30.0 Nm (22 lb. ft.).
NOTICE: Install ignition switch (41) to jacket (40) with switch in "OFF-LOCK" position. New ignition switch will be pinned in "OFF-LOCK"
position. Remove plastic pin after switch is assembled to column. Failure to do so may cause switch damage.
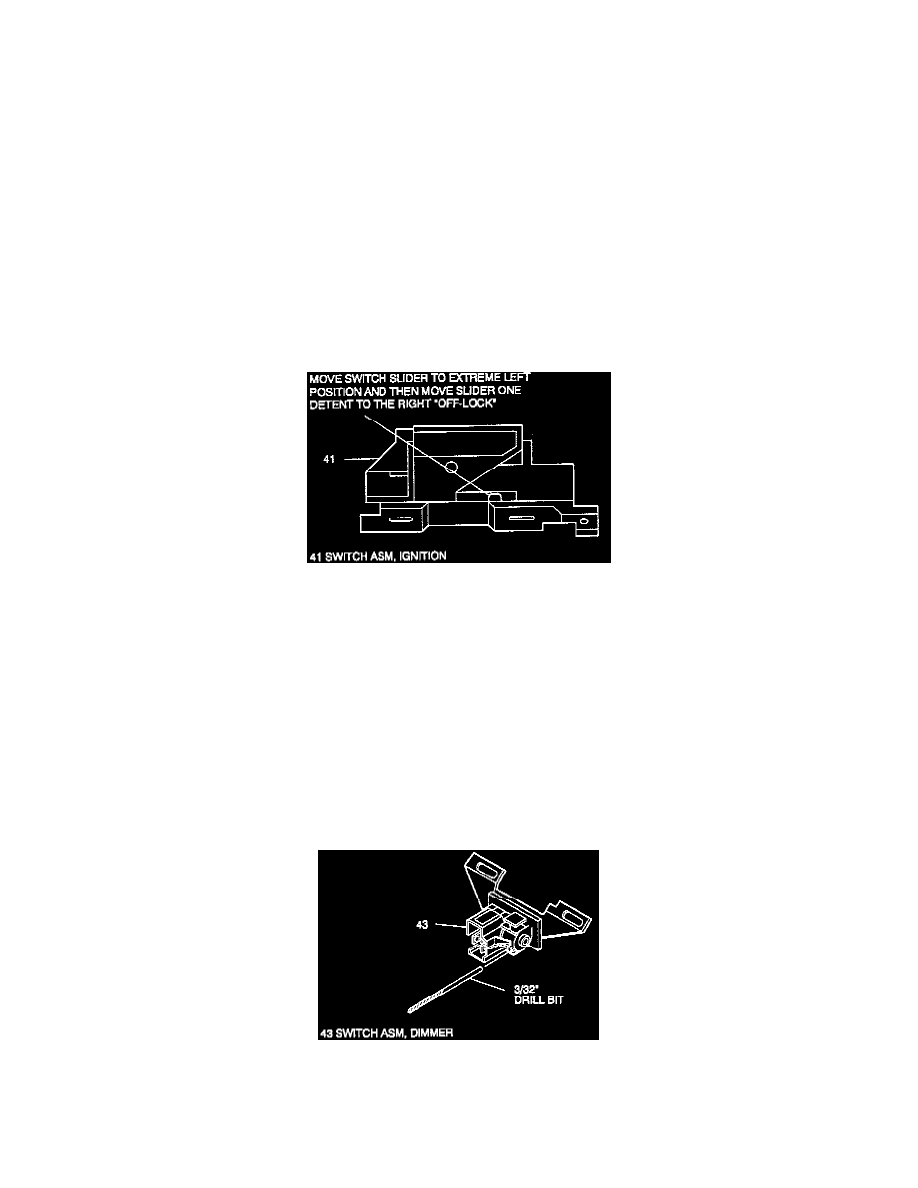
Adjusting Ignition Switch
ADJUST
^
Ignition switch assembly (43).
A. Move switch slider to extreme left position.
B. Move switch slider one detent to right "OFF-LOCK" position.
13. Ignition switch assembly (41) and dimmer & ignition switch mounting stud (46).
TIGHTEN
^
Tighten stud (46) to 4.0 Nm (35 lb.in.).
14. Dimmer switch rod (45).
15. Dimmer switch assembly (43) to rod (45).
16. Washer head screw (44) and hexagon nut (42).
^
Tighten finger tight.
Adjusting Dimmer Switch
ADJUST
^
Dimmer switch (43).
A. Place a 3/32-inch drill bit in hole on switch to limit travel.