
K 3500 Truck 4WD V8-454 7.4L (1994)
Axle Flange: Service and Repair
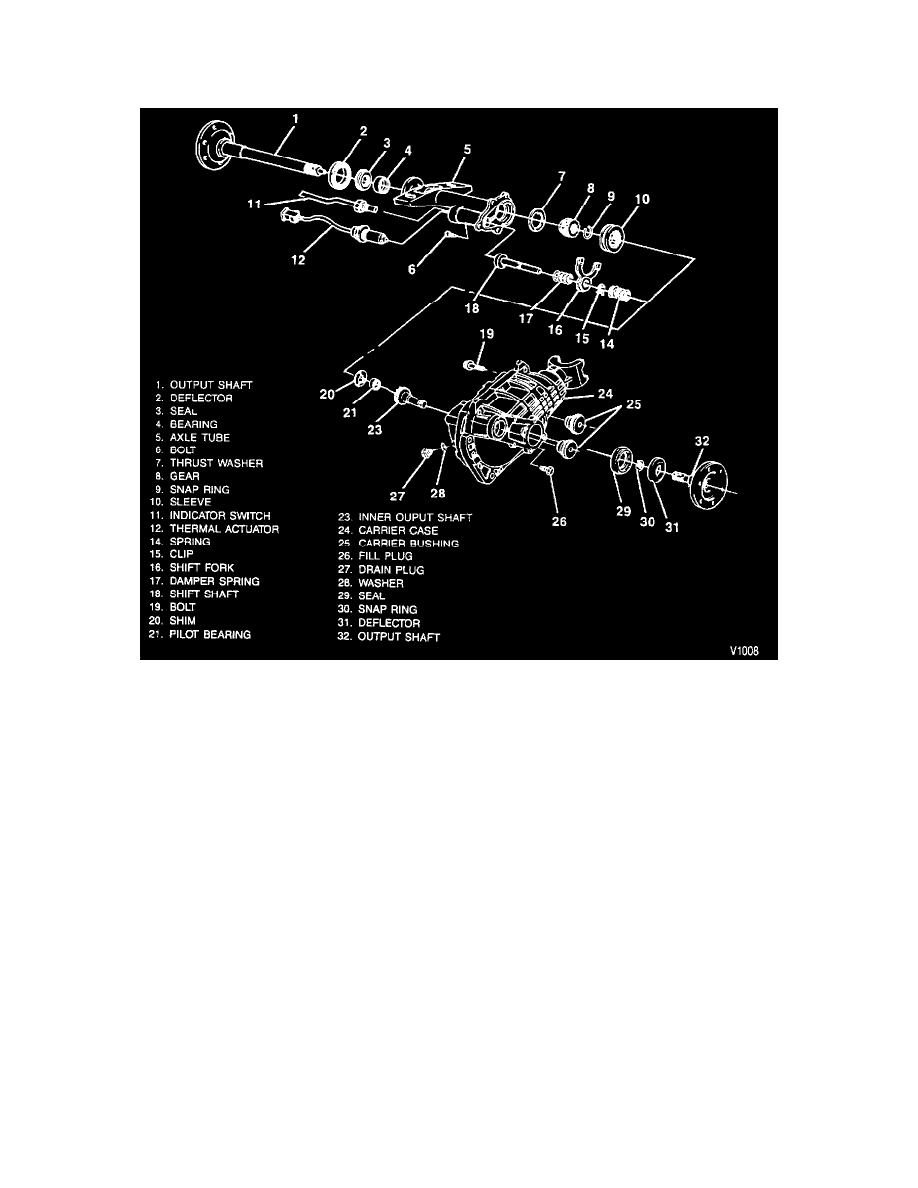
OUTPUT SHAFT REPLACEMENT
REMOVE OR DISCONNECT
-
Raise the vehicle. Support with jack stands.
-
Place a drain pan under the axle to catch oil.
1. Lift drive axle.
2. Lower carrier mounting bolt.
-
Carefully pry against the lower carrier to provide clearance for output shaft removal. Take care not to damage the carrier case.
3. Output shaft (32). Attach a slide hammer with adapter to the output shaft and pull it from the carrier case. Take care not to damage the carrier case.
4. Deflector (31).
5. Seal (29). Pry out with a screwdriver.
6. Bearing using slide hammer J 23907.
INSTALL OR CONNECT
-
It may be necessary to attach a 1/2 inch by 13 inch long extension handle onto the slide hammer for easier pulling of the bearing.
TOOLS REQUIRED:
-
J 36600 Seal Installer (K2 models)
-
J 22833 Seal Installer (K3 models)
1. Bearing (square shoulder in) using J 22761.
2. New seal (29). Use J 36600 (K2 models) or J 22833 (K3 models). Lubricate the seal lips with grease.
3. Deflector (31).
4. Output shaft (32). Carefully pry against the lower carrier to provide clearance. Take care not to damage the carrier case. Tap the output shaft into
place with a soft mallet.
5. Lower carrier mounting bolt, washers, and nut.
TIGHTEN
-
Bolts to 110 Nm (80 lbs. ft.).