
K 3500 Truck 4WD V8-454 7.4L VIN J SFI (1996)
Fuel Pressure Regulator: Service and Repair
Diagram
Removal Procedure
1. Disconnect the negative battery cable.
2. Relieve the fuel system pressure. Refer to the Fuel Pressure Relief Procedure. See: Service and Repair
3. Remove the ignition coil.
4. Remove the intake manifold plenum. Refer to Engine Mechanical.
5. Disconnect the vacuum line to the regulator.
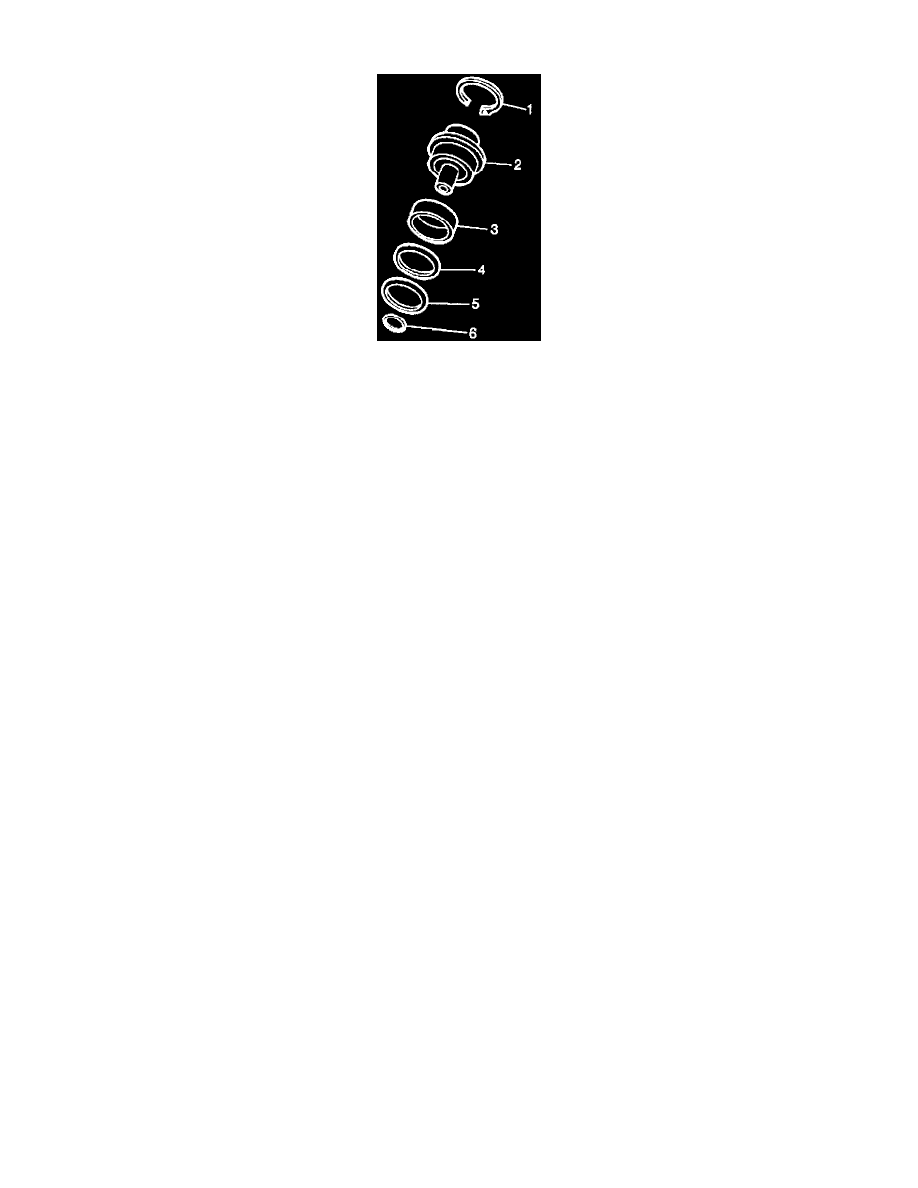
6. Remove the snap ring (1) from the pressure regulator housing.
7. Place a towel under regulator to catch any fuel, then remove pressure regulator from fuel socket. Twist back and forth while pulling from the
socket.
8. Remove the fuel pressure regulator (2) from the fuel rail socket.
9. Remove the pressure regulator small O-ring (6), filter (5), large O-ring (4), O-ring backup (3), and discard.
Installation Procedure
10. Lubricate the new pressure regulator O-rings (3), (4), (5), (6) with clean engine oil and install on the regulator inlet as a complete assembly.
12. Install the snap ring retainer (1) into the slot on the fuel regulator housing.
13. Connect the vacuum line to the regulator.
Important
-
Verify that retainer is engaged in slot in pressure regulator housing. Grasp and pull on regulator (2) to ensure that it is properly seated.
-
Turn ignition to ON for two seconds and then turn OFF for 10 seconds. Once again turn the ignition to ON and check for fuel leaks.
4. Install the intake manifold plenum. Refer to Engine Mechanical.
Legend
(1) Regulator Retainer Clip.
(2) Fuel Pressure Regulator Assembly.
(3) Back-up Ring.
(4) Regulator Seal O-ring.
(5) Regulator Filter.
(6) Regulator Seal O-ring.