
K 3500 Truck 4WD V8-454 7.4L VIN J SFI (1996)
Wheel Bearing: Adjustments
Full-Floating Axle (11 Inch Ring Gear)
General Information
-
Make sure the brakes are fully released and do not drag.
-
Check the wheel bearing play by grasping the tire at the top and pulling and pushing back and forth, or by using a pry bar under the tire. If the
tapered roller bearings are properly adjusted, movement of the brake drum in relation to the brake flange plate will be barely noticeable and the
wheel will turn freely. If the movement is excessive, adjust the bearings.
Rear Axles With Disc Brakes
REAR WHEEL BEARINGS ADJUSTMENT
^
Tool Required:
-
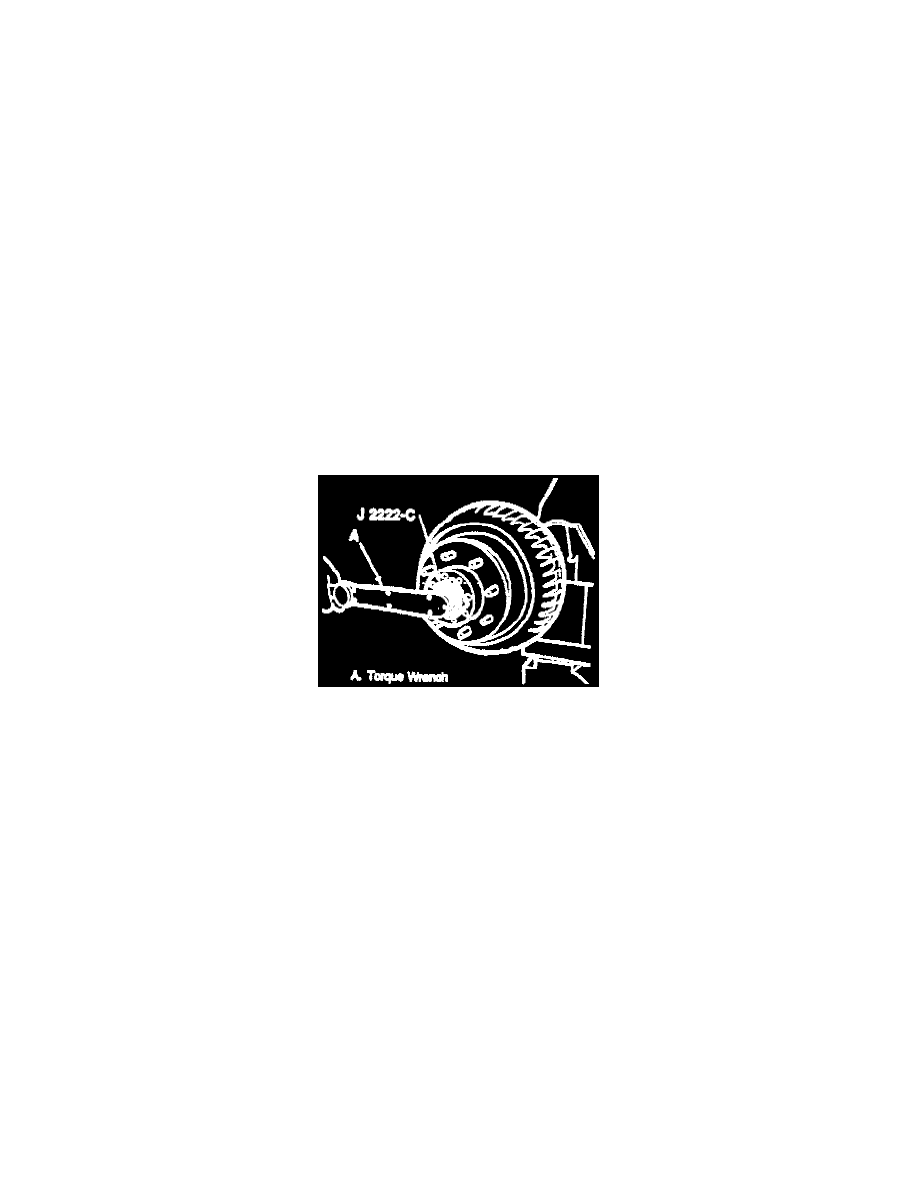
J 2222-C Wheel Bearing Nut Wrench
REMOVE OR DISCONNECT
^
Raise the vehicle until the wheel is free to spin.
1. Axle shaft.
-
Be sure the keyway, threads and adjusting nut are clean and free of chips, burrs and shavings.
2. Retaining ring.
3. Rear wheel bearing axle adjusting nut key.
4. Adjusting nut.
-
Tighten adjusting nut to 68 Nm (50 ft. lbs.). Tighten with J 2222-C while rotating the hub assembly, making certain the bearing cones are
seated and in contact with the spindle shoulder.
Adjust
-
Back off the adjusting nut and retighten to 47 Nm (35 ft. lbs.) while hub is rotated.
-
Back off the adjusting nut 135 to 150°.
INSTALL OR CONNECT
NOTICE: Always use the correct fastener in the proper location. When you replace a fastener, use ONLY the exact part number for that application.
The manufacturer will call out those fasteners that require a replacement after removal. The manufacturer will also call out the fasteners that require
thread lockers or thread sealant. UNLESS OTHERWISE SPECIFIED, do not use supplemental coatings (paints, greases, or other corrosion inhibitors
on threaded fasteners or fastener joint interfaces. Generally, such coatings adversely affect the fastener torque and joint clamping force, and may
damage the fastener. When you Install fasteners, use the correct tightening sequence and specifications. Following these instructions can help you
avoid damage to parts and systems.
1. Lock washer.
-
Bend one tang of the retaining washer over a flat of the adjusting nut, 30° minimum.
2. Outer retaining nut.
-
Tighten outer retaining nut to 88 Nm (65 ft. lbs.) minimum.
Adjust
-
Final bearing adjustment is 0.025 to 0.25 mm (0.001 to 0.010 inch).
-
Bend one tang of the retaining washer over a flat of the outer nut, 60° minimum.
3. Wheel bearing grease into bearings.